Friday, December 20, 2013

Christmas Lights

Over on the Daring Cardmakers it's time for our last challenge before we take our Christmas break.
For the last dare of 2013 we have. for you....
'This Little Light of Mine'
 Lights are always associated with Christmas - candles, stars, fairy lights - and those "tiered" candle holders from Scandinavia which I can't remember the name of - I'm sure someone will let us know.....
So please use any sort of light associated with the Christmas Season on your cards - and you have an extra long time to join in with us this time as we won't be back with another challenge until 10th of January

Here's my Fairy Lights card

In my initial DT box from Crafter's Companion I received a number of their lovely flower quilling dies.  Now they do make lovely flowers - but sometimes you've just got to think a bit "out of the box, haven't you?  Just to stretch your imagination a little bit....
The sunflower quilling die has proved the most adaptable so far - the pine cones on a card I shared a few days ago were made using the small sunflower die and the fairy lights on this one are made using the larger version.  
I trimmed a little from the piece that holds all the petals together to make it narrower, then used the die again with coloured card to make the lights. In fact, being mean I used a couple of small pieces of card on the die as I didn't really need a whole length of them.
I glued the "light-bulbs" onto the green base strip, added a touch of white gel pen then coated them with Glossy Accents.
The white card was embossed with the pretty Christmas Patchwork folder,  the sentiment is from one of the Christmas Sentiments sets and the red label is also from Crafter's Companion


 Materials and Tools
Smooth white card, Bazzill Red, Blue, Yello, Green
Glossy Accents, White Gel pen
Die'sire Sunflower Quilling Die (large), Christmas Patchwork Embossing folder, Sentiment stamp, Label die all by Crafter's Companion

Hopefully I'll manage to update the poor neglected blog again soon - I've been woefully bad over the last few weeks!
 Just in case I don't get here before the BIG day, I'd love to wish you a great 
big, wonderful, 
shiny, glittery and very Happy Christmas

Friday, December 13, 2013

Christmas Film Quotes

Oh gosh, I really struggled with Beckie's challenge for the Daring Cardmakers this week! 
    Beckie here today with my dare for you .....
    'The best way to spread Christmas Cheer,
    is singing loud for all to hear.'
    I love the movie Elf and this has to be one the best sayings from the movie! So this week I am challenging you to use a quote from your favourite Christmas movie on your card.

Well - I think the last time I watched a "Christmas" film it would have been "The Snowman" as we'd sit the whole school (4-7s) down in front of it as a treat just before the Christmas holidays to give us teachers the chance to do some clearing and sorting!  As you'll undoubtedly know, there's not much in the way of dialogue in that one!
I MUST have seen some of the films that came up in my google search, but obviously they didn't make much impact.  So I cheated and just looked around for a quote that I could use whether or not I'd seen the film.  I found one from "How the Grinch Stole Christmas" based on the Dr. Seuss story and I think it sums up what Christmas is all about.
Here's my card
I started by making the text piece on the pc, then printed it twice.  One to use for the card, the other to use as a pattern as I wanted to do a bit of emboss-resist around the text.  This involves cutting around the text, then making a couple of layers of the same patterned "hole" and sticking them together.  It's easy to do using a die-cut shape, but a bit more work when you want a more free-form space like for this.
That done, I placed the other printed piece of card in the embossing folder, then the aperture pattern I'd just made over the top of the folder - I usually use a little bit of Pritt-stick glue to keep it exactly in the right place.  Now it's ready to go through the machine.  If you look closely you can see the "wibbly" outline around the text
The embossing folder I used has different patterns on it as you can see. Usually it's for using with the dots at the top and the snowflakes at the bottom with a space between perfectly made to fit a ribbon.
I cut a layered star in silver and glittered card and added silver ribbon, some extra snowflakes, some glitter and some gems.
Materials and Tools
Navy Blue card Blank, Silver card, White card
Glitter card; Silver and White
Glamour Dust Glitter, Gems
Embossing folder: Christmas Elegance (Crafter's Companion)
Snowflake punches; Martha Stewart, EK Success
Snowflake die; Small snowflakes 4x4 die (Cheery Lynn)
pc generated text
Craft Robo cut layered star 
There was a point when I questioned whether I'd actually come up with anything for this challenge - and I do hate to be beaten by a tricky one! Got there in the end though ;)
Do please visit the DCM BLOG to see all the fun cards made this week.
Back with more of my Darice samples next time so I hope you'll come back soon


Wednesday, December 11, 2013

A Prototype

Well, it's not often I write two blog posts on one day!
A while back I saw an idea for a box which lad space for some sort of little treat plus a space to hold a gift card.  We often give Gift Cards and vouchers as presents, but sometimes they seem a bit dull and "sterile".  I thought it was a lovely idea to idea to have a space for a little treat of some kind, be it sweets, nice soaps or some other little extra gift.
 
Now, I was sure I'd saved the link for the instructions somewhere in my Pinterest galleries, but it seems that I didn't - I probably went off on a tangent, following links )as you do) and then forgot where I started, and forgot the most important thing - saving that link.

Well, I'd already bought some treats to use in the box, so unless I wanted to eat them all myself, I had to figure something out.
 So despite having plenty of other things higher up the to-do list, guess what I've been making today.....a prototype box, with a cute little holder at the back for the gift card. 
This box was made specifically to hold these 3 Marks and Spencer choccies, as I'd already bought them.  A better way round would be to make the box and then find sweeties etc to fit! 
I thought I'd share the pictures of my prototype anyway.
The gift card fits in the holder at the back, I've wrapped a ribbon around it and added a little Pull tab so that it's easy to see that there's something else in the box.

What do you think?  Some feedback would be much appreciated :)

Darice Samples

Oooh it's a bit nippy today - a bit foggy too and looks like one of those days when it will hang around all day.
Have you tuned in to any of the Crafter's Companion shows on Create and Craft in the last couple of days?  There's a "4 day Deal" going on that started on Monday, so still today and tomorrow's shows to go.
The team I'm part of worked with some brand new Darice embossing folders and I actually managed to remember to watch yesterday eveniong's show so caught a glimpse of some of my cards.
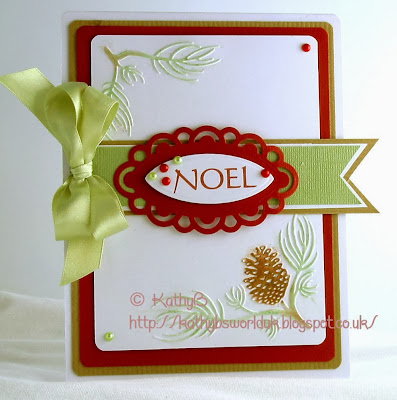
For these two I used the "Pine Cones in Corner" embossing folder
Materials and Tools
From Crafter's Companion: 
Darice Embossing folder - Pine Branches in Corner, 
Dies - Die'sire Cameo Stamping Frame, Coredinations card (red)
From my stash: Chalks for shading, green card, ribbed kraft card. Green Satin ribbon, Red & Green pearls, Crystal Ice Stickles, Glamour Dust,
pc generated sentiment

I like the contrast between these two cards made using the same folder - the NOEL one is quite clean and bright, whereas this next one is much more grungy - I had some fun with my Distress Inks and a gold Posca pen making the pine cone background.  I love the gorgeous Die'sire Doily, and managed to use both sizes on one card, by using the smaller one to make a corner detail.


What do you think of the little pine-cones?  They were made using the Small Sunflower quilling dies - I know they aren't perfect, but they were a bit of an experiment and didn't turn out too badly ;)
Materials and Tools
From Crafter's Companion:  
Darice Embossing folder -  Pine Branches in Corner, 
Dies - Die'sire Circle Doilies, Die'sire Quilling Small Sunflower (for the pine cones)
From my stash:
MME Papers Lost and Found Christmas, 2x Circle punches, Leafy sprig punch
Various Inks, Red Thread, Narrow satin ribbon, Red organza ribbon
Glamour Dust
Here's a little reminder of the Create abnd Craft shcedule
Thanks for visiting today, I hope you liked what you saw here and will come again soon


Friday, December 06, 2013

December Colours

It's the first Friday of the month and that means a Colour Combo Challenge for The Daring Cardmakers.  This time Zuzana is our hostess and the colours, and accompanying inspiration photo are perfect for winter time.  I suppose "Blue-tit Shades" just about sums it up.
Here's my card
Materials and Tools
Various shades of grey and turquoise Bazzill card and Glitter card.
The Yellow card is a Funky Hand design from the "Sleigh Ride" collection, printed onto white Bazzill card.
Turquoise seam binding, Pearls, Silver cord
Memory Box 3x stockings die
I made the sentiment in Paint Shop Pro and printed it onto the yellow card
 Head over to the DCM BLOG to see some really beautiful cards using these gorgeous colours

As I had the various pieces of card and other stash out - and because  I'd cut far more of those tiny stockings than I needed I thought I could use it to make another batch of Christmas cards. So I pared down the design to make a simpler, quicker to make card that is also "thinner" for posting.

In the end, I made quite a lot of the design with the deep border section, then as some of the printing went a bit awry I made a couple with banners on rather than wasting the resulting prints. 
After a while, as is so often the case with this sort of thing - I got a bit bored using the same colours so looked around for other colours to add in to the mix.  I haven't done photos yet, but imagine the same thing with some lilac and purple and you'll get the idea.
After a while I realised that using my Craft Robo to cut the rectangles - and rounded rectangles at that,  would be easier and more accurate - I wish I'd thought of it sooner, that's all!
That's me for today, back to the Christmas card making, but I'm nearly there now, thank goodness!

Thanks for looking, have a great weekend and please come back soon :)


Thursday, December 05, 2013

More Sequins

Whilst the sequin baubles card that I shared a couple of days back was quite simple to put together and I'll probably make a few more like that, this one was fiddlier to make.  The only wreath die I have is a snowflake one and I wanted holly (so...I'm awkward), anyway, it's a lot bigger than I wanted the wreath to be.
 My holly die is the "straight" one I used for the baubles card, so I used that anyway and tried to create a circlet with a couple of die cuts and a bit of cutting with the craft knife.
Materials and Tools
12x12cm card blank
Purple, Green, White and Gold card
Assorted sequins, Purple ribbon
Red and Gold Stickles, Red pearls,
Craft Robo for sentiment
Memory Box Holly die

I quite like the result I think it turned out ok, but too much of a bother to make more!
I hope you like it too
Thanks for looking

Tuesday, December 03, 2013

On the Line

There's a new LO sketch over on The Sketch File blog today and I used it as the basis for a few more Christmas cards.
By chance, a little bag of pretty sequins fell out of a box when I was looking for something else the other day, and I thought that if I "downsized" the design they would make the sweetest tiny baubles!


Materials and Tools
Red, White, Green and Gold card
Gold thread, Sequins Stickles Glitter Glue
Memory Box holly die
Craft Robo to cut the banner and sentiment
"On the Line" sketch from The Sketch File


 I made a few of this card - though mostly just with the "noel" and no banner because I was in a hurry to get them done.  I think they look better with the little banner tbh, Mind you, to send through the post the banner would have to be a flat version rather than 3D like this one!

That's all for this time, thanks for visiting