Every now and then, rather than one of the team thinking up the challenge for the Daring Cardmakers, we all put our heads together and come up with some ideas to use as "Team Dares". This week we've decided to make use of one of these ideas and have a challenge called "Take 5" for you.
All you need to do this week is make sure you have five of something on your card; it could be circles, brads, tags, candles, elephants, whatever you like is fine - just as long as there's five of them. Surely you can't get much easier than that?
I've just come back from a few days up in Northumberland with my rellies, so didn't have a lot of time to get my card done - so I decided to use the latest sketch on my Sketch File Blog (I'd love to have you join in with the sketches on there, btw!) to help me out here - a double hit as I'd not got round to making a card for that sketch before I loaded it.
Obviously, for me it had to be five flowers, didn't it?......and as I'm still loving making "distressed" poppies that's what I chose to use on my card.
It also took the chance to use some of my new Cosmo Cricket papers - I know they aren't a new range, but for some reason I've never got round to buying this set despite looking at them zillions of times. When I saw them in the Scrap Revolution shop last week at a reduced price - well, I had to buy them, didn't I?
I just adore the colours of this "Love Notes" collection - they are similar to the BG Fusion ones which are some of my all-time favourites, so not surprising really that they've always appealed.
I used my one and only Fiskars edging punch to cut the scalloped edge in the base paper, then matted the second paper between.The oval shapes are cut with Nesties - not really getting the hang of these yet, for some reason... I cut two slits at the end to tie the ribbon through which meant I could just glue the long piece on nice and flat.
To make my five flowers I punched two sizes of circle, I didn't bother with the distressing tool this time - spritzing with water and crumpling them up seemed to do the trick - I didn't ink the edges either as the white core helps the flowers stand out on the card.
I used a mixture of two and three circles for the flowers and added a tiny gem in the middle. I bought another Anita's gem wheel while I was away, this time with the 3mm gems in it. Got that, some posh black brads and a couple of Cats Eye Queues at fab prices at Boundary Mill - didn't get anywhere near any other craft-type shop during our trip though. I think it was a conspiracy!
The words are Robo cut in two different fonts - I can't remember what the first one is, but "wishes" was cut from the Liorah font. I thought I'd write a seperate blog post to say how I do my Robo words - It's in the post directly below this one - I hope someone will find it useful.
Anyway, please pop over to The Daring Cardmakers Blog and see what other members of the Team have made this week - we're a bit depleted this week due to holidays, house-moving and other stuff that Real Life tends to throw at us from time to time, but the cards are still just as lovely and hopefully just as inspiring as usual!
Friday, May 29, 2009
Making Robo Words in PSP
Not sure if this will be helpful to anyone, but I thought I'd take a few minutes to write down how I make words for cutting with my Craft Robo.
I use Paint Shop Pro to make my words.
Open a large new page (about 1000 x800 pxls depending on what I'm needing).
Type the word, change the letter size to as large a number as will allow the word to fit on your page.
Reduce to 2 colours (B&W) and save as a gif.
Now you can tweak the saved copy so that it cuts as required.
For a joined up word I'd use the "magic wand" to join up the letters,. then paintbrush tool to neaten up the joins - either in black to make the lines longer, wider etc or in the white to take away any bits I don't want.
I then select the whole thing and expand the selection as much as I can without distorting the letters too much - usually by 10 for joined up words.
Fill the expanded area with black using the Paint Can (Fill tool) and check for any tiny white dots that sometimes appear as Robo will cut anything you leave white).
Save again as a gif
It may seem a bit of a faff - but once you've saved them you start building up a "library" of words and letter styles so you'll soon have quite a few that will be ready for use whenever you need them. I try to remember to save mine using the font name and the word itself, so that I don't find myself making the same word in the smae font twice!
Now you can open a new page in Robo, and use the Get Outline button to bring up a new window, click Load Image in the File menu and load your gif
Click on "Convert to Outline", then "Paste then Exit"
Your word should appear on the page and you'll be able to rexize it as required:
With the mouse over the word, right click and a new menu will pop up, right at the bottom of the list you'll see "Position Settings", click on that.
The width and height options are the second set of boxes - you'll probably know how wide you want your word to cut so fill that measurement in - remember these values are in milimetres not cms.
You can choose to tick the "Hold Aspect Ratio" box to alter the height by the same ratio, but if you want the letters a bit taller you may prefer to change that value manually too.
I often set the value of whichever (width or height) is the most restricted for my project, then go back and tweak the other measurement by just stretching or reducing with the grab-lines on the page. You can always go ack to the Position Settings window to check what size they'll end up being when you cut.
If I'm cutting the word in card, I usually tell the Robo to cut it twice by highlighting, copy and pasting without moving the shape at all - this helps make sure the word is cut out completely.
To get more dimension for my words I'll cut 1, 2 or 3 times in card, run them through the little X shaped xyron and stick them all together. For the words on THIS card I cut a layer in card and a top copy in patterned paper.
That's it really, I hope at least some of this makes sense and is useful - although I can only use PSP I'm sure other graphics programs have pretty much the same wotsits (tech term...) to do the same things.
Monday, May 25, 2009
Aimee's Birthday Card
About an hour before we had to leave to go to niece Aimee's 18th birthday dinner I decided that the flowers on her card really didn't look "right"
So I ripped them off and added in some Primas from Creative Treasures and layered them up differently. I think it looks a bit better in the second photo - but still not totally happy with it. By then it was too late to do anything else though!
The background "stuff" is actually flocked sticky backed plastic from Wilkinson's -- yes, really! The lovely Rosie discovered it and gave me some pieces when we met the other week (thanks Rosie...). I thought it would be just the thing for an 19th card. The frame is also covered with this stuff, but in the black on black version. Rosie said they had a black on red roll too.
bet you'll all be dashing off to Wilko's now to see if its still availalbe!
The words and numbers are Robo cut, glittered then covered with Glossy Accents.
Aimee loved it, thank goodness. Next time I'll show the photos of the Accordion Photo Album I made to go along with her main present.
Another dinky little message.....
Friday, May 22, 2009
Wet, Wet , Wet
It's my turn to set the new challenge over on the Daring Cardmakers this week.
I just hope this one doesn't bring loads of wet weather in its wake! My apologies in advance if it does lol lol
You can almost guarantee that every one of us struggles with the dare we've actually set - don't know why that is, but we all say it from time to time.
This was my Plan B and was greatly helped by being let loose in Scrap Revolution on Wednesday when I met my friend Sue who has a key! Don't worry though - I did BUY my new stash!
I'd already made theRobo template by then, but at the shop I saw this fab paper by My Little Shoebox" and just knew I had to make use of it for this card.
I've used a couple of the papers, plus scraps of matching Bazzill to make this one and I just adore the colours and the cheery designs. Isn't it great when everything comes together? :)
Here's a close-up of my little Puddle Jumping Chappy
I do hope you'll have a go at my dare - I'll try my very best to leave comments on your blogs if you do - but the next few days are going to be a bit hectic for me, so it may be well into next week before I get round to that - so please bear with me....
Another short one this time, thank you so much for visiting
I just hope this one doesn't bring loads of wet weather in its wake! My apologies in advance if it does lol lol
This week I'd like you to do a bit of "singing in the rain" and make cards on the theme
"Wet, Wet, Wet"
I'd like to see cards featuring water of any kind, and if you can actually USE water in the making of them - then you can claim an extra bonus point lol.
So if you're ready to get splashy off you go....
Looking forward to seeing all your wonderful cards, so please head back and leave a link to your blog on the DCM message board
You can almost guarantee that every one of us struggles with the dare we've actually set - don't know why that is, but we all say it from time to time.
This was my Plan B and was greatly helped by being let loose in Scrap Revolution on Wednesday when I met my friend Sue who has a key! Don't worry though - I did BUY my new stash!
I'd already made theRobo template by then, but at the shop I saw this fab paper by My Little Shoebox" and just knew I had to make use of it for this card.
I've used a couple of the papers, plus scraps of matching Bazzill to make this one and I just adore the colours and the cheery designs. Isn't it great when everything comes together? :)
Here's a close-up of my little Puddle Jumping Chappy
I do hope you'll have a go at my dare - I'll try my very best to leave comments on your blogs if you do - but the next few days are going to be a bit hectic for me, so it may be well into next week before I get round to that - so please bear with me....
Another short one this time, thank you so much for visiting
Thursday, May 21, 2009
Pop Up cards
One of the card projects posted on the mini cyber-crop on Bubbly Funk last weekend was such a fun idea that I decided to use it as my project on Bubbly Scrumptious emag this week. It's a pop-up card, but a bit different to the usual sort and I'm hoping thateveryone will enjoy making these as muc as I have.
To cater for UK card sizes, I've added the measurements you need to make the equivalent of a 14cm sq card. The link to the video, plus my version of the measurements, along with a couple of diagrams and pictures of the two cards I've made are over on the Bubbly Scrumptious emag,
I hope you'll head over there and have a look - I'd love to know if you make one of these cards, so please leae a link either there or here! Sorry this is so short, but I'm running around in ever decreasing circles - and getting nowhere, obviously! See you soon
Monday, May 18, 2009
A mini crop, cyber style!
I had every intention of blogging sometime over the weekend, honest.. but here we are on a Monday already!
Spent Saturday out and about - popped into my bro's place to say "hello" as its a while since we last saw them all and I wanted to pick up my little Cuba album that I left there last time, then to one of the garden centres - I don't know, we seem to need to visit at least one every week atm, can't remember when I last went "ordinary" shopping I've almost forgotten what M&S and John Lewis's look like!
Back home with a boot full of compost and some new plants, frames for growing the tomatoes on - all that sort of boring stuff. Then obviously it was out into the garden to deal with peas and beans and what-have-you.
Getting really sick of all this windy weather, it plays havoc with my hayfever and my eyes are always streaming and itchy.
OK so now the moaning is over and I can talk craft instead.
Bubbly Funk is one of the forums I like to hang out on - I have a few such favourite places for craft chatting lol. Anyway, one of the BF Girlies mooted the plan of a Retreat - booking into a big self-catering place and hiding away for a weekend of crafting and no doubt, gossip. It was a popular idea and this last weekend they all deserted the forum and headed off to play.
Those of us left decided that we should have ourselves some crafting fun too so we organised an "instant" cyber crop - it had to be "instant" because we were a bit late in thinking of it. Actually though, it worked really well and being impromptu added to the fun. Nothing was really organised -and everyone was invited to add a project, class or anything really - we also used You Tube videos of various projects as a starting point for our crafting.
We had a joke thread and also some photo prompts on-going over the weekend which kept us giggling and taking/sorting photos - which was great fun
I made this tag after watching one of the Tim Holtz vids using distress inks
And this pop-up card was made following a You-Tube video tutorial, it all folds flat into itself, but my photos aren't really showing that too well, are they?!
Back next time with more - if I can find the photos!
Friday, May 15, 2009
Sing Your Own Song
Daring Cardmakers Day today, and this week Jane's back to set the challenge. She's asked us to find our inspiration in all things musical, so musical instruments, song lyrics, pieces of music - as long as there's a musical link anything goes. Recently most of my projects have involved using masses of papers and loads of colour. so for a change I decided to keep the design really crisp and simple. There's even lots of "white space! shock horror! I used some clipart to make the piano keyboard strip; I needed to alter it to get the right size - - I had to call on hubby to help with that bit, it wasn't as easy as I thought it was going to be. I printed that bit on glossy photo card to get the right look for the piano keys (yes, I know that might be considered a tad "over the top", but there you go!) I then printed the wording on a strip of regular card and matted the keyboard onto that. I used another clipart for the piano - it was far too complicated to make the sort of layered Robo template I usually made, so I just blacked the whole lot out and cut it as a silhouette. The little pewter heart charm came ffrom a US online store "A Charming Place", the ribbon from Ribbon Oasis, the rub-on letters are Maya Road. Yesterday morning I drew the winner of the little accordion album I made for Bubbly Funk Kits last week The book will be on its way to its new owner, Lisa Hemmings asap - I do hope she enjoys filling it up with her own bits and pieces. All for today, now I need to go and finish off some of the half-done projects piled up next to my desk. Does anyone else have phases where lots of things get started, but nothing seems to get finished? I bet you're all much more disciplined that me and you always see a project right through to the end before starting something new. Did I ever mention that my Hubby calls me "Kathy Half-Jobs"? lol
Thursday, May 14, 2009
Sloppy Poppies!
Thursday again and my turn to add a project to Bubly Funk's fabby emag aka Bubbly Scrumptious.
I don't know if its just me, but I often have a problem using "ready made" embellishments - I think maybe it feels a bit like cheating if all I do is stick something someone else has made onto a card and then say, "Look what I made". Besides which, they rarely seem to work for me anyway.
Mind you, they are just the bee's knees if you're in a hurry and need to assemble something quick-smart!
I've been working with the various embellishments that match this month's K&Co "Madeline" kit from Bubbly Funk and I set myself a challenge to try to use them in a more imaginative way. The great thing about them is that as many are layered and have several components, they are fairly easy to pull apart and you not only get more for your money, but you get the chance to use your creativity to make something that's all your own style.
This week, I've been pretty thrifty really (some might even say "mean" lol) I've used just one sheet of paper from the mat pad - they only measure about 18 x 12cms, and I made a background, covered a swirl and made 2 sloppy poppies (ooops, nearly typed "poopies" there - Joanne would have enjoyed that one, I know...) from it! I've altered one of the swirls from the Frames and Flourishes pack, and thought of a way to use bits from the beautiful "Sheer Bliss" embossed paper that I know I'll only manage to use a small amount of for other projects.
You can see my card and find out how I made it by clicking HERE, and I'm also announcing the winner of the book I made last week - I wonder who it was.......;)
Thanks for looking, I'm off now to make my card for tomorrow's DCM - I think I've got a plan.....
Monday, May 11, 2009
Its Crafty Template Time Again
There's something new from Leo at Crafty Templates this month. The template collection is still there, and just as fab as always, but the Goody Kit that goes with it is a bit different this time - its a set of papers and embellishment printables delivered straight to your inbox and ready to print off and use to your heart's content.
There are some fun templates in this month's set and I've made a couple of cards so far using the templates and the downloadable papers.
The first is this shaped card using one of the little Japanese Doll templates in the set. I used two of the printable papers for this one and added the extra bits from my stash
I've tried and tried to get a decent photo of this flying saucer card and failed dismally - so I'm giving up and just posting this one
The fab flying-saucer background paper is from the paper kit, as is the spotty paper I used for the alien and the star message badge thingie - which I've attached on a piece of tightly-coiled wire so that it wobles about!
I cut the flying saucer in acetate first, then adhered the Bazzill saucer on top of the acetate, and the alien underneath the bubble shape.
Sorry again about the rubbish photo - it looks better irl.....
You can find out all you need to know about Leo's Templates, and the downloadable Goodies collections HERE and there's a fab Crafty templates blog with loads of info, projects and ideas HERE
Thanks for visiting,
Friday, May 08, 2009
Mum's the Word
Mother's Day in the UK is always in March, but in other parts of the world it is celebrated later in the year. In NZ Mother's Day is this Sunday, and as Tanya, one of our NZ Team Members is setting the dare, she's chosen "Mum" as the theme:
My customre has ordered cards for her mum and mil before, so I know that they are both of the modern, youthful granny mouldm so bright and funky goes down well.
It seemed like the perfect excuse to get out those gorgeous MME "Bloom and Grow" papers again
I used one of my own old sketches for this one, you can see it HERE - it was the one I made for Jo's "Get Someone Else to Make It" dare from a couple of months back.
There's yet another "hidden" component - as in Jozza's dare of a couple of weeks ago - other people combine dares so why shouldn't I eh? lol
Lift the ribbon loop and the flower reveals the rest of the message!
I've used "Mam" instead of "Mum" for both the 65th birthday cards as they are for Northumbrian Mums - one of the great things about a handmade card is that you can have the "right" word for the recipient, isn't it?
The top three flowers on the lift up flap and the green ribbon are from the fab May flower kit from Creative Treasures
Papers: MME Bloom and Grow
All wording is Robo cut
Anita's tiny gems
There are some lovely cards on the Daring Cardmakers blog this week - nothing new there, I suppose - but with such an "open" theme there's a great variety of styles and techniques which we hope will inspire everyone to get crafting. We do love to see all the cards that are made so if you make one, please leave a message on the blog so we can come visit!
Here's another card using the Creative Treasures May flower kit - I absolutely adore the colours of this kit they are just so darn pretty! To prove my point - and just in case you missed seeing them the first time I posted the pic:
I've used my newest addition (sketch #10) to the Sketch File for this card - the one on the sketch blog has a masculine theme so this time I've made it more girly.
The flowers work so well with quite a few paper collections, this time I've used the beautiful Fleuriste set from Cosmo Cricket. Both the ribbons on this card come in the kit too. A couple of the flower centres are brads, the others are just fake chippie covered with papers from the Fleuriste set, cut with the Cuttlebug then given a layer of Glossy Accents.
Lettering is cut on the Robo.
That's all for today,, but just before I sign off - do take a look at the thread directly below as there's info about winning the little book I'm showing on there.
Thanks for visiting today, I hope you'll come back soon
Hi, it's Tanya Leigh here and I am back after a long break from the Daring Cardmakers. The break was needed for different reasons but I am now back and have had fun getting back into making cards.
This week it's my first time to set the dare since being back - it's Mother's Day here in New Zealand on Sunday 10th May (not sure about other parts of the world), so this week's dare is to make a card with the word MUM on it somewhere.
It could be Mother's Day, birthday etc.
Fortunately for me, I have an order for two "Mum's 65'th Birthday" cards - the first one was at the start of the month (I used the Bog Blooms dare to make that one) the next is at the end of May, so very convenient for this one - especially as I don't have a mum of my own to make things for anymore.It could be Mother's Day, birthday etc.
My customre has ordered cards for her mum and mil before, so I know that they are both of the modern, youthful granny mouldm so bright and funky goes down well.
It seemed like the perfect excuse to get out those gorgeous MME "Bloom and Grow" papers again
I used one of my own old sketches for this one, you can see it HERE - it was the one I made for Jo's "Get Someone Else to Make It" dare from a couple of months back.
There's yet another "hidden" component - as in Jozza's dare of a couple of weeks ago - other people combine dares so why shouldn't I eh? lol
Lift the ribbon loop and the flower reveals the rest of the message!
I've used "Mam" instead of "Mum" for both the 65th birthday cards as they are for Northumbrian Mums - one of the great things about a handmade card is that you can have the "right" word for the recipient, isn't it?
The top three flowers on the lift up flap and the green ribbon are from the fab May flower kit from Creative Treasures
Papers: MME Bloom and Grow
All wording is Robo cut
Anita's tiny gems
There are some lovely cards on the Daring Cardmakers blog this week - nothing new there, I suppose - but with such an "open" theme there's a great variety of styles and techniques which we hope will inspire everyone to get crafting. We do love to see all the cards that are made so if you make one, please leave a message on the blog so we can come visit!
Here's another card using the Creative Treasures May flower kit - I absolutely adore the colours of this kit they are just so darn pretty! To prove my point - and just in case you missed seeing them the first time I posted the pic:
I've used my newest addition (sketch #10) to the Sketch File for this card - the one on the sketch blog has a masculine theme so this time I've made it more girly.
The flowers work so well with quite a few paper collections, this time I've used the beautiful Fleuriste set from Cosmo Cricket. Both the ribbons on this card come in the kit too. A couple of the flower centres are brads, the others are just fake chippie covered with papers from the Fleuriste set, cut with the Cuttlebug then given a layer of Glossy Accents.
Lettering is cut on the Robo.
That's all for today,, but just before I sign off - do take a look at the thread directly below as there's info about winning the little book I'm showing on there.
Thanks for visiting today, I hope you'll come back soon
Thursday, May 07, 2009
More Vintage & a Giveaway
For my project on Bubbly Scrumptious this week I've made a little accordian album - well to be truthful, I've decorated one I bought from the Bubbly Funk Shop a few weeks ago then stashed away in the drawer till an idea for using it popped into my head!
Now I'm wondering why I waited so long, as these books are such fun to do! I've used the "small" size accordian album, along with the Bubbly Funk May Kit to make this mini album. which because it has such a old-fashioned, chintzy feel seems just perfect for perhaps displaying old family photos.
However, you'll notice that my book has no title and is devoid of photos too - that's because I've decided to make it a Lucky Dip Giveaway. To get your name into my virtual hat, you need to leave a comment on THIS thread of the Bubbly Scrumptious emag - there are a few restrictions, but you can read all about it on that post. I hope you'll click the lionk and visit soon.
Thanks for looking, hope you'll come again soon
Now I'm wondering why I waited so long, as these books are such fun to do! I've used the "small" size accordian album, along with the Bubbly Funk May Kit to make this mini album. which because it has such a old-fashioned, chintzy feel seems just perfect for perhaps displaying old family photos.
However, you'll notice that my book has no title and is devoid of photos too - that's because I've decided to make it a Lucky Dip Giveaway. To get your name into my virtual hat, you need to leave a comment on THIS thread of the Bubbly Scrumptious emag - there are a few restrictions, but you can read all about it on that post. I hope you'll click the lionk and visit soon.
The Bubbly Scrumptious emag is open to all and filled to the brim with ideas and inspiration for all sorts of crafting. You don't need to be a kit subscriber or a BF forum member - - anyone can visit, see the projects, send in photos of their own crafty makes and of course, leave comments - so why not head over and check it all out?
Thanks for looking, hope you'll come again soon
Wednesday, May 06, 2009
Bumbleberrying
I'd not long found Bumbleberry Crafts Shop and forum when owner and Scrapper Beckie Dreyer (Rusty Pickle Team Member, Docrafts designer etc etc) and family relocated from Ireland to Scotland, and the shop closed up for a year or two while they all settled in to their new environment.
The forum kept going though, and has recently been relaunched in a very posh new "livery" - it looks fab and friends new and "old" are finding the new "cafe"
I'd only managed to acquire a couple of Beckie's wonderful kits before the shop closed boohoo, but now the kits are back and I was thrilled when Beckie asked me if I'd like to have a play with the first one.
Its bright and beautiful and filled with gorgeous 3 Bugs "Butterfly Kisses", 12x12 card, and ribbons, buttons, brads, flowers etc all perfectly matched.
I thought they'd be just the thing for one of the "Happy 65th Birthday Grandma" cards I need to make for a customer.
The card has a pocket on the front and a big folded tag sits inside, with its hidden "Happy Birthday" message. I've cut out lots of flowers from the papers, and added some extra Primas to decorate the tag.
The kits are very limited in number and available through the Bumbleberry Cafe at the moment.
Also for the Bumbleberry Cafe I've written a little tutorial on making distressed "poppy" flowers as on this next card - and issued a challenge to used one of these flowers on any project you like.
I used Sketch #8 from my Sketch File Blog to make this card,
Papers are Fancy Pants "Botanicals"
Ribbons from Ribbon Oasis
For the little "badge" I used Mr Robo to cut the numerals and the scalloped circle is from Mr Cuttlebug 's scallop flowers die set.
Sunday, May 03, 2009
Sketch File Update
I loaded a new sketch onto the Sketch File blog yesterday, so please check it out and see if you can come up with a card using it - I'd love to see what you make.
This is the card I've made using the sketch - its quite an achievement for me to have the card and sketch ready to go at the same time lol!
I used:
White DL card
Blonde Moments - the green paper
Bazzill - red card
Ribbon Oasis - Football ribbon
Craft Robo - letters and footballs
I won't go into detail about how long it too to make the football template.....
I have this crazy idea that I could make up versions of this card with different backgrounds and wording, then just add the embellishments to suit the recipient.
Obviously I won't ever be so organised, but one can dream!
You can find the sketch HERE
Friday, May 01, 2009
Eee I eee I ohh
Another Friday, another Daring Cardmakers challenge, and its Vanessa's turn to set the challenge this week:
All through April we were joined by a wonderful Guest Designer, Jo Willis - it was lovely to see her fab cards on our blog and I for one will continue to visit her blog to see what she's been making. But a brand new month starts today, and we have a brand new guest designer playing with us during May.
All the way from Poland (well, actually she's in Leeds, England right atm visiting her fiance lol) we'd like top welcome Asia Wu to the Design Team.
I'm thrilled she's agreed to be our GD because I've been visiting her blog regularly for ages now and its always full of wonderfully inspiring crafting and a joy to visit.
After last week's excitement of having my card ready to go ages before Friday, it was back to a more normal Thursday panic for me this week!
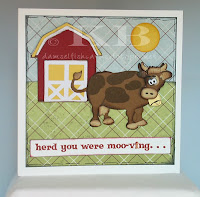
First I was going to do a chicken card....then I thought I could see if I could get a whole farmyard of animals on one card.... and then I found this free colouring sheet and decided to use that instead.
I did a little bit of tweaking in PSP then made a Robo Template so that I could cut it in lots of layers and different colours.
Never one to miss the chance of a pun, to get the chance to use TWO on one card made my day! I know, I know little things please little minds.... lol
Background papers are Scenic Route, I quite liked the effect of using the patterned papers for a background and tbh they were the first green blue combo I pulled out of the paper boxes.
Thanks Vanessa for a fun dare this week - I hope everyone enjoys having a go at it. I'd LOVE to see lots of puns creeping into your cards too if you fancy a little extra challenge!
The DT have made some fab cards this week, and you can check them out on the DCM BLOG as usual.
Last night I finished my second 12x12 LO - I started two at the workshop on Sunday, the first I shared earlier in the week and I'm still not sure how to finish it.
I'm much happier with this one though. Hubby looked at it last night and said "ah this one's got more "Kathy Bits" on it..." and then he prodded the little tiles with the left-out-to-dry Glossy Accents on.........
I used the Mr Robo to cut the title - it took me ages to figure out what the title should be, I wonder if things like that get easier with practise?
Sorry about the rubbish photo, I'll replace it with a better one when I manage to take one!
Anyway, I'd be interested to know what you think of SB LO effort no. 2! I've madethe photos click-on-able so you can have a close-p inspection if you really want!
Thanks for looking
"I don’t know why I came up with this one, but for some reason I’ve been singing away to Old MacDonald, you know the song “Old MacDonald had a farm, Ee I ee I oh! And on that farm he had some .........”
........we’ll let you fill in the blank – that’s your dare this week, get some farmyard animals on your cards and pop a link in the comments section so we can come and see!"
All through April we were joined by a wonderful Guest Designer, Jo Willis - it was lovely to see her fab cards on our blog and I for one will continue to visit her blog to see what she's been making. But a brand new month starts today, and we have a brand new guest designer playing with us during May.
All the way from Poland (well, actually she's in Leeds, England right atm visiting her fiance lol) we'd like top welcome Asia Wu to the Design Team.
I'm thrilled she's agreed to be our GD because I've been visiting her blog regularly for ages now and its always full of wonderfully inspiring crafting and a joy to visit.
After last week's excitement of having my card ready to go ages before Friday, it was back to a more normal Thursday panic for me this week!
First I was going to do a chicken card....then I thought I could see if I could get a whole farmyard of animals on one card.... and then I found this free colouring sheet and decided to use that instead.
I did a little bit of tweaking in PSP then made a Robo Template so that I could cut it in lots of layers and different colours.
Never one to miss the chance of a pun, to get the chance to use TWO on one card made my day! I know, I know little things please little minds.... lol
Background papers are Scenic Route, I quite liked the effect of using the patterned papers for a background and tbh they were the first green blue combo I pulled out of the paper boxes.
Thanks Vanessa for a fun dare this week - I hope everyone enjoys having a go at it. I'd LOVE to see lots of puns creeping into your cards too if you fancy a little extra challenge!
The DT have made some fab cards this week, and you can check them out on the DCM BLOG as usual.
Last night I finished my second 12x12 LO - I started two at the workshop on Sunday, the first I shared earlier in the week and I'm still not sure how to finish it.
I'm much happier with this one though. Hubby looked at it last night and said "ah this one's got more "Kathy Bits" on it..." and then he prodded the little tiles with the left-out-to-dry Glossy Accents on.........
I used the Mr Robo to cut the title - it took me ages to figure out what the title should be, I wonder if things like that get easier with practise?
Sorry about the rubbish photo, I'll replace it with a better one when I manage to take one!
Anyway, I'd be interested to know what you think of SB LO effort no. 2! I've madethe photos click-on-able so you can have a close-p inspection if you really want!
Thanks for looking
Subscribe to:
Posts (Atom)