Showing posts with label Gift Wallets/Holders etc. Show all posts

Wednesday, December 11, 2013

A Prototype

Well, it's not often I write two blog posts on one day!
A while back I saw an idea for a box which lad space for some sort of little treat plus a space to hold a gift card.  We often give Gift Cards and vouchers as presents, but sometimes they seem a bit dull and "sterile".  I thought it was a lovely idea to idea to have a space for a little treat of some kind, be it sweets, nice soaps or some other little extra gift.
 
Now, I was sure I'd saved the link for the instructions somewhere in my Pinterest galleries, but it seems that I didn't - I probably went off on a tangent, following links )as you do) and then forgot where I started, and forgot the most important thing - saving that link.

Well, I'd already bought some treats to use in the box, so unless I wanted to eat them all myself, I had to figure something out.
 So despite having plenty of other things higher up the to-do list, guess what I've been making today.....a prototype box, with a cute little holder at the back for the gift card. 
This box was made specifically to hold these 3 Marks and Spencer choccies, as I'd already bought them.  A better way round would be to make the box and then find sweeties etc to fit! 
I thought I'd share the pictures of my prototype anyway.
The gift card fits in the holder at the back, I've wrapped a ribbon around it and added a little Pull tab so that it's easy to see that there's something else in the box.

What do you think?  Some feedback would be much appreciated :)

Friday, March 18, 2011

No Play Today

It's Daring Cardmakers Day today, but unfortunately I wasn't able to join in with Jo's dare. It's a real shame too, because she's asked everyone to use postage stamps on our cards and I always save interesting ones on a "just in case" basis! Typical that I'm unable to play along atm...maybe I can do something over the weekend and add my card a bit late....
Anyway, don't forget to check out the BLOG to see what the team have made, and it would be fab if you'd join in - I bet you have a little bag of interesting stamps somewhere too!

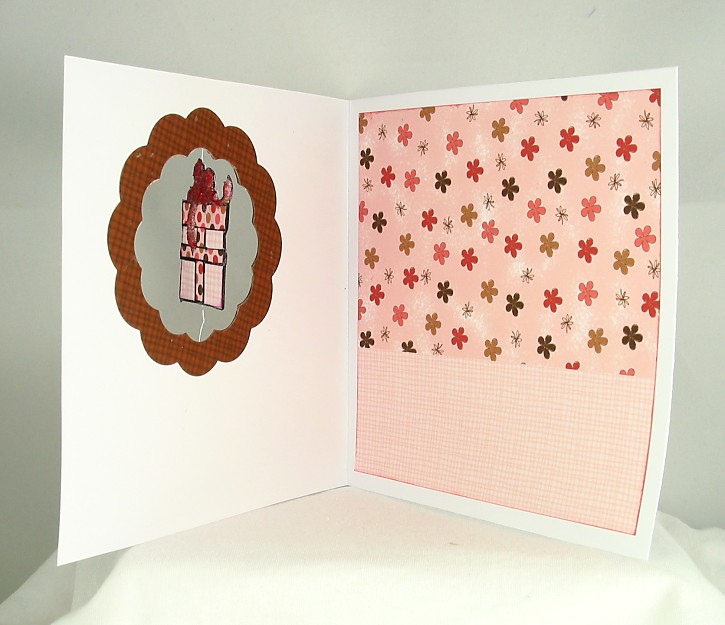
I've been sharing stuff I've made over the last couple of weeks the last few days and today I have another "Our Betty" card.  This one uses the pretty Gift stamp from the "Your Special Day" clear stamps set from Funky Hand, along with more lovely Craft the Year Away papers
I stamped the sentiment (from the same set) in Brown ink randomly along the strip of card, The gift was stamped on the different papers and paper pieced onto a card background piece before cutting out.
Aperture and border cut with Nesties Large Scalloped Circles
Frilly double border strip made with MS border punch
Stickles for some bling on the bow
It was my niece Izzy's 17th birthday at the beginning of this week.  I gave her the cupcake card I showed here a couple of weeks back
She's saving up for a new saddle for her horse, so we've given her money for her Saddle Fund.  I made this little pouch to present it in - I think it's nicer than just having the cheque tumble out of the card, makes it more like a gift, doesn't it?
Green Bazzill to make the pouch
Yellow Rainbow Polka Dots papers from Funky Hand for the fluffy flower and the decorative panel.
Green Bakers Twine, Yellow brad, Lemon Ice Stickles for a bit of bling.

Hopefully this coming week things will be back to normal - at least blo-wise!  There's still a long way to go until everything else is anywhere near what you might call normal.
Catch you all soon

Thursday, March 03, 2011

Gardener's Gift

With all the upheaval and what-have-you, I just didn't have the time to search out a birthday present for my SiL, so I've gone down the vouchers route.  They may seem the lazy option, but at least people can get what they actually want, can't they?  It'll be cash for my niece later this month too as she is saving up for a new saddle for her horse.  Anyway, we got some Garden centre vouchers - I know I'm always happy to get those so I hope she will be too.
I made a presentation wallet for them and continued the gardening theme:
You might recognise some of the components hehe, I've used the flower pots and seed tray, and the little seed packet I used on hubby's birthday card a couple of weeks back but gave them a more girly look with some pink, yellow and blue colours.  I did make a new template for some gardening gloves though.
Papers are Springtime from Echo Park,
Pink, yellow, Blue, Brown Bazzill
Prima flowers, Spellbinders Large Scalloped Circles die, pink Bakers Twine
Pots and seed tray, seed packet and gloves all cut with Craft Robo. 
Graphtec, the makers of the Craft Robo have recently taken over the Silhouette machines too.  I'm not sure if the software is the same, but if you have a Silhouette maybe these templates will be of use to you too.
I'm happy to share these templates with Craft Robo or Silhouette owners, just email me if you're interested.
Gosh, it's chilly today - I've got Cold Mouse Hand for the first time in ages hehehe.  The plasterer is in situ for the next couple of days so I'm trying to stay out of the way as the plaster dust seems to find its way through the smallest gaps and my eyes really don't like it :(
I'm struggling with the old crafting mojo this week - I've lots to do but it's all a bit of a trial this week.
I shouldn't moan, I know I'm lucky and at the end of all the work it'll be like a new room - what with being much warmer and looking all smart with fresh plaster, paint and lovely new furniture.  We spend such a lot of time in the study it makes sense to make it a nice place to be.
It'll all be worth it in the end, It'll all be worth it in the end, It'll all be worth it in the end....
off now to warm my hands around a mug of coffee - and then maybe get some things ticked of the to-do list :-O
Thank you for visiting, please leave a comment if you've a minute!

Friday, December 24, 2010

Christmas Eve

I hope you are all coping with your preparations for the big day!
As usual, apart from the obvious Getting Ready for Christmas Day stuff, I've found a couple of crafty type things I'd forgotten about.  Like a card for hubby, for instance....ooops!
That's done now and I'll show it in a day or two. Today I'm sharing a few voucher/gift card/magazine subscription presentation things I've made in the last couple of days - Last Minute Minnie strikes again!
- but maybe if you're the same you're still looking for some quick ideas and these might help
The first are three variations on the same theme - a three fold piece of Bazzill with some sort of pocket on the central section to hold the card or voucher.
I've made two creases down each end of the long side card about 3mm apart - this means there's room for the gift card pocket without it all looking a bit squashed.  I hope that makes sense.
1. i-tunes card holder
I made a pocket to hold the gift card using a long piece of paper.  The string goes right round and the ends tie through an eyelet hole on the flap.  The "belly-band" holds it all closed.
2.  Magazine Gift Card holder:
My uncle's magazine subscription comes with a postcard type gift card, so I made a really simple pocket to hold it in the centre section of this gift wallet.
3.  Magazine Renewal
I used some leftover die cuts from the last lot of Christmas cards I made on the front of this wallet.  It looked a bit bare so I glitttered the front section.  The little renewal card was made using Ppaint Shop Pro, then printed  out and attached to the inside of the card - the circles are Card Candy from Creative Treasures.  The wallet is held together with ribbon
3.  New Magazine Gift Subscriptions
For these I bought the current issue of the magazine, scanned the cover and used a bit of Paint Shop Pro magic to change the wording on the scanned image.  I used the clone brush tool to remove the existing wording, then added my new text.  I resized the entire image, printed it out then glued it to a "sleeve" of paper that goes right around the front of the magazine.
You have to look closely to see the message though - another time I'll just print the "new" cover off full size.  Never mind, it amused me!
Somehow I don't think I'll be blogging tomorrow so I'll wish you all a Very Happy Christmas now.  I hope all your Christmas wishes come true and that you and your family enjoy a very special time together.

Monday, September 06, 2010

Gone in a Flash

On Friday, the gorgeous 3 months-old bundle of joy you see in this photo -  my adored nephew Charlie, celebrated his 18th birthday. I find it utterly mind-blowing that these years could have gone so fast.  Just in case you didn't guess - I'm a doting auntie, and I'm so proud of him!  He's doing so well and turning into such a fine young man, but seeing him reaching this milestone birthday was quite emotional for me as I couldn't help but feel sad that his grandparents (on our side of the family), and various other family members who are with us on the Christening photos weren't there at the w/e to celebrate another of the special days in his life.
Funny isn't it, how really happy occasions often make us feel incredibly sad too?

Anyway, it's been a hectic couple of weeks and I've not done much blogging, or blog-hopping.  I'm giving myself and early birthday present and planning a do-as-little-as-possible week this week!  So with a bit of luck I'll get plenty of crafting and blogging done and spend some time catching up with all my favourite blogs.  I've loads of stuff to blog, but as my head is still full of Charlie's big birthday I thought I'd start the week with his birthday card and voucher holder.

I made a huge easel card - well huge for me, it's about 9" square - I had to make an envelope (of sorts) too because I didn't have anything big enough for the card once it was done.  Ahhh what price a bit of planning and forethought....?)
You'll probably realise that he's a Magpie's (NUFC) supporter....how delighted my dad would be of that alone!
Papers by Imaginisce and Doodlebug. All numerals and lettering Robo cut using Bazzill card, Papermania buttons, the perfect B&W ribbon and the B&W Divine Twine from The Ribbon Girl, Football-shaped tokens, silver star brads and B&W brads from my stash

We're giving all our nephews and nieces a sum of money in Premium Bonds as they reach 18 - we had the idea  last year when our eldest niece (on hubby's side of the family) hit 18.  So how come when I knew I'd be needing all the info again I didn't save all the images and wording I used on the gift wallet I made for her?  I've made darned sure I've saved it all this time!
Outside and all fastened up it looks like this:
The gift card looks like this:

  I printed out the logo and glued it to one side of the paper, then added the info on amount given etc on the reverse, then laminated the whole thing.
Inside it looks like this; the little pocket in the centre holds the gift card and there's plenty of room for  on the inside cover sections for adding a greeting and message.
Right, that's all for this time.  Tomorrow I'll be concentrating on Funky Hand stuff; It was my turn to set the challenge for this month and there's a new Christmas download release just gone on sale, so plenty to catch up with there.  I will catch up....one day!
Thanks for visiting

Tuesday, June 01, 2010

Two for Crafty Templates


I knew there was some crafty things I still had to blog. 
I've just realised I've not added my latest Crafty Templates projects so will put that right over the next couple of days.  
This time Leo has created lots of lovely templates with a bit of an outdoorsy/Summer garde sort of feel. There are birdies and flowers and blossom, plus some sunshine and surfboarding templates thrown in for good measure.
My first is a card using a really lovely flowers in vase template. I love the simple, stylish look of this one.  I cut the little flower shape three times for each flower and curled the petals up before using a brad to secure them together.  These papers and the lettering stickers are all part of the Crafty Goodies kit which is available as an extra to the template collection
Next is an envelope type thing I made to send some vouchers as a birthday present.  The vouchers were too long to do my usual type of holder so I had to improvise and add some side flaps to make the envelope work.
This border flower template caught my eye immediately I opened up my DT template set and is still my favourite.  I cut it in various layers so that I got plenty of dimension and could use several of those lovely papers from the Goody bag,  The letters are more stickers from the Goody Kit too
You can find everything you need to know about Crafty Templates and Crafty Goodies by clicking HERE
You'll always find something you like in one of Leo's kits and of course, once you've got them they're yours to print off and use as often as you like.

Right, I've just realised that I should have been making pages for a fat book rather than spending all weekend playing...ooops!  I suppose I should go and get on with it then
Thanks for popping by

Friday, May 21, 2010

In the BoyZone

My nephew Dan will be 10 in June - the last of the "boy birthdays" for a few months, phew!  I've really got ahead though and made his birthday card already - as this week's Daring Cardmakers challenge was perfect for getting it done
 Our new dare  is called BoyZone and it's all about making cards for "Little Boys and Teenage Boys" 

There are even prizes for two lucky draw winners this week because a couple of weeks ago up popped the lovely Karen at Charmed Cards and Craft with the offer of a couple of  bundles of Digi images for the Daring Cardmakers to give as prizes - as they are both "boy themed" bundles we thought a BoyZone challenge would be a great match for the prizes.
You can see a couple of pictures of the dig-image bundles on the DCM BLOG 
and all the info on how you can be in with a chance of winning one of the bundles is there too - plus of course all the DT's "Little Boys and Teenage Boys" themed cards.

Some insanity gene deep within me thought a Wii Mario Kart theme would be a good one to do.  Surely it wouldn't be too hard to make some Robo templates to make my card with....
 It's turned out pretty well in the end - but boy did it take some time.  Remind me not to do anything so complicated again, please!
Mario, his kart and the wii steering wheel are all cut with the Craft Robo, as is the wording
The Chequered flags are clipart.
Materials: Bazzill blue, red, black, brown and white card, scraps of silver card.  Stardream silver for the base card

While on the subject of boys, here's another Craft Robo offering, this time made for one of my BILs who recently qualified to referee for kids' football matches
And here's a gift card/cheque holder that I've not shown on here yet.  This one uses BG Colour Me Silly papers and with the big frog carefully positioned didn't need any further embellishment (result!!!).  Instructions for making these wallets, and the winding thread closure are a couple of posts down from this one.


That's all for today - I'll now need to go and finish or make some things so that I'll have something to post next time!
Thanks for visiting, please leave a comment - they are always appreciated.

Tuesday, May 18, 2010

It's a Gift!.....card wallet!


 As promised, here's how I made the Gift Card/cheque wallets.  I hope the instructions are ok and the pictures help (there are lots!).  I would love to know if you have a go at making one and of course photos would be fab.  If you use this tutorial, please be sure to let people know where you found it.


Materials
Card (Bazzill weight)
Selection of papers to match
String/embroidery floss/thin cord
Medium sized brad
Circle punches

1. Cut a piece of card 4 x 12”
2. Make folds at 4 and 8” on the long side.  Crease with a bone folder
3. Trim about 1-5cms off the right edge, then cut across the top of the same section at an angle, to give something like this:
 4. Cut a 4 x 12” piece of patterned paper.  Starting at the left edge (the one which hasn’t been trimmed) glue the paper around the card strip, section by section – make the folds as you go so that the paper moulds itself around the creases and you get a better finish.  You'll be left with a small margin of paper showing at the right side, this will form the tab and help make the pocket section more secure

5.  Whilst most of the paper protruding over the edges of the right flap is useful, but there’s a little piece you need to cut off – It’s easier to show than to describe in words, so use Picture 3 as a guide at this point. The white paper underneath is just there so that the shape  shows up more clearly

 6. Fold the triangular piece of patterned paper over to the inside and glue down.
7. Fold the small rectangular piece around (don’t glue it down though).  This forms the “hinge” of the pocket section.8. Fold the right side in and mark with a pencil where the edge comes to on the middle section.   Apply glue on this edge and also on front side of the paper of the little flap.
9. Burnish the glued edges with a bone folder and ensure they are sealed (you don't want the contents to fall out!)  The wallet is now ready to decorate.
 
 Obviously you can embellish however you like, and a simple ribbon tied round will do the job of sealing it all.
  However I thought I'd also add instructions on how to make an alternative closure as it's useful on all sorts of projects and, if you're making a gift card wallet for a male, ribbon might not be so appropriate!
1.  Cut a strip of paper about 2.5cms wide you can make it long enough to all the way around, or to stop part way across the back as I’ve done – I used a corner rounder on the end which will be at the back.  Ink the edges
 
 2. Cut a 4” length of paper to go down the side, use a border punch to decorate if desired.  Apply a narrow line of glue to the edge and stick in place, leaving the majority of this panel loose,
3. Decide on the position of the closure and tuck the end of the long paper strip under the edging panel – when you’re happy, glue the strip to the panel as shown in picture 1
4. When securely fixed, poke a hole through the two paper layers as in the picture – this hole is for the brad so make sure it’s big enough to take the prongs.

5. Punch and glue together 2 small card circles.  Punch and glue together two larger circles. Place the small one centrally on top of the large one and poke a hole through. 
6. Poke the brad through the hole in the small circle. Cut a length of thin string or thread long enough to wrap around the whole wallet about three times.  Put the two ends of the thread together and then put the prongs of the brad through the “loop” made at the central point, wind the thread around the brad a couple of times and then tie a knot to secure.  This makes a little shank between the two layers of card circles
7. Poke the ends of the brad through the large card circle, apply a spot of glue to the back of the large circle, then  poke the prongs through the hole you made in the wallet decorative pieces.  Adhere the circle to the panel, open the prongs and make sure that they are concealed by the paper strip/edging panel ensemble.  Now apply glue to stick the rest of the panel in place, and then adhere the paper strip around the wallet.
  8.  You should have the double length of thread hanging loose, so just tie a few knots at regular intervals to keep the pieces together.  To fasten the wallet, take the string across the front (right to left) then around the back and bring it back to the front at the right side (opening edge).  Wind the loose end of the string around the brad, under the small card circle.
That's it. all done, I hope you find this little project useful and I'll be looking forward to hearing how you get on with it.

Happy Crafting


Wednesday, May 12, 2010

woowoo WOYWW

It's that day again, when we all hop over to Julia's Stamping Ground to meet up and share our crafty workspaces.  Doesn't matter what craft you're involved with and it doesn't matter how big or small your space is, we're just a nosy bunch who like to peer inside other peoples' crafty nooks to see what you're all up to.  If you've not joined in yet, please don't be scared, just take that photo and share in the world wide crafty space hop!

But first a little moan.....
Yesterday someone left a comment on my blog and as I have comment moderation switched on I have to validate them. It came from someone called "Michelle" and said "I've been into cardmaking lately. Thanks for the ideas!"  there was a hyperlink added to the word cardmaking so I checked it out and found it took me to a well-known UK supplier of card and paper - now, I think that's a bit cheeky - trying to get a bit of free advertising like that so I'm mentioning this today so that you can be aware and watch out. You almost expect it of the scammers and porn purveyors but respectable shops?
It's ok I've climbed down from my soapbox now hehehe
After shocking everyone with my tidy desk at the beginning of last week's post, normal service has been resumed and as I'm in the middle of a mini book project I've got pretty much everything I might want to use gathered around, the drawers are open and the tools are scattered about.
Here's a close up of my WIP
 Here's the book standing up so you can see the "concertina" effect of the pages - it's the folds that are causing the problem really and if I made another I'd probably sort out the "pages" before assembling it. You live and learn, eh?  I really fancied the idea of having "dangly" things in the aperture, but I couldn't figure out how to make it work when the book is folded and closed up - and obviously I'm too impatient to think it through before getting stuck into the project!
A couple of weeks back I showed a little cheque/gift card holder - I promised instructions on how to make it and I've not forgotten.  I've just finished the last one of these that I need and remembered to take photos as I was doing it so all I have to do is write the project up now....so watch this space, as they say.

 Right, I'm off now to post my link on the WOYWW thread, and have a look at those early birds who've already added theirs.  Mustn't get carried away with blog-hopping though as I've got crafting to do.
Thank you so much for visiting, please leave a comment before you go - it's such fun to read them and see where everyone comes from each week.
Happy crafting