Wednesday, January 31, 2018

Poppy Blog Candy - Spellblogger Post for Spellbinders

  
Hello! 
I'm back with another Spellblogging post for Spellbinders
and today is the last chance to enter my blog candy draw to win the same die set that I've used to make today's card. 


The draw closes at midnight today - Wednesday 31st January 2018
 (UK time) so there's not long left! 
Poppy blog candy:
Click HERE to join in with this prize draw 

 I love these beautiful Poppies, so I'm really happy to have a set to give away!

 As well as the large card on the main blog candy post, you can see another card made using this die set HERE

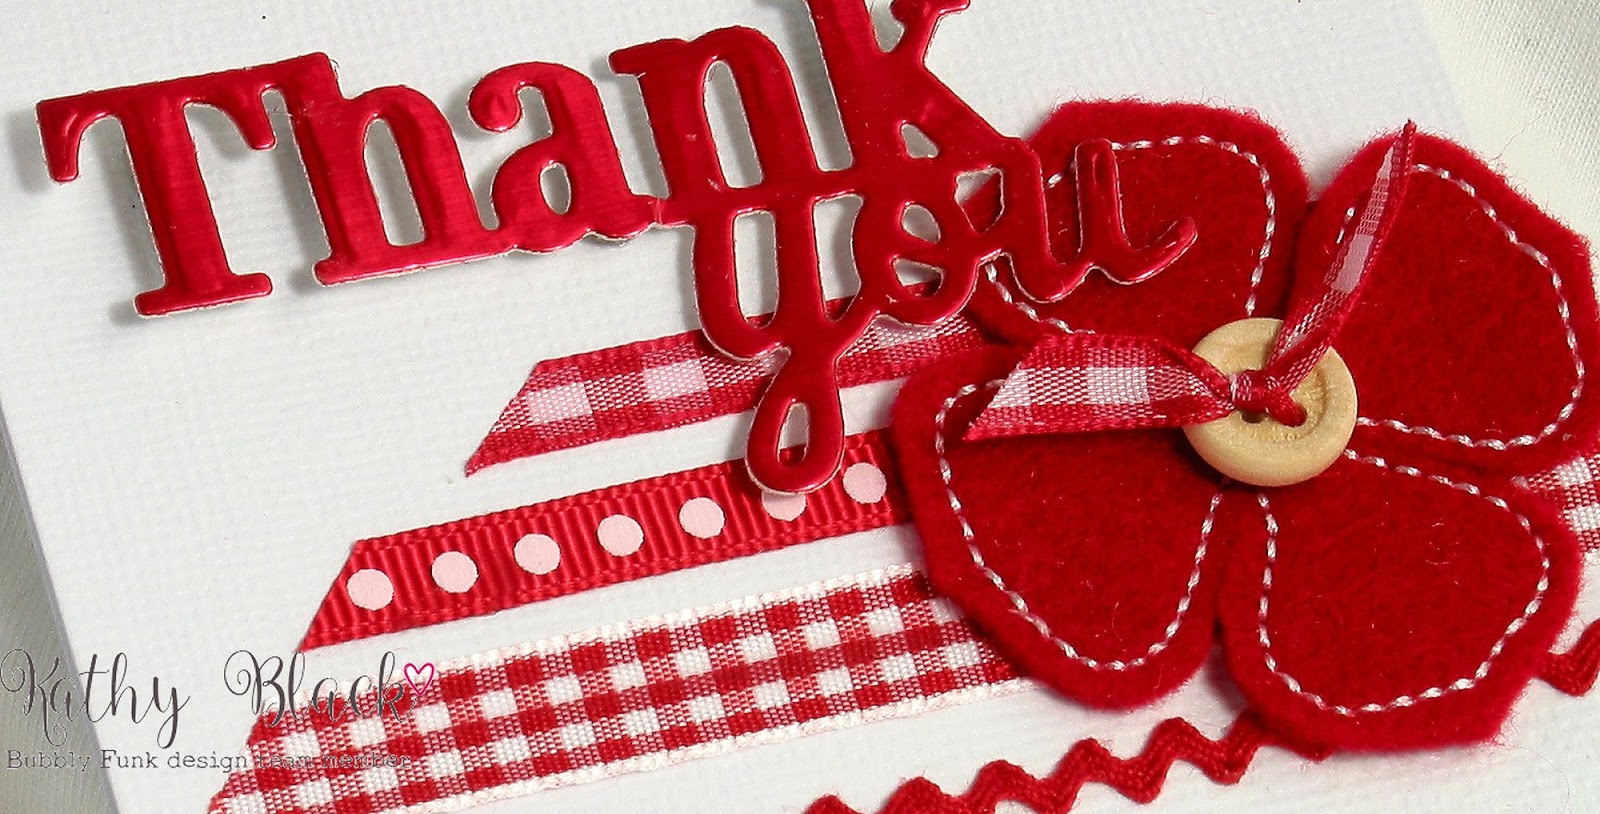
Here's today's card, and this time I've kept it really simple - you really don't need to add much fluff and fancy stuff when you make a project with this beautiful die set


Info
Smooth white card blank
Sentiment created in Paint Shop Pro and printed directly onto the card blank
Green and Lilac card for poppies
Deeper lilac ink for edging and stencilling
Lilac organza ribbon for bow
Lilac flat-backed Pearls (I don't know why they look pink on the pics!)Once the poppies had been embossed with a second run through the machine using the embossing mat, I left the dies in place and inked through with the darker shade


Here's a closer look at this Spellbinders die set
Poppies 
Shapeabilities Etched Dies


I also used:
 Thank you for visiting, if you click on This Link  you'll find yourself at the Spellbinders store where you will be tempted by lots of lovely dies, stamps and much much more! 
Let me know if there's any stamps or dies there that you'd like to see as blog candy another time and I'll see what I can do! 😉

Happy Crafting


Tuesday, January 30, 2018

In Gear


Hello

I've a card using one of the newest die sets from Spellbinders to share today - its perfect for masculine cards, and I've teamed the die set with the January LO from The Sketch File to make my card.  I have a lot of male family birthdays coming up in the first half of the year.  Not my favourite kind of card to make, so its great to get a little stock built up ahead of time!


This is the sketch I based my LO on, with a simple grey panel, then all the gears layered up in place of the circle on the sketch, and a pc generated sentiment to finish

 A You can find the sketch here: The Sketch File 
The Sketch File; January 2018
.
Info:
White card blank, plus extra for the printed sentiment
Grey Bazzill cardstock for background panel
Dull Gold, Dull Silver, Pearlescent Copper and plain copper 
cardstock for die-cutting


This is the Spellbinders die set I used

Gears Die D-Lites Etched Dies
 

It's a great little die set and I know it will be used again and again.

Just before I go, a quick reminder about some blog candy I have on offer
 I love these beautiful Poppies, so I'm really happy to have a set to give away as blog candy
Click HERE to join in with this prize draw

Closing date is midnight Wednesday 31st January 2018 (UK time)
so there's not long left!
Happy Crafting


Saturday, January 27, 2018

Letterbox Thank You

Hello!
Today I’ve a little Thank You card made using some of the lovely red and white ribbons, and the sweet felt flower from the  “Love is…” Through the Letterbox  craft box.  The button is also from this box of goodies.
I love the crisp red and white colour combo – it looks so fresh and clean.
Using small lengths of ribbons and braids is one of my favourite ways to make a background for a pretty flower - and this flower is made from felt and the stitched edge is already done for you

‘Thank you’ is a die cut from a Spellbinders set. I cut it in a red shiny card stock, then adhered in place, using some skinny bits of chipboard to raise it where required
The Letterbox craft boxes cost just £12.50 and  they are stuffed with stash!  Perfect for a non-fattening treat for yourself or a crafty friend 


From the “Love is…” Through the Letterbox craft box I used: Small lengths of some of the ribbon and braid, Felt Flower, Button for flower centre
From my stash: coloured card and die cut
That’s it for this time, thank you for visiting.
Happy Crafting

Friday, January 26, 2018

Simple Masking Ideas


Hello
You know those times when no matter how hard you paddle, you get nowhere?  That's my crafting life at the moment!  Never mind, I'll keep at it and hopefuly work through the pain barrier hahaha
The biggest fly-in-the-ointment just now is that I'm trying to get to grips with my new Go Press and Foil machine, but I'm struggling, and wasting a lot of time in my attempts to get results I can actually use.  Hopefully one day I'll get there and can start sharing projects using the hot foils.  
I'm telling you this because one of the plans I had for this week's Daring Cardmakers challenge was to foil a design over my masked circles background.  But it didn't work so I ended up die-cutting the images instead.  It was such a good idea, too!  I'll have to try it again when I've sussed it all out.  Wondering now whether the foil doesn't like my regular card-stock - which is smooth white 300 or 350 gsm, maybe it needs a rougher surface to 'key' into? Have you got the machine, if so what do you think? And which die cut/embossing machine are you using?  I'd be really interested to know.
This week it's me, Nat, setting the challenge and I've been inspired by one of the techniques I fell in love with while trying to tackle my Christmas card production backlog last year:
Masking   
I'd like to see you use masking techniques on your card, whether with masking tape, post-it notes, masking paper or masking fluid - or even some completely new-to-me medium!

It's such a fun technique for stamping, creating DIY backgrounds with ink blending, using die-cuts from masking paper, and many more looks.
Click the link to see the projects the design team created:
One of the wonderful things about our design team s that we have a wide range of skills, talents and styles, and some incredibly clever 'inky' types - I'm not one of these, so knew I needed to find an easy option!
In the end I made two cards using different masking ideas
For the first one I masked off a horizontal area across the middle of my card with masking tape then used a stars stencil and lots of different inks. When that was dry I used more masking tape to leave narrow borders at the top and bottom of the white area, then filled the borders with dark blue ink

Info:
Stars stencil; Imagination Crafts
Plain nested stars die set; Tonic
Smooth white card blank, edge inked with aqua ink
Bazzill white card for upper layer
Other card; plain Royal Blue, Silver, plain white for inking using various Versa inks

My second card is the one that should have had some gold foiling for the background, in the end I used the same dies, but in the normal die-cutting way
For this background I started by die cutting the different sized circles from all-over sticky sticky notes, which are just fab for this sort of thing.  If you've not seen them, imagine a Post-it note where the amount of sticky to plain paper are reversed and you'll get the idea.  By die cutting the circles into the sticky note I created both a mask and a stencil, and I used both to create the circles background for my card
Info:
Smooth white card blank plus extra for inked panel
Various scraps of Bazzill card, Gold card 
Aqua and Turquoise inks
 

The Sticky note method makes it easy to create the overlapped effect so I think I'll try it out with some of my other nested dies and maybe some image die cuts.  That pineapple shape for instance would work brilliantly for a tropical or fruity sort of background.  Might have to use that die set for another card!
So that's me for today, at last, you say......
Check out The Daring Cardmakers HERE
WIN my Blog Candy - a lovely Spellbinders Poppies die set HERE

Tuesday, January 23, 2018

Poppy Giveaway - Spellblogger post for Spellbinders


Hello! 
I'm back with another Spellblogging post for Spellbinders

I'm using one of my favourite recent Spellbinders die sets, from the beautiful Poppy die set collection that was released a few weeks before Christmas


Well, when I blogged the first card (see HERE), I mentioned I had an extra pack of this particular die set to give away - well, I think its about time I did just that, so read on to find out how you can win.

I don't usually make huge cards, but in this case, once I'd made the focus piece, it really needed some space around it, so this card is a 21 x 21cm card blank - I just took a couple of cms of the side to get a more pleasing shape for the other elements to sit on


Info
21 cm sq White card blank, top fold, with 2.5 strip removed from side
Extra of the same card for inking, and cutting the fancy background shape (3 layers)
Black card 
The background was created using various ink pads in shades of lemon, peach, Pink Grapefruit, Rocket red, and more. I used this inked card to cut all the flower heads as well as for the background section
For the fancy background shape I used white card and die cut it 3 times.  The upper 2 layers have a circle aperture cut into them, the lowest layer was inked with shades of blue ink.  They were glued together with small pieces of cardboard between each layer
I cut the full set of poppies twice, then several extras for each poppy flower section using the inked card.  These pieces were added in layers, some with pieces cut out, or the petals separated and arranged over the top.  I used a ball tool to get the 'crumpled paper' look that poppy petals have.
Tiny black gems were used for the seeds.
The poppies were arranged over the fancy white piece, and adhered in place, using more scraps of chipboard underneath when necessary
To finish I matted all the layers and added some black and white spotty, satin ribbon and a bow, then added tiny circles punched from scraps of the inked card and shaped with a ball tool.  I'd planned to use a die cut sentiment but the balance was all wrong so instead it was pc generated and printed on white card, then matted with peachy inked card and black card. 


Here are the Spellbinders die sets used this time

Poppies 
Shapeabilities Etched Dies

Platinum Die Cutting and Embossing Machine
 That's it for this time, I love these beautiful Poppies, so I'm really happy to have a set to give away as blog candy

Here's how to win

Shapeabilities Poppies Etched Dies

I have one set to give away and the winner will be randomly drawn from those who keep to the following rules
1. You must leave a comment on this post

2. Closing date is midnight Wednesday 31st January 2018 (UK time)
3. I will send only to addresses in the UK and Europe


  Thank you for visiting, if you click on This Link  you'll find yourself at the Spellbinders store where you will be tempted by lots of lovely dies, stamps and much much more!

Happy Crafting