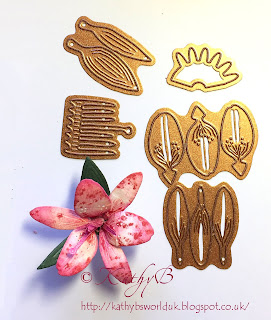
Welcome to my second post for Spellbloggers. Ohhhh I'm having so much fun being part of the Spellbinders family.
This week's post is all about lilies, I used them to decorate the box I shared on last week's Spellbloggers post but then I decided I'd make another one to show more clearly on this week's post. It seemed a shame not to make something with it though, so one thing led to another....as it does
So. here's the card I've made with the new lily
Info
From Spellbinders:
Create
A Lily - Shapeabilities
Inspire Etched Dies
Sprigs - Die D-Lites
Etched Dies
A few 'waste' circles for the faux brads cut using Nestabilities Eyelet Circles
Accent piece on the right is from an old Shapeabilities set; Lace Doily Motifs, but there are many pretty narrow accents that would work (such as in the
Shapeabilities Ironwork Motifs Etched Die set)
Shapeabilities Ironwork Motifs Etched Die set)
other
Paper
Download "Faded Beauty" from Funky Hand (no longer trading) - resized and
printed directly onto card front, plus extra designs for die cutting
White and green card (Bazzill) for Lily
Inks
There's a step by step on the back of the packet showing how to create the flower. Ink up your petals before you start, it's much harder once they are shaped and attached! I like to add a bit of shape to petals using a ball tool. I have them in various sizes - my favourites are solid stainless steel and are actually from a sugarcraft (cake decorating) supplier
Although this pink lily was made simply from card, those I used to decorate the box I shared last week were cut from 'foaniran'. This is a very thin sheet of foam, easy to cut, die cut etc and it makes beautiful soft to the touch flowers. You can use an iron set to a low heat to help mould the petals, but if your flowers are small then just crumple them in your fingers or use a ball tool to create some shape. I used the iron method for the lilies but another time I wouldn't bother
Spellbinders Die D-Lites Create a Lily
Spellbinders Die D-Lites Sprigs Etched Dies
'Foamiran' foam sheet for flowers
various gems and dots
 I think the Die D-Lites Sprigs die set is one of my most-used dies ever! Hardly a week will go by when I don't use it. I love the twirly one on the left for adding an extra flourish of its own, or 'filling out' a dull space on a design. The leafy die on the right though, is just brilliant used with tiny flowers as well as a whole piece - I usually cut the sections apart and tuck the pieces in behind my small flowers. If you were to scroll back though this blog you'd spot these two all over the place!
Anyway, I think that's probably quite enough of my warbling for one day, I hope you weren't too bored, and have enjoyed your visit!
Have a great Easter weekend
Happy Crafting


