Friday, February 22, 2019

Oh Man!

Hello!

The old blogging has slid again this week, but its been a busy one and I#ve failed to catch my tail so far.  So a quick post today and then I have other cards to make - and quickly if they're not going to arrive late!
It's my turn to set the challenge for the Daring Cardmakers and with the first of the 'men' cards of the year needed this week there was no option really!
  
Like a lot of cardmakers I find men's cards a bit of a trial - and as all the boys in the family are getting too old for the kids' cards I used to make for them I need lots of new ideas for cards for men. 
So my challenge is called;
Oh Man!
and I would love you to make and share cards made with men in mind.
As always the design team have come up with some great ideas and you can see them HERE
I made my card with my Hubby's birthday in mind, and went with a cycling theme.  He's longing to get out of commuting to work by car as the traffic is driving him nuts.  His cycle route is off-road, around fields and on unlit tracks so impossible to use in the Winter.  So with the days getting temptingly longer he's
itching to get his bike out and cycle there and back at least a couple of days each week.
The card has a box fold on the lower front so the bike stands out from the background,  It's a bit like the cover of a matchbox, so it folds float to go into an envelope.
I created the mountain bike template using clipart and cut all the pieces with my Silhouette Cameo.  There are several layers to the frame and also the tyres - I wanted to make the spokes from thin wire, and this way I could 'sandwich' the ends of the wire between a couple of tyre shapes.
Materials and Tools
One piece of A4 card wasn't big enough to make the whole card so I made it in two sections; one piece folded to create the front of the card with the stand-out box section, then another piece of card used to make the back.
Black and silver card for the bike
Digital designs from PixelPineClipart resized and printed onto white Bazzill card
Thin wire for the spokes
black and white card for the banner
green card, for the grass, some is hand cut, some fie cut with a Spellbinders die set
Silhouette Cameo and my own mountain bike template
Small gems, a black brad and some Black and white Bakers' Twine

You can see the 'box' fold better on this next photo

That's it for this time, I hope you'll come over and play along with us this time - I definitely need to see what cards you make for all the men in your life!

Thank you for visting, hope you have a wonderful weekend

Happy Crafting


Friday, February 15, 2019

WordArt

Hello
Hope you are well and have had a great week
We have sunshine here today, but chilly - it's been frosty nearly every morning this week.
I'd been thinking about what to do for Sylvia's Daring Cardmakers challenge for a food few days when I suddenly remembered a website I'd come across before Christmas and hadn't had time to check out during the busy Christmas period. This was the perfect opportunity  to try it out!
Hello Sylvia here, 
This week I am hosting the challenge which is
 "ALPHABET SOUP"
I would like to see letters, words or numbers as the main feature of your cards.  You can see the Design Team's ideas HERE
 I decided to combine my WordArt effort with making my Valentine's card for my lovely Other Half:
Once I'd got the layout I was happy with in the WordArt program I  downloaded 
 resized and printed it out onto some card.   
That done, there wasn't much more I needed to do.  I decided to print it a second time and cut out an extra set of the LOVE letters which I then glued over the lower ones with some chipboard between to add some dimension.  I matted this piece onto silver then onto red. A length of red satin ribbon was added to the lower edge of the card and a knotted piece on top. The only other embellishing was a small red heart gem to tidy up the point of the heart
The actual WordArt piece isn't perfect, but it's not bad for a first try.
I do love the whole WordArt 'thing' - in fact, for our Silver Wedding Anniversary last July, I had a large piece made as a gift for Hubby.  I love how personal it is, with words and phrases that mean something to us but seem nonsense to everyone else.  A really special and unique piece of art.  If you are interested, check out Cherry Pete 
. they made and framed mine and I was thrilled with the finished artwork and their service was brilliant.
This is not ours, but one from their website to give an idea what I mean
Anyway, that's all from me for this time.  Please do pop across to see what the rest of the team have been creating this week {HERE}- and of course, we'd love you to give it a whirl and share your own 'Alphabet Soup' with us!
Have a great weekend
Happy Crafting!

Friday, February 08, 2019

Three Candles

Hello

Gosh Friday has come around quickly this week and I haven't got half the things ticked off my to-do list. So a quick post from me today and then off to my craft desk as I have a sympathy card to make, important, but never easy.
This week on the Daring Cardmakers we have a challenge set by Miri:

SO MANY CANDLES!
Use one or more candles on your card.
Maybe you can use a birthday cake with candles on top? Or a very early Christmas or advent card? Or even use a real candle on your card?
We would love to see your creations!

Click HERE to visit the blog and see some fab ideas from our
 great design team:
I printed some digital papers to use on my card so that I could use pretty designs, but reduce them in size for the rolled paper candles, and in larger sizes for other parts of the card
The 'candles' were rolled around a bamboo skewer to shape them.
I threaded through some lengths of ordinary string to make the wicks then glued the 3 candles onto a strip of scrap paper to hold them together.
More string was used for the tie around them, but I separated off a few of the strands to make it a bit less thick
The sentiment was cut in black card using an alphabet set for the HAPPY letters and a script die for 'Birthday'
To finish I used some of the leftovers and punched a few small circles which were them shaped with a ball tool to add more interest and balance.

That's all for this time, I hope you like it. Don't forget to join in with us this week - you can add any kind of candles and however many you like to your cards - we'd love to see them.

Hope you have a great weekend

Happy Crafting

Tuesday, February 05, 2019

Hot Foil 'Stamps' from Regular dies: Hot Foil Adventures #5

Hello there!
I've been experimenting at making my own stamps/plates to use for hot foiling with my GoPress & Foil machine.
If you've been following this series you'll have seen how regular cutting dies can be used with the hot foiling gadgets, of not, check out the list of Hot Foil Adventures posts in the side bar. 

In my HFA post #2 I shared a couple of cards made using ready cut "SnipArt" as a hot foil stamp and as that worked out pretty well I got to thinking that  if a cardboard cut-out could be used to foil with, then surely I could use a die to make my own. 

After a bit of experimenting I found that by carefully gluing 3 die-cuts (300gsm card) together and burnishing the edges so that they are a bit less 'sharp' I was able to get a workable hot foil stamp.  Obviously, being made from card they won't last as long as metal ones, but it does open up a whole raft of possibilities from your die collections!
I chose a die which isn't too 'fussy' and doesn't very skinny lines to cut, as they can be quite tricky to stick together really accurately.  This one is a lovely Marisa Job die set from Spellbinders.

Step by Step
Click on the photos for a bigger view
1. Cut the die three times in smooth card. Mine is 300gsm, and the colour doesn't matter!  Make sure you pop out every single little bit of card that shouldn't be there
 2. Carefully, and accurately, glue the three layers together, be sure to match them all up on top of each other perfectly.  Leave to dry,

3. Use a ball tool or something similar to burnish all the edges a little on  the top layer, just to stop them being too sharp.  It's a bit tedious, but you'll get a nicer stamped image if you take the time to smooth those edges!

4. Now you can use your stamp.
Start by turning your machine on so that it can be heating up while you prepare your foiling sandwich
Cut a piece of the card you want the image to appear on. 
Add a piece of the foil, shiny side up (sticky side down!)
Position your stamp on top with the burnished side down 
add pieces of washi tape to hold it all in place

5. Place the 'sandwich' onto the hot foil machine's platform as in the photo, then add a card shim before closing the lid. Leave to heat everything up for a couple of minutes
6. Roll the platform through your die-cutting machine slowly a few times as usual.  Remove the sandwich from the platform; I like to let it cool for a minute before removing tape, stamp and foil.
Here's how this one came out - I should have chosen better colours for this, but I hope you can see it okay.  The used foil is on the left, the foiled card in the centre and the home-made stamp on the right

Info
Joyous Celebration die by Marisa Job for Spellbinders cut 3 times
Rose Gold foil by Couture Creations
Scraps of 300gsm card
Bazzill card
Washi tape
GoPress & Foil machine

Card 1
punched heart from peachy pink inked cardstock
2x rose buds with spiralled stems
Coffee coloured organza ribbon
Narrow peachy pink ribbon tied in a three loop bow
Small heart die cut from a spare piece of foiled card 

Card 2;
Same stamp and foil, but onto cream card
Rolled roses from peachy pink shades of card plus green die cut leaves
Same narrow ribbon looped and glued in place
Gems

Just before I go, here's another hot foil stamp made in the same way.  This is a Memory Box Christmas Tree die.
Well done on getting to the end - I hope you think it was worth the effort and that the tutorial will be useful to you.
If you have a go, I would love you to come and tell me how you got on and where I can see what you've made.

Thanks for visiting, please leave a message 😊

Happy Crafting

Friday, February 01, 2019

February's Elemental Inspiration

Hello!

i hope this Friday finds you well!
We have a bit of snow here today.  Snow-covered  gardens look so pretty - I just wish they'd come up with some kind of magic ingredient so that it didn't settle on the roads and footpaths!

Anyway, on to things crafty and over at The Daring Cardmakers we have February's Elemental Inspiration Picture board to work with this time
All you need to remember is to select at least three elements from Joanne's picture and use them when you make your card
Here's what I've made this week 
 I chose the colours, lace and buttons, and one of my favourite go-to layouts for this one. Here's Joanne's picture

I started by making a stencilled background with my most favourite stencil and several shades of blue ink, plus a little silver Starlights paint and a touch of silver Alchemy Wax.  Then added ribbon, lace and some lovely flowers from my large flower stash (its about time I used some!).  To finish I added some tiny buttons, including a heart shapes one to echo the button heart from the picture, and a die cut sentiment.:


I enjoyed making this - probably because I used so many favourite things and techniques!
I hope you'll take a look at the other wonderful cards our fabulous team have made this week - Click HERE to visit the blog - and we'd love you to join in and play along with us too.

That's all for this time, thank you for visiting
Happy Crafting

Monday, January 28, 2019

Please.....Colour Me Happy

Hello

A quick post because I'm very late with my Daring Cardmakers project for Friday's challenge.  The whole "Winter" thing has finally caught up with me and I'm fighting a fit of the Glooms  - and not being very successful with it either.
You would think Ruth's 'Lots of Colour' challenge would be just the ticket for cheering up a grumpy mood but apparently even that didn't work.
Hello!  It's Ruth here and I'm your hostess for this challenge.  Lets banish the dreary, wet and cold January blues with
lots of colour
I want to see lots of colour in your creations!  The more the better!

To see the Design Team creations, just click HERE 
 Enjoy!
I wasn't really happy with how my card turned out - it looked different in my head! The bit I really enjoyed though, was making the littler coloured 'blobs' I used for die cutting the hearts later!
Info
Scrap card and lots of different inks used to make the coloured scraps for die cutting
I cut the hearts using the smallest of the Tonic Nested Hearts die set
The lettering was made using my hot foiling machine.  I used grey foil on black gloss card, the alphabet set is from CraftStashUK  It took ages because of needing a few repeating letters!  Maybe I should invest in a second set....

I've had the brightly coloured hearts twill ribbon literally for years, so it was good to actually use some!  
To finish I added some matching coloured gems.

As I said, I wasn't especially keen on the finished card, so I used some more hearts to make this Thank You card

 The hearts have small pieces of chipboard behind them to give a bit of dimension,  The heart panel is matted onto black gloss card and I used another scrap of the same card to cut the sentiment - which is one of those on an ancient Cuttlebug plate
The tiny hearts are cut with a border punch and the tiny confetti dots are made using the tiny berries die from a Mistletoe set 

So that's it for this time.
I hope you had a great weekend and that the Winter Blues are
 staying away from your door

Happy Crafting

Friday, January 18, 2019

Stamping and Me.....

Hello
Gosh it's a chilly one today, our outside thermometer was reading -7 at 8am this morning.  A frosty start, but bright and sunny. 
 I'm writing this while waiting for my grocery order to arrive - so if I disappear in the middle, you know why 😆 😂

Stamping and me are definitely not best friends, not downright enemies, but more the "rather not be in the company of"  kind of thing, so imagine how my heart sank when Dawn issued this challenge to the Daring Cardmakers
Its Dawn here with this weeks challenge and its called
Just Stamping
I would like to see just stamping on your cards this weeks.  This means no embellishments, die cuts, papers etc...
For me this was a hard challenge so if you need to add something maybe a sequin or two please make sure that the stamping is the main focus of your card
So get out your stamps and your favourite ink pads and create.
 
Now it would have been easy to throw my hands up and say "No, too hard!" and opt out, but I don't think we've had a challenge I've missed through cowardice yet, so..... out came the box of stamps - yes, I do actually have some, though most have never actually been used.  Some have arrived in various DT boxes and their use avoided wherever possible, some came free with magazines and some I actually bought (shock, horror)
To cut a long, tedious, story of failed backgrounds and stamping attempts in the end I decided to keep it really simple and use this rather lovely text stamp by Spellbinders which nicely fills up most of my card!
I even have one of those MISTI things because occasionally I use sentiment stamps and it helps a lot!  I stamped it on a separate piece of card, it's a big stamp and a bit of a tight fit for the frame of the gadget which made it a bit tricky to do. Next I trimmed it to the right height and adhered to the card front.
The little hearts on the side were done using a Memory Box stencil

I 'used' to have a set of mini alphabet stamps but I'm blowed if I can find them, so instead, I used my GoPress & Foil gadget and hot foil alphabet stamps from CraftStashUK to make the tag - it still qualifies as stamping, right? 
 ðŸ˜‰ðŸ˜‰
I used black gloss card and silver foil and matted the piece onto red gloss card. adding silver and black twine and narrow red ribbon in a loopy bow.
I probably cheated a little bit with the tag and twine, but oh, it looked so FLAT and dull.  So I had to do it, didn't I?
Sorry Dawn......

So, are YOU up for the challenge this week? We would love you to join in and give it a go!
Thank you for popping by

Happy Crafting

Monday, January 14, 2019

Christmas Round Up 1

Hello
These Mondays come round quickly, don't they? 
 A sunny one here, but jolly cold.
Things got a bit hectic towards the end of 2018 and I didn't get to blog much in the last few weeks.  Now that things have settled down I thought I'd catch up and so a bit of catch-up Christmas card blogging. 
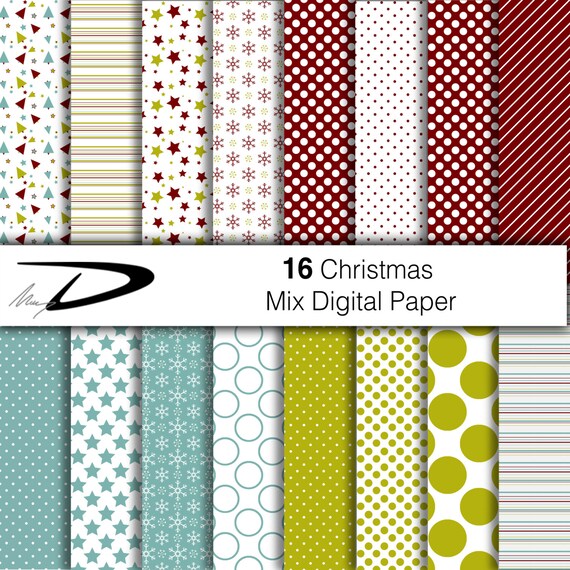
I've mentioned before how I love digital papers, and this time I'm sharing a few of the cards I made using lovely papers from MaryDdigital

Reasons I love digital papers:
You can have them on your pc and ready to use almost immediately
You only need to print as much as you want
You can crop and resize to exactly what you need
You can print on loads of different media
They don't take up any room on your shelves
And you never run out of your favourite designs!

I wanted to use these paper sets to cut some of my favourite little tree and stocking dies.  As the dies are small, I started by simply resizing the papers so they printed out 3 on an A4 sheet.  Then I printed them on textured cardstock.  That way you get a little dimension and a more interesting finish

I made loads of cards with these paper sets - but I forgot to photograph most of them.

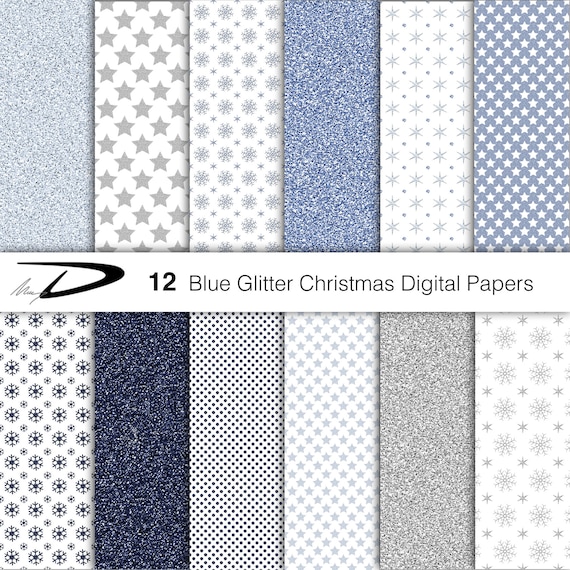
Tiny Trees and stockings cut from this gorgeous Blue Glitter Christmas paper set

I made lots of cards on a variation of this theme.....
 and even more variants on this kind of card

They were all made using this Christmas Mix set - these are my favourite Christmas colours ever!
 

Both of these paper sets are fab and they print beautifully.  There are lots of designs in these sets that aren't out-and-out Christmas too - check out all those spots stars and stripes!, so I'll get loads of use from them.  


Ok, that's it for today, thank you so much for coming by - I hope you'll leave a message before you go 😀

Happy Crafting!

Friday, January 11, 2019

January's Elemental Inspiration Picture


Hello

Hope this Friday finds you well!

The Daring Cardmakers are back today after our Christmas break and for our first challenge we have a beautiful Elemental Inspiration Picture board to work with.
All you need to remember is to select at least three elements from the picture and use them when you make your card - it could be the colour palette or the, the Layout as well as any of the things you can see on the board, whether big or small.
Here's what I've made this week
 I hose the hot drink, the chevron texture and  the gorgeous colour palette from the mood board Sylvia found for us:
Hi everyone, Sylvia here, I am hosting the January Elemental Challenge this week and would like to see you use at least three elements from the picture below. 
As we are beginning a new year a "New Beginnings" theme came to mind - New Year, new job, new baby, new home etc. but you can make whatever you like. 
 I chose the blues and browns, the bear, blue and brown textured fabric and the bow in the laces.

I love this mood board, it has such a warm and comforting feel to it - just right for chilly January!  I love the shabby-chic feel, and all the different textures.  I was tempted by the chair and nearly made a cosy armchair as the focus, then of course it was hard to resist that gorgeous teddy! Or those cute little baby shoes.....
In the end though it was the cup and saucer that I went for.  It looks like hot chocolate in there, which is always tempting, but as I had brand new, never used die sets which have been waiting since before Christmas for an airing, I decided on a coffee theme. 
And, by the way,  spelling 'Bean' that way was intentional - a bit of a pun to go with the little coffee bean die cuts.  I'm not so sure it's obvious enough, but it was the best I could come up with!

Info
White card blank and extra for embossed background piece - the Chevron Embossing folder is by Crafters' Companion.
The embossed panel is matted on to brown scrapbook paper
Cup and Saucer die set (also has the coffee beans), Coffee Pot die set by Spellbinders.  The Spoon is from the Baking Utensils set, also by Spellbinders
Cups and saucers cut from various plain and inked card, some of the cups were
embossed with the same folder as before
I die-cut the cafetière from silver card, then coloured a piece of white card with pale blue for a glass effect, and added the 'coffee' on top of that using brown and cream card.  I cut this piece by hand to fit behind the silver die cut
The stack of cups were glued together, then I made a 'vox' hinge to put between the cups and the card front so that it stands out from the card, but lies flat for posting - this picture shows how it works

The sentiment piece was computer generated, trimmed down and matted onto a piece of the card used for one of the cups. I die-cut some coffee beans for detail and added a coat of Glossy Accents to each.
To finish I die-cut a couple of spoons from silver card and tucked them in the saucers

Click HERE to see what the rest of the team chose from the board to use for their cards this week - and then, we would love you to join in with us!
That's all for this time, thank you so much for popping by

Happy Crafting
Wednesday, January 09, 2019

Happy Birthday!: Hot Foiling Adventures no 4

Hello

As this is my first post of 2019 I want to wish you a (rather belated) Happy New Year -  I hope all your crafty (and other) dreams come true, that the Bad Fairy of Procrastination stays away from your desk and that your crafty mojo is always there for you.6
I hope all that for me too, of course!
A couple of months ago we started a Handmade Card group on FB, mainly to swap birthday cards, but there will be other swaps along the way, I'm sure!   Anyway, my first card make of the year was a birthday card for Andrea, one of our group and I couldn't resist finally trying out some of the new hot foil plates I bought late last year and hadn't had time to use, plus one of those my OH gave me for Christmas
I must apologise for the photos, I've not got the hang of photographing foiled items and I was in a hurry too!

 The dotty background turned out better than I expected.  The foil is one of the 'pearl' finishes and to be honest I've found them rather disappointing when I've tried them before.  The colours look stunning on the roll but when you actually use them the colour hardly shows up at all, which is a shame.  I can't remember whether I've tried the pearl foils on coloured card so I should add that to my foiling 'to-do' list!

I'd just tried out this same pearl finish turquoise foil with another regular hot foil plate using white card and the image was really poor, so when I tried it with this lovely dotty background plate I didn't really hold out much hope - but as you can see, it worked really well and the tiny coloured dots show up very nicely.
The flower is from a foil and cut set by Spellbinders Glimmer.  It's lovely!  You get four sizes of flower along with the cutting dies for each, and also two foiling plates only for some leaves - I didn't use the leaves here as I wanted to tuck some die cut leaves behind the flower head for this card.
I foiled two of the flowers in shiny turquoise then used the cutting dies to cut the shapes out.  The cutting line wasn't as close to the foiled images as I wanted, so I just hand-cut around to make it closer
The sentiment is another Spellbinders Glimmer plate and I used lots of scrap foil, cut into strips to make a multi-coloured sentiment panel.  I'll tell you more about making these next time, and have more pictures to share too

Hot Foil Plates:
Background; Swiss Dots by Couture Creations 
Flowers; Foil Flowers by Spellbinders Glimmer
Happy Birthday Faux Script also by Spellbinders Glimmer
Hot Foil rolls all Couture Creations
Other: 
White card blank plus extra for foiling elements
Turquoise card for matting
Leaf die Spellbinders
Turquoise satin ribbon to finish
 
That's all for today.  Back soon with more Hot Foil Adventuring and other things from my crafty journey too.
Thank you for visiting, please add yourself as a 'follower' via the sidebar.  
I'd love to hear from you so please leave a comment.  
 If you're a blogger too, I'll be sure to visit you to return the favour.
Happy Crafting