Friday, April 13, 2012

Hats Off to You!

I love hats - my OH is always careful to grab my arm and steer me quickly through the hat department in John Lewis's - what a spoilsport!  For some reason he does the same thing in the bag section too!  Funny though, how pace slows as soon as we get into the "technology" department.....ahhh yes, it's all different then, isn't it?
Anyway, this week's Daring Cardmakers' challenge was set by lovely Zuzana and it's all about - did you guess? HATS!
Hi, this week is Zuzana here.
 With the more warm and sunshine weather I came up with idea to open  
The Hat Boutique
I would like to see a hat on your cards: straw, cowboy, top-hat, vintage, wedding, winter, baseball cap ...
It's completely up to you what colour and kind you prefer :0) 
We are really looking forward to seeing your creations. 
So get ready and let's start with crafting.
With Eldest Niece due to graduate from Uni in a couple of months time, I thought I'd "get ahead with a hat" and make a card featuring a mortarboard.  It was going to be much less complicated than the rather girly one I eventually made, but I'll save that idea for when Eldest Nephew finishes his degree in a couple of years time (if I remember!).
I know mortarboards are usually black, and I did start out by getting out more suitable, more muted coloured supplies, but hey, a small break with tradition and a little flight of fancy is a bit more fun  
So here's what I ended up with
Materials:
All papers from MME "Be Happy" 6x6 pad (from Follow Your Heart collection)
Bazzill aqua card (for sentiment)
Hand-made flower, tassel and scroll
Silver thread, inks
Own template for Mortarboard - please email me if you would like a copy
Tools:
Craft Robo (mortarboard, sentiment)
Zutter corner-rounder
Dies: Spellbinder Persian Accents, Memory Box swirly border
Punches: Punch Bunch flower, EK Success border punch, plain circle punch
 Isn't the swirly Memory Box die lovely?  I cut it twice to form the background for the sentiment, and trimmed each down slightly to fit better.
I made the paper flower using several punched flowers.  The scroll is just a piece of paper inked and rolled up, with a very narrow piece of paper used as a "tie"
 Looking at it now, I think I should have made the mortarboard a couple of cms larger, so I may go back and do that later.
To make the tassel I fringed a small rectangle of paper, added some strong glue to the uncut edge then rolled it up tightly around the end of the cord. 
There's a fab array of hats to see on the DCM BLOG this week, and we'd love it if you'd join in and show us your own Hat-themed cards.
Nothing exciting (or even vaguely interesting happening around here just now, so I'll just say "thanks for visiting" and head off to look at the new DT set of Crafty Templates that arrived yesterday and work out what to make this month.
Have a great weekend

Sunday, April 08, 2012

Late!

It's been a busy few days - not much helped by tweaking my back the other day and being in a bit of pain since.  We've been doing more "house-reclamation".  Apart from all the downstairs remodelling work, we discovered that to get the funky new taps to work properly we needed to bring forward another job - fitting a new water-heating system.  So just as I was beginning to clear some of the mess, more mess was made!
This weekend, I am determined to reclaim the dining room - as much as possible, anyway!  Which is why I was crawling around the floor with the Dyson, trying to get at the muck and dust that I've not been able to reach for a couple of months, and during which activity I did something that hurt.

Anyway, it's not too bad (as in, it's been worse....) and I just need to take it easy for a few days.
We've had the "obligatory" Band Holiday trip to the dump, sorted out a bit more of the clutter, had a little shopping trip and now Hubby is busy putting up the bathroom cabinet, loo roll holder, new window blind and a picture in the new cloakroom.  I'm thinking that I might have a bash at doing a small canvas or two to put on the narrower wall in there too.
Enough waffle, I'm late blogging Friday's Daring Cardmakers card for this month's Colour Combo challenge.  Leo chose the colours this time and they are lovely sorbet shades - they make me think of our road trip in Italy a few years ago and all the ice cream and sorbets we indulged ourselves with in the carious towns and cities we visited! yummmmmm
We have loads of family birthdays in May, so it's good to get a bit of a head-start, and these colours seemed perfect for a 21st birthday card for one of our nieces.

This is the inspiration photo Leo had given us to work from:
My favourite MME "Howdy Doody" pad yet again provided the perfect papers for this challenge - so often recently this pad has been the one I've reached for, that I've pretty much used it up - in fact a parcel is at the sorting office right now with replacement pad and 12x12 papers in it - we were out yesterday when they tried to deliver - boohoo!!
Materials:
Papers: MME "Howdy Doody" 6x6 pad
Wired flower on bow, and flat petals used to make the other flowers all from Creative Treasures
2 shades of seam binding and Card Candy also Creative Treasures
Frosted Lace Stickles. Glossy Accents
Bazzill aqua card for numerals
Tools:
Memory Box border die (I cut a 2nd time in lemon, and then cut the flower shapes from it)
Nellie Snellen punch (flower centres)
Spellbinders Labels 18 (I think)

The flowers in the top left corner are all hand made - there's a coiled paper flower, and the other two are made from "flat" Prima petals and some of those tiny stamens you can buy from floristry places

Thanks for dropping in for a visit, I hope you'll come back soon
Happy Easter

Thursday, April 05, 2012

Easter Trio

I've made these Easter cards using the lovely "Spring Has Sprung" download collection from the Fabulous Funky Hand.

Materials:
Imaginisce IRocks gems
PC generated sentiment
Tools:
Craft Robo to cut egg shape
scoring board to make ruffle
Memory Box die for outer petals, Tonic punch for inner petals

Materials:
Seam Binding and flattened Card Candy from Creative Treasures
Daisies cut from Funky Hand paper (printed out at different sizes
Tools:
Plain circle punch (medium)
Spellbinders large scalloped circles die set (smallest)
Craft Robo for "Easter"

See, I can be quick and to-the-point when I try!

Thanks for visiting, I hope you have a lovely, peaceful Easter weekend and that the sun shines on you wherever you are :)

Tuesday, April 03, 2012

April Sketch File

It's the first Tuesday of the month, so time for a new  LO idea for April on The Sketch File Blog - I hope you'll pop over there to see the sketch and the projects we are sharing on the firs of this month's posts.  We like to spread the ideas out a bit, so over the coming weeks there will be more pieces appearing there = so do go back regularly to see what's new!

Being a Last Minute Minnie to start with - and having a visit from the BFoP (Bad Fairy of Procrastination) to contend with didn't help one bit.  BUT I was brave and kicked her out of the house and in the end managed not only to do a page for my resurrected mini album, but a card too!  Wow! are you impressed? hehe
We gave ourselves a present for our Wedding Anniversary in July 2010 of a year's membership of the National Trust - the mini album is supposed to be a record of all the NT places we visited during that year. I'm doing (sort of) ok with the photo pages ( if you call still working on it a quarter of the way through 2012, "doing ok"), but the facing page for each LO is supposed to be more of a journal entry about the place - and I'm really, really behind with those.
For this page we're in Yorkshire visiting Beningborough House during our stay at the gorgeous English Heritage holiday cottage which is part of beautiful Mount Grace Priory.
 I used:
April sketch from The Sketch File Blog
Bazzill card for base page
All papers Bo Bunny Weekend Market 6x6 pad (Charmed Cards and Crafts)
Narrow green organza Ribbon, Blue Brads
EK Success Moroccan Lace border punch
Circle punch
Lettering cut with Craft Robo

This was my first dip into my new Bo Bunny papers - they looked so gorgeous that I bought the 12x12 set as well ooops! At the same time I felt compelled (as you do!) to invest in the Graphic 45 8x8 "Olde Curiosity Shoppe" pad too. It's a lovely "Steampunky" sort of pad with lots of collage effect papers plus lovely vintage designs and great colours - flicking through it was enough to get me cutting and sticking again!

 I used:
April sketch from The Sketch File Blog
All papers; Graphic 45 "Olde Curiosity Shoppe"  8x8 pad
Narrow brown/cream gingham ribbon
MS border punch
2 x Circle punches

I really enjoyed making this card - I like using papers, and bits of the designs on them collage-style.  It's often more interesting and more personal to build up your own designs using elements from several papers.
I'm thinking I might add a bit more to this card and make it into more of a collage picture - some flowers maybe, and some more ribbon.....maybe some good old steampunk cogs....

Anyway, thanks for visiting, please come back soon

Friday, March 30, 2012

Material Girl

All week I've been meaning to blog this one - it's another of the cards I've made with the latest Funky Hand download "Spring Has Sprung". 
  The designs and colours are so perfectly pretty for this time of year and I know that these papers are going to come in really useful in the future too - the sort of collection you come back to again and again.
They would also be absolutely brilliant for the current Get Funky challenge; "Spring Celebration"......
Here's a little collaged of what you get for the bargain price of £3.19
 
 Next stop is the new challenge from The Daring Cardmakers and this week it's Keilly's turn to do the honours:
Material Girl"
We want to see you using some fabric on your creations - not just a bit of ribbon or lace though - that would be too easy! 
You can add those too, of course, but we'd really like you to be a little more adventurous and try using some fabric as a background, or use it to make your embellishments from.
We have the most wonderful Design Team - it doesn't matter how tough the challenge seems (and being wonderful doesn't stop us moaning when they are tricky), so please visit the DCM BLOG and see the fab creations on show there this week!
I had a couple of goes with this challenge - Number 1 went in the bin so you won't be seeing that!  The idea was ok, but the execution was pants!  The idea was to make my card just as I usually do, but to substitute fabric for paper wherever possible.  What I didn't think through properly was how difficult it is to make nice straight, even edges with fabric, so it all ended up looking a bit of a dog's breakfast.
On to Plan B then!
Instead of the gingham fabric I'd unearthed from my (large) fabric stash I resorted to paper this time.  My material elements are the flower and the decorative border. 
Does iron-on Vilene go "off"?  The stuff I have is a good few years old and certainly didn't want to stick to the fabric so instead I used some Bondaweb to give the fabric more stability.  It's a beautiful lawn fabric that I've had stashed away for ages (too pretty to cut)
Using dies to cut the petals for the flowers was successful so I thought I'd see if a border die would also work on the fabric - it's a really quite intricate pattern and I was pretty pleased at how well it worked.
Materials:
Papers: MME 6x6 "Howdy Doody" pad from Miss Caroline collection
Fine lawn flowery fabric backed with Bondaweb
Paper flowers and pearl strings from Creative Treasures (I made the pearls into loops for a change)
Jewel brad for flower centre, stick on pale pink pearls
Tools:
Decorative border and corner element both from Spellbinders Moroccan Accents set
Spellbinders Labels 18
Tim Holtz Bigz Flowers die
Craft Robo to cut sentiment
I forgot to add dots to the letter i's so need to do that before I send this one off - it just doesn't look right to me without!
That's it for this time, thanks for visiting.  Hope your weekend is sunny and bright!

Wednesday, March 28, 2012

Crafty Templates Time

The new set of Crafty Templates have been out for about a week now and I'm late again in posting my DT makes for March.
Some days I feel as though I'm catching up with everything, and then it just all goes wrong again - but I am trying to get back into some sort of routine - just not what you'd call succeeding just yet hehe.  I'll get there eventually though
This month new teamies  Keilly. Trish and Jo have joined Leo and myself at Crafty Templates DT Central - they are fab designers and it's going to be fun to have more crafty teamies to work with. Each month Leo sends us most of the templates she's got ready for that month's set then leaves us to decide which to use and how to use them, so it's always fun to see which templates others choose to work with and what projects they come up with.
 Grassy Banner 
I love the cute  little tulips and they are perfect for Spring, so I've made an Easter card.  The banner comes blank on the template so you can add whatever greeting you want.  I cut the letters using my Craft Robo!   The banner stands away from the card in the middle and is only glued at the ends - it looks fine irl, but a bit  wonky on the photo!

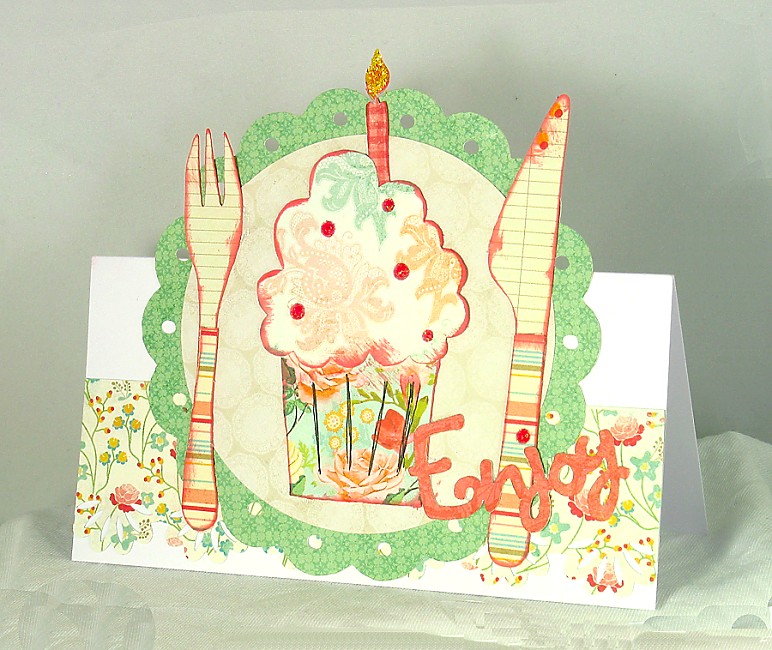
Dig In Cupcake
I thought this was really cute - if this cake were real it would be HUGE wouldn't it?  

Kites in the Sky (and the front half of the Bunny)
I've combined two of the March templates to make this card.  The Bunny comes with a back view too and I had planned to make a shaped front-and-back card using him, but then I thought how sweet he'd look holding onto the string of the kite from the Kite and Clouds template
I've added some seam binding in a couple of shades and some small flowers to finish this one off.

Here's a reminder on how to find Crafty Templates and the Crafty Goodies Kits that Leo puts together each month:

Thanks for popping by today, I hope you've enjoyed your visit and will leave a message to say you were here! :-)

Saturday, March 24, 2012

Funky Hoppity Hop Hop Hop

Thank you for visiting my blog today, it's great to have you "springing" by!
If you've bounced over from Ruth's blog as part of your Funky Hand Blog Hop journey, then you probably know what it's all about already, but if not, then you can find out what is going on by visiting Anice at
Funky Hand Blog Hop Central HERE

The Blog Hop is all about introducing the fabulous new Funky Hand Download
Spring Has Sprung
It's full-to-bursting with lovely Spring themed papers and the prettiest pastel shades and is available from Sunday 25th March from the website HERE,
but by visiting the blogs on the Hop today, you'll get a sneaky preview of this pretty collection. 

A blog hop is just the PERFECT way to get a really good look of what's in the new download: by visiting the blogs of those Funky Gang members who are joining in with the hop you'll see lots of the colours, papers and sentiments that form this gorgeous download collection

So here's the Spring Has Sprung project I'm sharing today


All of the plains and patterns I've used for this card are from the new collection, the cute sentiment image is one of the sentiments you'll also get with your download and the word "Smile" is cut from another.
I cut the little daisies from one of the papers as they are so pretty I had to find a space for them!

If you're liking what you're seeing as you bounce from blog to blog you'll definitely be interested in the prize Anice is offering for joining in.
There's a free copy of the
Spring Has Sprung download 
up for grabs just for joining in with our blog hop. 
You'll need to travel around the blogs of all the Funky Gang who are taking part in the hop, leaving a comment on every single blog and collecting a letter from each. The hop begins and ends with Anice's BLOG - so if you're not already following all the links from blog to blog, then do head over to Anice's and begin your tour there! 
The letters you'll collect are an anagram and you'll need to solve that to be in with a chance of winning the prize. - but all the info you need is on Anice's blog so I'll stop wittering on and give you your next letter.... just don't forget to leave a comment here and on all the blogs you visit or you won't qualify for entry.
Our blog hop lasts from Saturday 24th March till 9am (UK time) Monday 26th March - you'll be able to add your blog comments and to leave your answer to the anagram right up till 9am (UK time) on Monday morning.

The letter I'm giving you is:
"A"
and your next stop on the Funky Blog Easter Bunny Style Hop is Lou's place
Hope you're having fun and liking what you see
Happy Hopping!

Friday, March 23, 2012

What's in the Box?

This week on the Daring Cardmakers Fran has given us a "proper" old challenge!  It's had a good few of us scratching our heads in "I haven't a clue what to do with this one" fashion.  If you head over and visit our BLOG though, I think you'll agree that our fab team rose admirably to the challenge and made some wonderfully creative projects which we hope will inspire you to put your thinking caps on too!
It goes like this:
A Box of Tricks
I (Fran) would like you to feature a box, or something box-shaped on your projects - it could be a 3D project, decorated box, box shaped embellishments...once you start thinking outside the box (!) you can come up with some fun ideas!

Now I'm sure there are loads of rubber stamps with boxes  of one kind or another, but obviously that's no good to me, so I spent most of the week thinking about types of boxes and how I could make at least one of them work on a card.  I think it was when a lovely package of new Memory Box dies arrived that the thought "Window Box" jumped into my head.
Just to make it harder for myself I thought it might be possible to make the window box part a 3D pop-out.  After faffing about a bit with card and a bone folder (and giving myself a horrible paper cut which brought tears to my eyes and sent me scuttling off to find the tape and wadding to staunch the blood) I came up with this one:
It's quite bulky but I've folded the "box" in such a way that it does actually fold (relatively) flat for posting.
Materials:
All papers MME from "Dolled Up" 6x6 pad (Miss Caroline collection)
Doily motif and tag are also cut from one of the papers
White lace
Turquoise, Pink and White pearls. pearl heart, decal sentiment

Tools:
EK Success border punch
Memory Box dies (Cherry Blossom, Petal Party
Tonic floral punch set  

You can see the box shape better on an angled view

And a close up of the flowers - I mixed up the various die cuts and punches
Yet again I've got behind with my blogging and need to spend some time catching up.
This week I've been busy with Crafty Templates and Funky Hand projects - all which I need to blog in the next few days.
This weekend sees the launch of a new Funky Hand collection and we're having a blog hop to celebrate - and to show off the papers that you get when you download the brand new collection.  They are sooooo pretty, so please pop by Anice's blog to see what's happening over the weekend and join in....I do believe there's going to be a prize on offer....
Right, time for lunch - Hubby's home-working today and once he's decided it's lunch time, then it's lunch time...
Thanks for visiting


Friday, March 16, 2012

Spring Greens

Don't you just love it that the day you have loads of internet-required tasks on your list is the day you wake up, switch on and find....."cannot open page as there is no service..."
I gave them a couple of hours after the "it'll be back by 2pm" they told us, and then rang to find out what was going on. Yes, the fault is fixed, you probably need to reboot the wotsit - do you know where it is?  hmmm, well I know it's on the ledge behind hubby's desk - but I also know that there's a mess of all sorts of gadgets, wires and cables behind there and to be perfectly honest that's as far as my knowledge goes.  Thank you to Nice Man at Virgin Media who kindly and patiently waited while I dragged massive desk away from the wall enough to squeeze behind, then as I described the various "stuff" - finally finding the right one to unplug so he could do the honours from his end. 
I guess they are used to dealing with such ineptitude!
Bad thing number 2 for yesterday was the discovery that the glass splash-backs arrived and didn't fit!  We know the templates fitted perfectly because we were called in to the kitchen by the guy who made them to see how it would look when the glass was in. The glass is exactly right against the templates he made, so how the blazes don't they fit?  Bemused.
Today the UK Rep for the manufacturers of the doors and drawer fronts has been to see for himself the problem with those!  Last time I did the Swiss a dis-service by saying they came from Switzerland - I apologise! - it's the Austrians who mucked up!  The whole lot are to be replaced, which is good, but means more delay.
Through it all our Kitchen designers have been absolutely fab and I can't fault the way they have dealt with it all - none of the problems have been down to them - all the work they have done is first rate and their attention to detail is brilliant - their handling of the project and determination to make sure it is all perfect in the end has kept us sane!

Tomorrow we have the plumbers here to fit the new water heating system.  I think it's called a "mega-flow" system and will hopefully mean that it won't take five minutes to get hot water from the various taps, and that the new taps in the kitchen will produce more than the dribble they do atm!

I can't quite believe we're getting towards the end of March already as we've been living in Building Work Limbo since a week into 2012.....it will be lovely when it's finished......

So yesterday's internet hiccup means I'm sharing my own challenge for Get Funky's Funky Fifteenth on the 16th and also my card for the new Daring Cardmakers Challenge too.

For Get Funky, I chose a "Spring Celebrations" theme; It could be something for Mothers' Day, or Easter, or it could simply be a celebration of Spring itself, and any sort of project goes - so if you want to make an Easter basket, or an Easter Bonnet, or a scrapbook page showing off the daffodils in your garden then it's all okay!  Just make sure you use at least one Funky Hand product on whatever you make.  It's amazing and not a little irritating when people don't read that one little rule!  It's especially annoying when they share such gorgeous creations, but rule themselves out of being chosen as our winner because they've not complied....such a shame!
I think my own Celebration of Spring project may end up as a little wall hanging, or maybe as a page in a mini book, rather than as the card it is atm!
Visit the Get Funky Blog to find out how to join in with us this month - and maybe win our prize of a free download of your choice.  There's also instructions on how to get hold of this month's Funky Freebie.  I've added more about how I made this card and instructions on how to make the paper frill
Materials:
Funky Hand CD Craft the Year Away - I've used papers from the Marching On and April Fool collections
Matching shades of Seam Binding to make a layered bow
Organza flower with pearl centre
Lemon Ice Stickles

It's actually one of the Spring Celebrations that Samm has chosen to base her "Lucky Green" challenge for the Daring Cardmakers around this week too
It's Samm here and this weeks' challenge is
'Lucky Green'
Yes, St Patrick's day is on its way, so I challenge you to make a card using the main colour as green and feature 'luck' somewhere on your card. It's one of those colours we hardly ever get to use so I hope it gets you all digging around in your crafty stash and creating frantically!
Looking through my Funky Hand downloads and CDs for the right stuff to use for the project above was very timely as the "Marching On" set I got the pale green background paper for the Get Funky card from is all about shades of green with a bit of deep turquoise/aqua in the mix.  Just the ticket and meant I didn't need to go searching through my stash - I could just "Print...and Go" hehe
 I'm not entirely happy with this and it might undergo a bit of a facelift before it actually gets used - I think it might be better on a white background for starters.
Materials:
All papers: Funky Hand CD Craft the Year Away - "Marching On" collection
Good Luck banner and the 3 leaf clover motif are created from images also found on the  Craft the Year Away CD
Green ruffled edge ribbon from Creative Treasures (there's a special offer on Prima flowers atm )
Ice Stickles
Tools:
Craft Robo to cut the banner, letters and shamrock shapes

I hope you'll head over to our BLOG as the cards look stunning again this week. 

Thanks for looking today and for putting up with my waffle at the start - sometimes you just have to have a good old rant don't you? - but I do seem to be on a bit of a ranting roll lately!  I will try to make my next post rant-free :)

Have a great weekend

Friday, March 09, 2012

Tantalising Tessellations

Another Friday and another challenge from the Daring Cardmakers - but before I get on to the card I've made for that, I'm going to have myself a little rant.....
What do you reckon to the new Captcha word verification widget on Blogger?  I've seen the same thing in other places too - Facebook have it for some posts for instance.  Up till now I've been happy enough to leave comments and fill in the word verification if required, even though some of the fonts were quite difficult to read on occasion.  But now, these new ones are just impossible to read - I swear the one I was asked to read earlier this morning was more like an ink blot than any letters I've ever seen.  I gave up and tried another...and another before I finally got something that actually resembled letters I might have a stab at typing correctly. 
I know I've been rubbish at blog-hopping lately, but it is something I like to do, and I love to catch up on what my friends are up to via their blogs - and \I like to leave a message to say I've popped by.  But thanks to these atrocious Captcha WVs I've decided that on blogs which still have them, I'll only leave a comment if I can figure out the WV at first try - life really is too short for clicking and clicking just trying to make sense of these infuriating things.
I don't have WV on here but I do have comment moderation switched on - there are a lot of Assorted Twits out there and I don't want them posting here - but I do want to hear from my blog-mates, and this way although comments aren't there till I click publish, at least you won't get eye-strain from trying to leave me a message.
Please - if you're reading this and still have the WV switched on, think about changing your settings
 - it's not difficult to do and if you don't know how, just let me know and I'll try to help.

Right - rant over, and back to some Daring Cardmakers crafting
 This week it's Leo here to bring you your next dare.......
'Tessellation'
I'd like you to create a card featuring a tessellating pattern. You c
an probably remember doing tessellation in maths class at school right? Basically all you're doing is making a pretty pattern with shapes that fit together perfectly on all sides, like tiling. It's up to you how you interpret the dare so it could be a pattern on a paper already made or even a pattern you make yourself
Well....I thought, and thought and thought about this challenge without a glimmer of an idea for what to do!  Finally I remembered the Tumbling Blocks design you see a lot on patchwork quilts and thought it would be perfect for a New Baby card.
I had to do a bit of research on the diamond shape used to make the blocks - maths is not my strong point, to say the least!  
Quite quickly I discovered that just any old diamond shape doesn't work hehe.  It has to be made from 2 equilateral triangles joined together - then the next problem - how to make one to cut on my Craft Robo.  I tried in Robo itself and then in Paintshop Pro and couldn't work it out - thought I might have to wait for the Resident Expert to do it for me when he got home.  But then I did a bit of googling around the patchwork quilt sites and found a template I could use.
The joins aren't perfect, I admit, but you can't have it all!
Materials:
All Papers MME Fine and Dandy "True Blue" 6x6 pad
Yellow Seam Binding, White lace
Tiny silver teddy bear charm
large spotty button, Stickles glitter glue
Tools:
Craft Robo for cutting diamonds, plain circle and letters
Spellbinders Lacy Scalloped Circles, Spellbinders plain Circle to cut the "head hole" (I'm sure there's a proper word...), Inks for edging
 As usual the team have come up with some fab ideas for using tessellating designs on their cards, so please go and check them out HERE.  Don't forget our new FB page too - it would be great if you'd pop along and join us there too.
On the Building front it's been a quiet week - as in nothing has happened!  It's all got to the point where it's a lot of little things need to be done - we are waiting for the glass for the kitchen splash-backs to get here - apparently it's made and should be here in the middle of next week.  As should the internal fittings we've chosen so far for the drawers, and also the closing mechanism for the glass doors on the  top wall cupboards.  And then there's the drawer fronts and doors that need replacing as the Swiss aren't actually as perfect in their manufacturing processes as we've all been led to believe.....
We need blinds and maybe some pictures for the cloakroom which is pretty much finished.
The new "broom cupboard" still needs shelves and hooks for hanging stuff on.
The pew is here, but the cupboarding for coats and shoes etc. hasn't been built around it yet.
Once that's done we're getting new carpets for the whole hall/inner hall/stairs and landing areas - at that point everything will look so much better!  I'm getting a bit tired of living in this Building Work Limbo, to be honest.
Jeepers, I do go on, don't I?  If you got through to the end, well done - and thank you - it was lovely that you made the effort!
We're supposed to be having some good weather this weekend - I hope the sun shines on you wherever you are.
Thanks for visiting

Tuesday, March 06, 2012

A Whole Load of Balloons

Over on Get Funky! today - the challenge blog for the fabulous Funky Hand  -
 it's my turn to share my project for Allison's high flying challenge. 
You can find out all about this month's challenge on Allison's introductory post on the blog, but basically it's all about things that fly. 
Any sort of project is allowable BUT to join in with the challenges at Get Funky you must use at least ONE Funky Hand product on your creation - there's plenty to choose from: papers, stamps, digital images and template designs to name a few - click HERE to visit the Funky Hand website and see all the great stuff you can get your mitts on!
 You can even join in if you don't own any Funky Hand stash (yet!) by using the Funky Freebie that Anice makes especially to fit in with each month's challenge
Find this month's Funky Freebie  paper by clicking the link or going to the website www.funkyhand.com and looking in the downloads section.

 Materials:
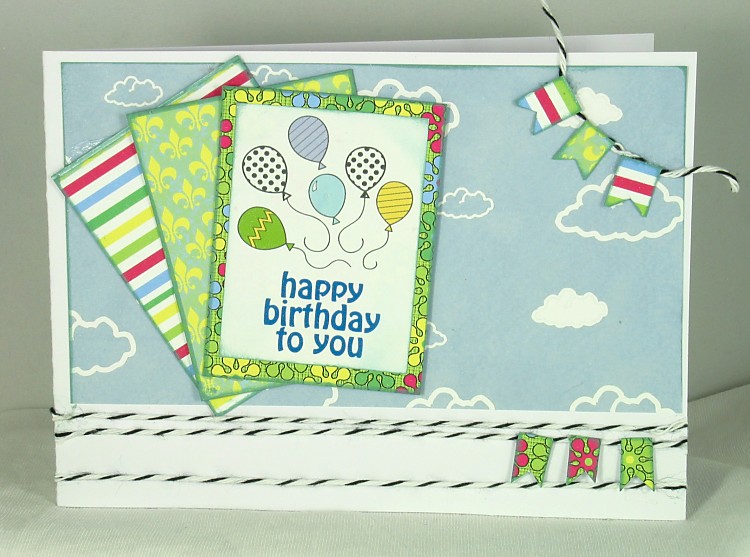
All other papers from Happy, Happy Birthday CD
Black card
You can read more of how I made the card by visiting the Get Funky BLOG

I still had some paper left over after I'd finished this card, so I made another one, this time using the Coloured Balloons (it's also available as a line drawing for you to colour in) digital image which is also from the Happy, Happy Birthday CD
I've used the new March sketch from The Sketch File Blog for the layout


 Materials:
All other papers and Image from Happy, Happy Birthday CD
Sentiment was added below the image using the Workspace then
printed out in one go

Black and white Bakers Twine
Right, I suppose I should get back to finishing my grocery order or there'll be nothing left to eat by tomorrow......hmmm maybe that would be a good excuse to go out for dinner, though....
Thanks for visiting, hope you have a great day today

Friday, March 02, 2012

Colour Combo Week

On the Daring Cardmakers blog the 2012 theme for the first Friday of each month is a Colour Combo Challenge - we're taking turns to set the colours and it's my turn this month.
Browsing around the net for inspiration I found lots of fab ideas, but in the end settled on a gorgeous photo featuring  shades of
Caramel. Pale Lemon, Duck-egg Blue and a hint of Gold
the cool colours seemed perfect for Spring - well I'm hoping the warmer, brighter days we've been having means that Spring isn't too far around the corner!
Here's my card
 Materials:
14cm square brown card blank
Papers; I've used papers from my scraps box, so not sure what they are!
Aqua, lemon, white ribbons and the paper and organza blooms are all from various sources
Flower centre is a button covered with Glossy Accents, with Czech glass beads and tiny gold beads embedded in it
Dew Drops for extra bling, pc generated sentiment 
Tools:
EK Success Moroccan Lace border punch
Spellbinders plain circle plus Floral Tags and Accents

The Aqua ribbon I've used for this card is actually some from the big reels I bought to make a ribbon cushion to match the colour scheme of Izzy's parents' wedding, so it's nice to be able to use it on this card - even if they probably won't even notice!
This is the photo that inspired me to choose these colours
The DCM blog looks soooo pretty today with all these colour-themed cards there are lots of different styles and ways to use the colours, but it all works so well - please pop across and have a look - and we'd love for you to join in with us too. 
Earlier this week I added a couple of new projects to the Sketch File blog.  One of them is a gorgeous chippie artwork from Carol who makes the most  inspiring variety of wonderful things - definitely worth a visit to her BLOG!
The other project is a card from yours truly - I've been trying to get a little bit organised by making this one to send to MIL for Mother's Day

Materials:
Smooth white 14cm sq card blank
Papers: MME 6x6 "Fiddlesticks" pad from Miss Caroline collection
Prima flat blooms from stash
Coiled flowers made with scraps of same papers
Off-white seam-binding and small cream wired flower from Creative Treasures
Half-Rosette made with two layers of same papers
pc generated sentiment 
Tools:
February LO from the Sketch File
EK Success Moroccan Lace border punch (can you tell it's me favourite, hehe)
Memory Box Rosette Die

That's it for today, I hope you like what you see and will visit again soon