Thursday, October 04, 2012

Well I Never!

A second blog post already this week, and as tomorrow is DCM day, then I should be posting then too.  Shock horror!

Anyway, over on Get Funky! (Funky Hand's challenge blog) the current challenge, set by Lou is to make a wordbook - any word, or some numerals is fine, and you can make it in any way you like.  As usual Anice has provided a lovely freebie to help out anyone who doesn't have any Funky Hand stash yet - and this time it's just what you need to make a wordbook of your own - so none of that "oh, but I don't have the letters/numbers so I can't join in..."  excuse!
Maybe you've never even tried to make one - well what a great opportunity to give it a try.  There are lots of ideas on the BLOG, with instructions, or links to instructions - and on the Funky Hand website you'll find a video of the lovely Anice herself putting a wordbook together - there are some other fab videos there too
Just because I'm an awkward soul I thought I'd have a go at using one of the download collections to see if I could make something a bit different to the usual wordbook format - and here's what I came up with


 It's not perfect, but as a trial run I'm quite pleased with the result.  You can see more of how I made it on the Get Funky! blog
I've used one of the fantastic new Christmas download collections:
to make this one, plus some images from last year's CD "Twelve Crafters Crafting"
Inside it looks like this:

I hope you like it and I hope it might help get those creative juices going.  This challenge doesn't close till 14th October so there's still time to join in.  At the moment only one person has linked her beautiful project to the blog - so she is sitting pretty to win a free download of her choice,  unless.......

Thanks for popping by today, please come back soon (and please leave a message to say you were here :) xx)

Tuesday, October 02, 2012

Rows of Ribbons

It's New Sketch Tuesday on The Sketch File blog today so just for once I'm going to be "on the ball" and get my stuff blogged on the same day.

The sketch is a really simple idea and I'm thinking it might be a good starting point for easing myself in to the Cword card-making zone, I'm sure I can do something a bit more seasonal with this one....
Actually I've already used this sketch to make several things so watch this space for more over the next few weeks.
I've added a couple to The Sketch File blog post today and there also cards from Victoria and Jackie to see this week too.
Here are mine:
Materials and Tools:
Papers MME "Follow Your Heart" 6x6
Card Candy, Pink button twine, black Bazzill card
Sentiment; Cuttlebug die


Materials and Tools:
Papers Bo Bunny "Serenadet" 6x6
Card Candy, Red button twine, black Bazzill card
Sentiment; Cuttlebug die

  It would be great to have you join in with us - just click HERE to visit the blog, see what we've been making and add your own link when you're ready to share.

Thanks for visiting today

Friday, September 28, 2012

Chevrons

Back home after a hastily arranged holiday in Kefalonia and trying to get back into some sort of routine.  It never fails to intrigue me how one week away can create so much extra work on either side of it. 
Still we needed the break - and to see a bit of sunshine.  We stayed in the village of Assos which has a stunning location on an isthmus and a fabulous almost enclosed bay which is a bit like a giant swimming pool- stunningly beautiful with the backdrop of buildings layered up the hillside. I'll add some photos at the end of this post.
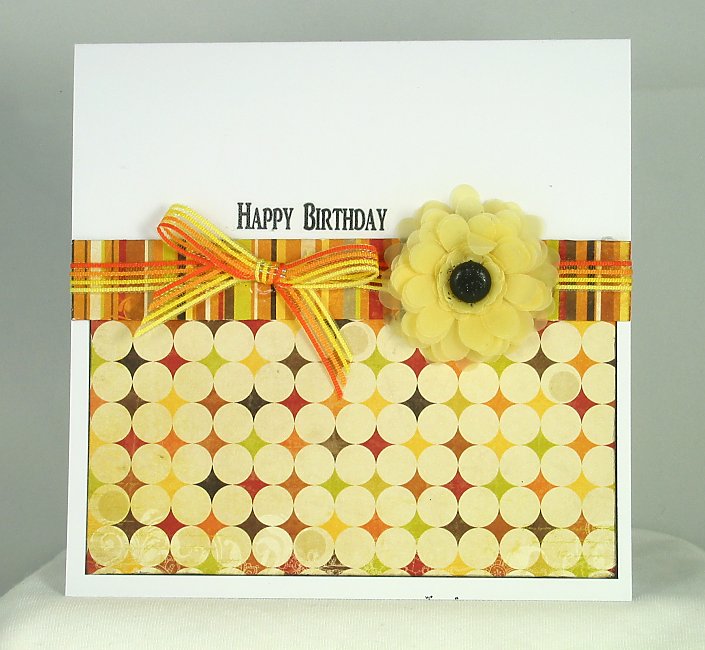
Today is Daring Cardmakers Day - and unbelievably I made my card before we went away (one less thing to do this week woowoo).  I needed to get my uncle's birthday card in to the post before we left the UK so Nat's challenge provided a great background for a masculine card


Nat said:
This week I thought it was about time we paid a special homage to that very popular design element that is doing the rounds right now.
The Chevron
Or zigzags if you like!
Just make a card featuring chevrons, zigzags, or even a herringbone pattern and share it with us via the InLinkz gadget on our BLOG

My uncle doesn't enjoy the usual blokey interests of sport and booze etc so it's always a bit of a challenge to come up with something interesting.  He's a real whizz at puzzles though so I thought a few challenging Sudokus might amuse him for a while.  The ones I've used are from the "evil" section, so fingers crossed that I copied the numbers correctly or they may turn out to be even more evil than intended!
 Materials and Tools:
I think the numbers paper is from MME - but I can't remember offhand
Narrow brown ric-rac braid
Sentiment created on Craft Robo; "Birthday" is cut out of the fawn card and layered onto a matching piece of black card. 
 The "Greetings" word is cut from another piece of black and added on top of the fawn.
For the puzzles;
I used a blank Sudoku grid found on the web and then used another website to find the puzzles - I copied the numbers into the grids using Paint Shop Pro 

It all still looked a bit bare and unfinished till I hit on the idea of adding a pencil loop and little pencil - vut down form a regular pencil
I added a couple of extra puzzles inside the card
The Design Team have come up with some fab ideas for using the chevron pattern on cards this week - there's paper of course, but also stamping, masking and various other ideas too.  You can  see them all on the Daring Cardmakers blog - and find links to the personal blogs of all the team so you can find out more about how the cards were made and what was used.
Right, now for a few holiday photos - you can click on them for a bigger view ;-)

First, Assos from the top of the road leading down to the village - just to keep in with the DCM challenge - there are a LOT of chevron road signs and many zig-zag and hairpin bends before you get down there!


This is an early evening panorama taken on the terrace of our accommodation using a funky app on my iphone
and a more regular shot from the same place
And this one is from up on the hillside on the other side of the bay -I've drawn an arrow showing where we were staying - right on the beach, with the sea lapping at the steps - it was as near to being on a boat as you can get without the wobbliness!
Ohhhh go on then - another view from the balcony, this time a night time one


Thanks for visiting today, I hope you enjoyed your visit and will come back again soon - it would be great if you'd leave a message


Friday, September 21, 2012

Giving Thanks

Sending "Thank you" cards and letters seems to be a thing of the past - I bet I'm not the only one who gets a bit disgruntled when the gifts we give and send aren't even acknowledged with as much as a text message....
Making sure you say Thank You in some way is just plain good manners - and besides, sending a little thank you message is a sure-fire way to get you into the "good books" of those doing the giving!
It's Zuzana's birthday (HAPPY BIRTHDAY ZUZANA) this weekend so she's obviously hoping that she's going to need some Thank You cards  

 as that's the theme for this week's Daring Cardmakers challenge.  As it was my birthday last weekend I was quite happy with this theme as it's helped me get my own "thank yous" made!
Here's my card


Materials and Tools:
All papers from the Crafty Templates Quirky Kit "Tell me More, Tell me More"
Prima flowers were part of the big prize I won recently from Charmed Cards and Crafts
Gorgeous Silky Crush ribbon and beautiful white lace from  Creative Treasures
Spellbinders labels Die, Cuttlebug "Thanks" die

Even if you don't need a Thank You card at the moment - you probably will soon, so it would be great if you'd join in with us this week and have a card made and ready to send as soon as you need to - just think of the Brownie Points you'll get for sending something lovely to say Thank You!
All the gorgeous Thank Yous the design team have made this week can be seen HERE

Thanks for visiting

Monday, September 17, 2012

Vintage Glam


I've got a couple of projects using the latest set of Crafty Templates to share this time.  If you like a bit of Fifties style, then this set will suit you down to the ground.  There are Dresses, shoes, a pile of gorgeous hat boxes and all sorts of other templates which you can use in any way you like.
Leo always gives each design in a selection of sizes - usually 4 for each, so you can use them to make a shaped card, or use them as embellishments and toppers.

My favourite this time was this pile of hat boxes - I love hats and dream of storing those I have in a stack of glam boxes instead of the dull "shop" boxes you get when you buy those wedding hats!
All papers, plus Blank and White ribbon from from the Crafty Templates Quirky Kit "Tell me More, Tell me More"
Thin black cord for handles from my stash

The next card uses one of the dress templates.  The printed ticket-shaped card comes in the Quirky Kit and I thought it would make a great background for the dress topper - you can imagine that this is the sort of dress a doting mum would make for a daughter's special occasion. 


All papers, yellow ribbon ribbon, shaped background card, sentiment piece from from the Crafty Templates Quirky Kit "Tell me More, Tell me More"
Headed pin, sequin flower, buttons and twine from my stash

Find out more about Crafty Templates and Quirky Kits HERE

Thanks for looking

Friday, September 14, 2012

Dig Out the Vellum

Vellum; it's not something I use often, but obviously being an addict to Crafty Stash Accumulation I still have a fat folder full of the stuff, so it was a case of crawling under the desk where the shelves hold "Stuff I don't use often" and finding it when Sharon announced that this week's challenge for the Daring Cardmakers would be to use Vellum in some way on our cards.
In the end I opted for some plain, pale yellow vellum and having unearthed the vellum I thought I'd use something else I hadn't used in ages and make a flower using one of the Cuttlebug quilling die sets.
 Here's my card

Materials and Tools
Papers: Bo Bunny 6x6 !Apple Cider"
Pale yellow vellum, Ribbon,  Black Stickles, Black glitter brad (prongs cut off)
Rub on Decal sentiment
Cuttlebug Daisy quilling die set

Vellum can be an awkward beast, it has a funny texture which sometimes makes getting it to do what you want a bit tricky - I wasn't sure it would work with the dies - you know what a pig vellum is to stick and I've found you really need to take some time to stick a couple of layers of the petal sections together (with the 2nd layer filling in the gaps between the petals of the first layer) before you start rolling them up,  And then I wasn't sure if the petals would fall into a nice shape when I'd put it all together, but apart from needing a bit extra bookbinding glue and a little more time, the flower worked pretty well.
You end up with quite a "deep" base to the quilled flower, so I die-cut a matching circle hole in the various layers of the card so that it sits flatter on the surface of the card - though it does mean there's a couple of mms poking into the inside of the card.

The DCM team have come up with some wonderful ways to use vellum - everyone has come up with something different, so it's a  really interesting challenge and one full of great ideas - if your vellum stash is unloved and unused, maybe you'll see something HERE that will inspire you to dig it out and join in with us this week.


Thursday, September 13, 2012

We Went to the Zoo

The weather was fab all last week and as Sunday seemed likely to be the last of it we decided to have a jaunt. 
As an anniversary present I "adopted" a lemur at Whipsnade Zoo for Hubby hehehe and as part of the deal you get a complimentary ticket, It seemed a good day to make use of it.  Obviously, a lot of other people thought it the perfect day to go as the place was really busy - good job it's on such a huge site and able to swallow up the thousands of people who must have been there.
Whipsnade was one of the places I remember visiting with my family when we first moved south - I was always a bit jealous of the people who took their cars in - it seemed the height of decadence to drive around instead of just walking, but my dad was having none of it!  FAR too much money for that carry on!
On Sunday I ticked that little "want" off my to-do list yay!  And yes, it did feel a bit naughty and a bit decadent but it was fun....we bought sandwiches instead of making our own .....and we had ice cream 99's too - oooh definitely a treat-filled day of the not-dad variety. Amd boy, was it hot - so a regular blast from the car's air-con was appreciated!
We still walked miles, as the road doesn't go to all bits of the park, but it was nice to be able to go round and round as often as we wanted, and not to have to lug all the junk and camera lenses on our backs!
I absolutely adored one of the elephant areas - it's where they do the elephant "displays" but on Sunday the elephants were just chilling out and having fun.  The fencing was very minimal, with a couple of keepers just keeping an eye on proceedings - such as heading off Big Mama Elephant when she was being encourages to "ooooh come over here, we won't hurt you" by one daft visitor with small child in tow....well, nooo you might not mean her any harm but she's a few tons of giant mama heffalump and she's heading your way....doh!
There was a baby elephant being bay-sat by his big sister - I admired her patience - you'll see why in the photo below.
Whipsnade has lots of free-running residents with wallabies, muntjack, hares, pheasants etc all happy to muddle along with the human and other animals and the scenery is fabulous with wonderful views over the rest of the Dunstable Downs and Bedfordshire countryside.
 I hope you enjoy seeing the photos!


 Someone is hitching a ride on the rhino's back!


 The penguins have a pool with a view!


Thanks for looking


Tuesday, September 11, 2012

Twice on Tuesday

It's my turn to share my project on the Get Funky blog today.
This month we've  an "Anything Goes Using Funky Hand Stash" challenge on the go and there have been lots of lovely things to see since the launch on the Funky Fifteenth of August.

  We're getting close to the 14th of September now,, which is the closing date for entries to this challenge, but you've still time to get out your Funky Hand stash and join in.  As usual Anice has created a freebie downloadable paper which is available only for the duration of this challenge but means that even those who don't have any Funky Goodies can still grab that and use it to make something....anything....and join in.  There's a free download of your choice on offer for our winner, so it's definitely worth taking part....especially as there's the beautiful new "Daisy Day" collection available now.


I chose to use the 3 rosy pink designs from Daisy Day to make this origami box.  You just start with two squares of paper and make some folds and you're done!  The link for the instructions can be found on my Get Funky post today
Click HERE to find the link and also to find the info info on how I made the flower decoration for the top if the box.  I hope you like it

 I love these soft and pretty papers and I know they are going to be used time and time again - the brilliant thing is that I can print them out whenever I want more - and I can print them on different papers too, which really adds to their versatility.  If that's not enough to convince you then maybe a price of  £3.49 you get:
20 twenty backing paper designs
Matching upper-case and lower-case alphabets
Numerals and extra characters.
Set of Daisy themed Digi Images to colour in, or over -print onto the backing papers for cutting out and layering
Can't be bad, eh?
Thanks for visiting - please leave a message to say you called by ;)