Tuesday, August 30, 2016

August Sketch Twosome

Hello

Another quick post, and I'm playing catch-up again
I ran out of time last week and didn't get round to posting my card for The Sketch File, honestly, I'm rubbish!

So today I've got two cards to share, both using the August sketch - it's the last week for joining in with this one, and it would be great if you'd try using it in your crafting


This is last week's card, using some gorgeous old MME Lost and Found papers, some lovely ecru cotton lace, satin ribbon, gems and a gorgeous layered butterfly

 Here's the sketch I've been using
The Sketch File
My second share is completely different, and I've really pared the LO down to its bare bones, using the larger shape as goalposts, punching a circular hole in the corner and adhering a felt football into the little aperture  GOAL!

I used a footballs embossing folder on the green backing piece - sorry,  I don't know who made it
The striped twill ribbon is supposed to echo the design of a football scarf ;)

That's it, I hope you'll give the sketch a try, it would be great to see what you could come up with - there are more variations and ideas HERE

Thank you for visiting
 

Friday, August 26, 2016

Wonderful Woodgrain

Hello
Going to keep this really short as someone has stolen my week and left me hardly anty time to blog or blog-hop - which just isn't fair.  Plus, it doesn't look like it will get any easier in the next few weeks either!
Nat's on duty over at the Daring Cardmakers this time, and has gone for that lovely old standby "Woodgrain" - however you want to use it is just fine by us.

There can't be many crafters who are without a woodgrain background at their disposal, whether patterned paper, stencil, embossing folder or something else, it's a really handy texture to use for loads of projects.
In my mind this looked different (my OH would say everything looks different in my head), but one thing that did turn out right was keeping it simple (again, like in my head)

The base is a 14cm sq navy blue card blank.
All the papers are from a 12x12 collection from Authentique
The Woodgrain embossing folder is  1n A4 one by Teresa Collins
I've added some twine and a wood effect button
And that is it

Thank you so much for calling by, please head over to the BLOG to be inspired by the cards the rest of the team have made this week

Told you it would be quick!


Friday, August 19, 2016

Pretty in Pink (and Lime)

Hello

Shock!  It's been raining this morning - not much, but the ground is actually wet.    Oh well - as the grass around here is now brown rather than green, I guess the gardens could do with it - but I hope the sun comes back soon!

We have a new Daring Cardmakers challenge this week and Svenja is definitely in a Summery, Zingy, Sherbet mood as she's set a colour theme for us this time:
 "It's Svenja here and this week I want to try and preserve that summer feeling just a little longer with some mouth-watering fresh & bright colours: use a combo of

Raspberry and Lime 
 
Sounds like a bit of an odd couple to you?  Not at all - just check out our BLOG to see the Design Team's fab creations!"

Pink and green is a wonderful colour combo, and I was looking forward to doing this one.  So why was it like getting blood out of a stone.  I think the card I eventually managed to finish was my third attempt!  One started off quite well,  but then I realised I hated the focus piece I'd started to make and I couldn't decide where else to go with it - so rather than end up making a hash of it, I set it aside to deal with later!  
Next I used a layered fancy die to make a centrepiece, but that was as far as that one went - am I the only one who has days like that?
So I cleared the decks and started all over again.


Info:
Coloured card all Bazzill
I cut a white square and slightly larger green square for the background.
 Using the frame lasercut as a guide I cut an aperture in the white square, then a larger one in the green layer.
 Next I used a series of increasingly deep shades of raspberry pink inks and the "Mini Spinning Tops" 6x6 stencil (Crafters Workshop) over the white square.
Once dry, I adhered the layers together with 3D glue. sliding a rectangle of printed lime green card into the aperture.  This piece is cut from some packaging I saved as it was so pretty - I think it was the backing card from some KandCo goodies!

I used black ink to colour the gorgeous chipboard frame from August's Craft Box
and when dry adhered it in place

Butterflies:
 smallest from the Butterfly Trio set (Memory Box)
the larger one is an Apple Blossom die (CraftStashUK
Handmade Flowers: 
Smallest is made using an EK Success punch. 
 For the other two I used a couple of build-a-flower type dies 
(Cheery Lynn and Britannia dies). 
I have two that are very similar because I didn't check the measurements.... but hey, as I rarely make just one flower, now I can cut two lots of petals at the same time!
Leaves:
Die cut using my favourite Leafy Swirls twosome (Spellbinders)
Tiny pink gems for a little bit of bling.  
 
That's it for this time, thank you so much for visiting, and for your comments -  like most bloggers, I really do appreciate it when you take the time to leave a message.
Have a lovely weekend
 

Tuesday, August 16, 2016

Soft Shades

Hello :)

Another lovely day here - I'm enjoying seeing the sunshine - but the pollen and hayfever symptoms,  not so much!  You can't have it all, I suppose (but why not?)
My project for the Sketch File this time is a card - I thought the LO lent itself to a bit of selective die-cutting to create a stand out section, so then it was just a case of choosing which die to use.


Using my eBosser makes it a bit trickier to do a partial cut - as it's electric you can't just stop turning the handle and wind backwards when you reach the point where you want to stop cutting.  Instead, I draw pencil lines on both sides of my card to indicate where the fold line will be, position the die where I want it, and  use low-tack tape to make sure it doesn't move.  Next I line up the edge of top plate with the pencil line so that the part I don't want to cut remains uncovered. Now the sandwich can be fed through the machine - only the part of the project which is covered with the top plate will be cut.
The Sketch
August 2016

Papers: 'Old Blue Damask' and 'Old Blue Patterns' Digital Downloads 
by Grepic on Etsy
Die set by Creative Expressions
Blossom punch for flower
To make the flower's centre, very thin wire is threaded along centre line of a length of wide organza ribbon, then pulled up tightly and threaded through the paper petals


I made a sentiment tag and tucked it under the flower, then tied a bow in cream satin ribbon around the lower section of the card and added some flat backed blue-grey pearls


Being in the grip of Olympic Fever - in this house, anyway, I thought I'd add a few on-theme photos from past visits to Greece.
The archway in the first is the one competitors would have used to enter the athletics arena in Olympia, with the second photo showing the 'tunnel' leading to the arena

This photo shows the stadium of the first Modern Olympiad, which was held in 1896.  This photo was taken in 2002 and at the 2004 Athens Olympics the old stadium was used for some events - I think the archery was held there, and the Marathon ended there and I believe a couple of the athletics field events were actually held in the ancient arena at Olympia, both of which must have 
been quite a special thrill with all that history to think on!


 OK, well that's enough waffling for today, thank you for coming by, it would be great if you'd leave a message before you go

Friday, August 12, 2016

A Room with a View

Good Morning - Happy Friday!

If you could choose your dream view to greet you every morning when you open your curtains, what would it be?  Would you love to see a City scape laid out before you, or maybe lush rolling countryside, Lakes and Mountains, or sea view......?

On the Daring Cardmakers this week, Dawn asked said:

"As I live in the beautiful countryside of Brittany in France I would like to see a window or aperture on your card with a picturesque view. 
So I have called my challenge:
"A ROOM WITH A VIEW"
It was interesting to see where this theme to our DT.  Some went with Wintry, Christmassy scenes and Svenja's quirky sense of humour saw her peeping though a keyhole as well as a window!  I thought about the view I'd love to see every morning, and gave it a bit of a Greek twist with some deep blue shutters concealing the view
Info:
The shutters were made from a rectangle of scrap card, embossed with "Distressed Stripes" embossing folder (Cuttlebug), then inked on both sides with a couple of shades Distress Ink.  A few lines and 'knots' were then drawn before halving the rectangle, and adding score lines at the ends.
I cut a slightly smaller rectangle from the card blank then embossed the card front with a Brick Wall embossing folder (Darice) - I had to use it twice to cover the whole of the card.

The 'view' was made on a separate sheet of card, with various inks to create the sky, sea and sand. I used a couple of different Stickles and Ice Stickles to add highlights and ripples to the sea, a grey marker to draw the seagulls and hand cut the pieces for the yachts from scraps of paper.  Once dry I trimmed it down and adhered to the inside of the card, then glued the shutters in place.

I was going to stop there. with the white brick wall and the blue shutters opening onto the sea view, but it looked a bit dull.  Plus, I couldn't resist the lure of the Beach Hut!  
I made a pop out shelf with more blue inked card, then  used some Promarkers and scrap card to draw some stripey pieces with matching solid areas which were then cut into the beach hut walls and roof shapes.  I added little card box hinges to the backs some of the tiny beach huts so they can really stand out on the shelf, others just had a couple of scraps of chipboard to give them some dimension
Finally, I added some matching bunting across the top would tie it all together.


If you head over to the Daring Cardmakers blog, you can see the view that greets Dawn when she opens the front door of her home in Brittany - she's a lucky lady, I think!
It would be great if you'd join in this week - we'd love to see how the Room with a View theme takes you!

Thank you so much for visiting, I hope you'll leave a message, and I'd love to hear what your own dream view would be.
Bye for now


Tuesday, August 09, 2016

Two for Tuesday!

Hello
I hope you are still enjoying sunshine where you are, even though it's a bit breezy too.  The warm wind has really kicked up the pollen around here and I've been suffering big-time over the last few days.  Good excuse though to stay indoors and watch lots of Olympic action on the TV and all the other gadgets at my disposal.  Got to love being able to channel-hop, or keep in touch with a couple of events at the same time when you can't choose which to watch.  Or is that just me? hahaha
With Rio being a few hours behind, at least I can get other stuff done in the mornings, so I've just been doing a bit of over-due blog-hopping and this afternoon I shall set the ironing board up in front of the TV and find some Rio Action to take my mind off the monotony of the never-decreasing ironing pile.  I should end the afternoon feeling quite virtuous, really ;)

On to some crafting now though and I have a couple of things to share today - both using the new August Sketch File LO 'Big Shape, Little Shape'.
The first is the anniversary card I made for Hubby the other week, and the second a quick and simple page for the on-going Paris mini album project


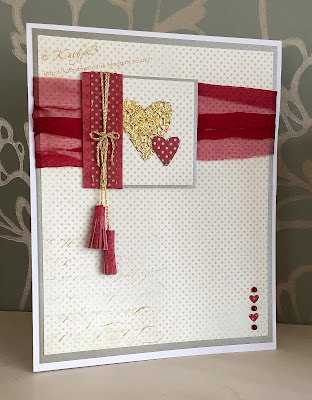
This is quite a large card (about 8" high) and I used the sketch in a very shrunken version for the heart element.  
I started by matting some lovely Carta Bella paper onto a dull gold card layer, then adding a length of wide organza fabric around it, using wet glue to work it into a rather randomly gathered effect.  I adhered this backing piece to the card blank, then made the focus square using the same card and dotty paper and adding a a couple of other for the red panel.  
The gold metal heart was cut from one of the 'tiles' I received in my July Craft Box.  I felt a bit bad cutting it into a different shape, but there are others still left in the pack.....
The tiny heart is just hand-cut from some paper adhered to some card.  I tied gold lurex yarn around the red section, to follow the sketch LO.  The tassels are made from strips of paper, tightly would around the knotted ends of a piece of yarn, then tied around those on the focus piece.  I made a tiny bow and glued it over  the knot to make it look prettier! 
The tiny hearts on the lower corner are 'waste' from a border punch, and I also added a few small red pearls.
Here is the main version of the sketch:
August Sketch File
I thought the LO would work (upside down) fairly well used with a landscape-style photo on a  book page.  As the pages are squarish, I could use the photo for the top, large shape, add the title on a small on the small shape element and then use the lower section to add a bit of decoration without covering the photo too much.
The picture looks a bit weird because I stuck it into the book before photographing it, then had to fold the book in such a way to get a half-way decent photo!

I tried to match the card colours to those of the lighting at the base of the stunning dome of the Galleries Lafayette store.  It looked a bit dull so I went rootling through (one of) my stashes of 'might come in useful one day' things and unearthed a tiny carrier bag which I think came in a crafty swap at some time.  It was cute, but plain white so I popped a paper daisy on, added tiny price tag found in the same place and glued both to the corner to finish it off.

That's it for today - well done on getting to the end - I hope you'll leave a comment before you head off to recuperate ;)

Thank you for visiting xx


Friday, August 05, 2016

Where did the Week Go?

Hello!
This last week whooshed by in the blink of an eye - which is my excuse for being such a bad blogger - and such a bad blog-visitor too, I really need to do some catching up!
I'm going to do a bit of a round up here today, so be warned! 

First off it's Daring Cardmakers Day, and the first Friday of the new month means we have an Elemental Inspiration Challenge, this is my card:


Nat chose the picture this time, and as you can see I selected the colours, mosaic patterned background and the vases of flowers to use on my card

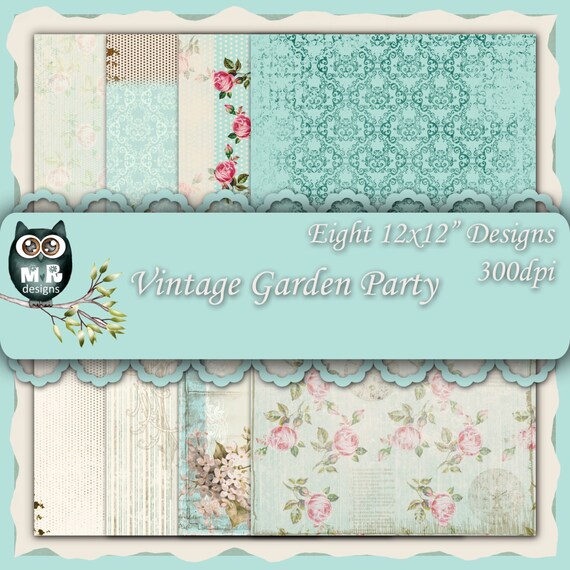
To get miniature patterns to use for the mosaic, I used a digital download paper collection.  Although intended to be printed at 12x12", because they are digi, I could resize the design to print at only 9cms sq, or even select a small area of the design to make the size I wanted - that's how I created the different sized roses for the smaller vases.
 Info
Digital Papers 'Vintage Garden Party' by MichelleR on Etsy,  resized and cropped as required then printed onto white Bazzill card
MichelleR designs
Other card for matting, leaves and die-cutting large flowers
Mosaic punch, Poppy die (Joanna Sheen), Silhouette Cameo to cut the vases


As mentioned last time, it was our anniversary last weekend.  We decided to treat ourselves to a stay at Hanbury Manor near Ware in Hertfordshire.  At Christmas we'd been given a voucher for Afternoon Tea there and it was about time we used it - so thought we might as well book in and stay there too.

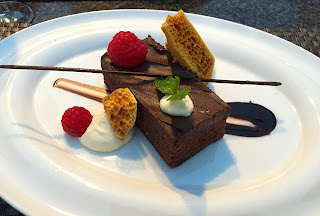
 The weather was nicer than it looks on the photos, thank goodness!  Nice enough to sit out on the terrace of the restaurant for our evening meal - which was lovely, especially my pudding!
By the following afternoon we'd made enough room for our afternoon tea.  Now, don't get me wrong, it was very nice but I have to say I was shocked when I glanced at the menu and saw that it cost £30 per person!  


We do like an Afternoon Tea as a special treat, and we have had better than this and for less money.  There is another beautiful country house hotel in the same town as Hanbury Manor which we've been to a couple of times for AT now and I know which I'd prefer to go back to.....
 
Earlier this week the new August LO  from the Sketch File went live and I will share my card for that soon - but I've rambled on enough for one day!

Thank you for looking, I hope you'll pop across to the Daring Cardmakers Blog to see what the DT have been making - and of course, it would be great if you'd join in too.