Showing posts with label Crafters Companion. Show all posts

Monday, January 24, 2022

HAPPY card 2


Hello
So, last week I shared a birthday card made using a Crafters Companion HAPPY shaped die set.  Today's card is in a similar vein, but in a different colour palette and with some different flowers.   Shabneez and Sarah's birthdays were in December and the opportunity to get away from Christmas colours and shapes and "go girly" with pretty colours and lovely flowers was just too good to miss!
But one day I shall use this set to make something more masculine - I have loads of 'boy' birthdays coming up so watch this space!

Anyway, back to Sarah's card


 Info

This time I chose a yellow, orange, peach mix of colours for the background shaped card, the upper layer of the letters and also for the thinner card I needed for making the flowers.  I used inks and Nuvo Embellishment mousses for this both sides of the thin card were coloured as the flowers would be 3D
 

I've not had the chance to make a big rose since the card and box I made for my nephew and new niece in law's wedding in July. so as this card would be hand delivered I took the chance of going ultra dimensional with my flowers!  Well, it would be rude not to, wouldn't it?
There is something so relaxing and satisfying about making a paper rose, I always enjoy making them. 
I cut the petals for this one using an extra large flower punch.  I have instructions on how to make paper roses HERE
 
 
 To balance the large rose I used a little trio of small coiled paper roses on the 'H', and added some green die-cut leaves to set them all off.

 To complete the card I made e sentiment piece using black and white sentiment and patterned pieces from my bag of bits.  I can't remember what font I used on this one, but I really love it!
Obviously, with the big flowers this was never going to fit into a regular DL envelope so I custom-made one to fit it. If I'd needed to post it I'd have made a box for it instead


Thank you so much for coming by, please don't go without leaving a little message, I do love to hear from you.  
Or maybe I really am just talking to myself
 
 Happy Crafting, Stay Safe,


Wednesday, July 23, 2014

Curvy!

I thought it was about time I did a midweek blog - I've fallen back into the bad old ways of only managing to do my DCM card blog post.  Must try harder.

So now that the special birthday this card was made for has come and gone I can share the photos.
This is a commissioned card and it has a curved, or bowed front (like an old-fashioned shop window), What with the depth of the card because of the bowed front and the rather extravagant flower set into the aperture I decided not to risk the Postie squishing it before  it even reached my customer, and made a box for it too.
Tools and Materials
All papers are from Funky Hand's beautiful
printed onto white Bazzill card for texture and a nice weight
The front of the card is created using the "Extravagance" Create-a-Card die from Crafter's Companion
Plain Oval and Labels die are Spellbinders
The peony flower was made using petals cut on the Silhouette Cameo
Other items used: Cream card blank, flat backed pearls, satin ribbon

I made the box using WRMK Envelope Punch Board, and added a "belly band" to keep it shut, there's space on the label on the back to add a message
I used more of the same papers to decorate the box.  The flower is cut with an SU punch, the centre is a plain punched circle with a layer of Glossy Accents and a few beads sprinkled in while still wet


That's it for this time, I hope you like this project and will leave a little message ;)

Thanks for looking

Friday, May 23, 2014

Origami Challenge

It's Leo's turn to set the challenge for The Daring Cardmakers  this time:

"This week we're turning to Japan for our inspiration and more specifically to the art of paper folding,
Origami
I'd like you to use either something inspired by Origami on your card or to have a go at making your own Origami embellishment. There are lots of online tutorials to look at with lots of different origami designs perfect to use in paper crafting so it's well worth having a go. If you need more inspiration to kick start your imagination take a lookat the BLOG to see what the design team have cooked up, (and folded up!) this week"

Quite a few years back I had a phase of doing a bit of Origami, thanks to a little paperback book I had.  I remember making things like an elephant and a bird which, when you pulled it's tail, flapped its wings.  I didn't really get much further with my paper-folding though, and probably moved on to another of my Crafty Dabbles - lace making...candle making..or whatever else took my eye!

So, when I read Leo's dare, I thought it would be fun to revisit the craft and hopefully, with the (new) help of the t'internet with all those video tutes etc maybe I'd actually manage to get a bit further and have less squares of crumpled paper.......
Hmmm. or maybe not!
I must have looked at LOADS of tutorials, and even sat with my squares of paper and followed quite a few of them.   Some were really good and some started off fine and then got to a tricky bit and no amount of scrolling back and looking again helped show what the person was doing.
So, my bin is full of crumpled squares of paper - good job that in most cases I used squares cut from scrap paper. 
In the end though, I found Leyla Torres' "Origami Spirit" blog and things started to look a lot brighter.  Her videos are so clear and she explains carefully and at a lovely, slow pace what she is doing at every step.  From here I made this flower - taking her advice to use a supple, malleable paper so that tearing isn't so likely.  I used some handmade paper that matched the other papers I wanted to use.
Do you like the paper designs?   They are a sneak peek at a brand new, "coming soon" paper collection from Funky Hand..... gorgeous, aren't they?


Tools and Materials
Origami flower
"Hollow Petal Flower" - tutorial is HERE
Handmade Mulberry paper
Bacground
All papers Wash It All Away Download coming soon from Funky Hand 
(printed on white Bazzill card)
Spellbinders Leaf Swirl dies (top left and bottom right), Butterfly
Crafters Companion Leaf 2 (behind flower)
XCut Tiny circle punch to make "card candy" pink and aqua embellishments from scraps of the papers - shaped with an embossing tool
Ice Stickles (Crystal)

 It would be fab if you'd take a look at what the The Daring Cardmakers team have made this week for Leo's unusual challenge - and better still if you'd join in and fold some paper too!

That's all for this time, thanks for visiting


Wednesday, May 14, 2014

Family Favourites


If you saw the "Tool Shed" programmes on Create and Craft this past weekend you might have seen some of the things I made using a couple of the Crafters Companion "Create a Card" dies.


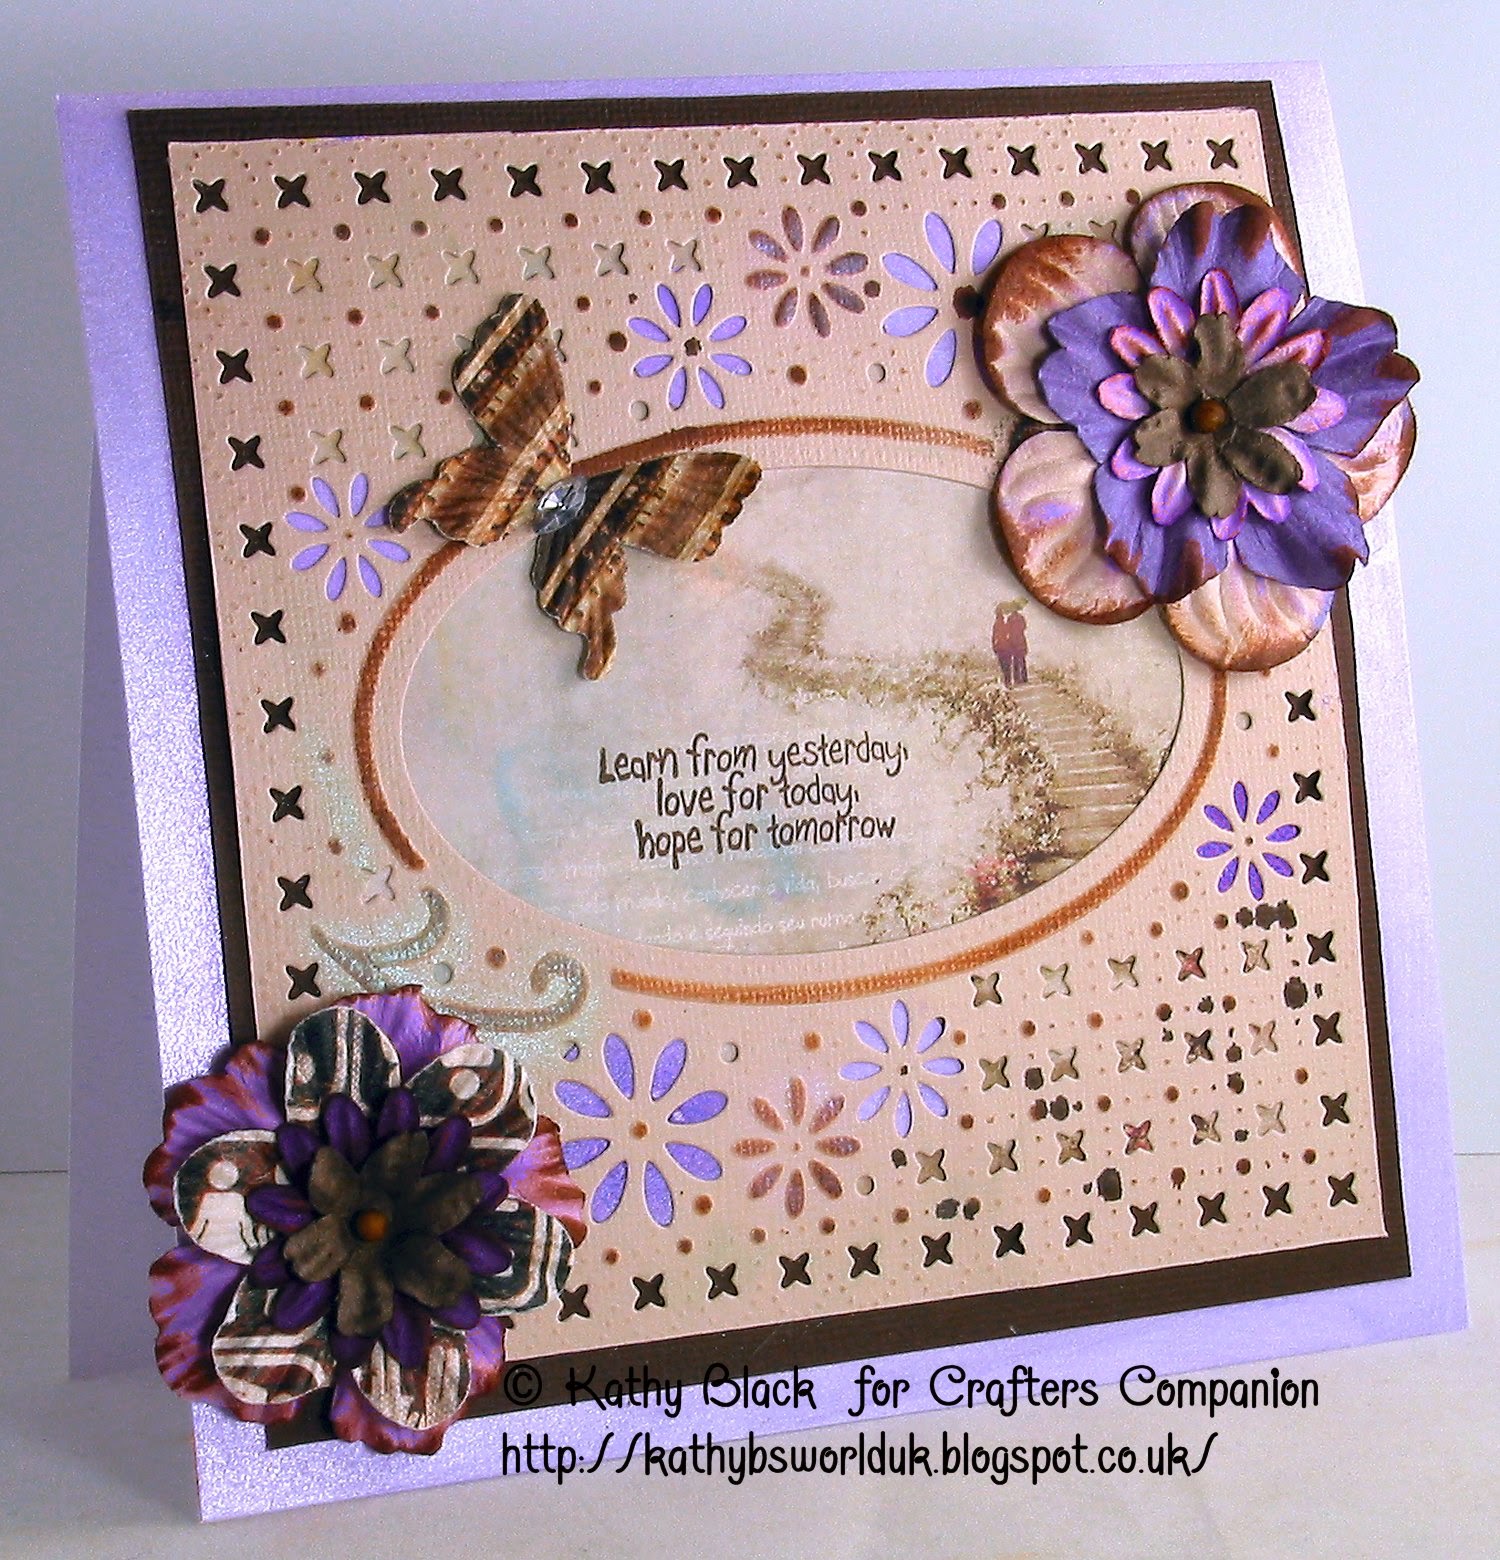
These dies are just fab!  What they don't do is cut any sort of outline shape - instead they cut all the little shape details and a centre piece out of the card stock, then with a second pass through your machine they emboss more of the pattern.  This means that you can actually cut the pattern anywhere you like on a piece of card, with the only limitation being the size of card your machine will take.

For instance, if you have a machine that takes A4 card, you can put the design in the centre of an 8x8 card blank just be leaving the card blank open then carefully placing the die in the centre of  what will be the front of the card ( a few bits of washi tape will help to keep it in exactly the right place) and running through your machine.
Fold the card and it's ready to embellish - though if you like a clean and simple style, it won't take much of that  as the designs are so pretty and intricate already.


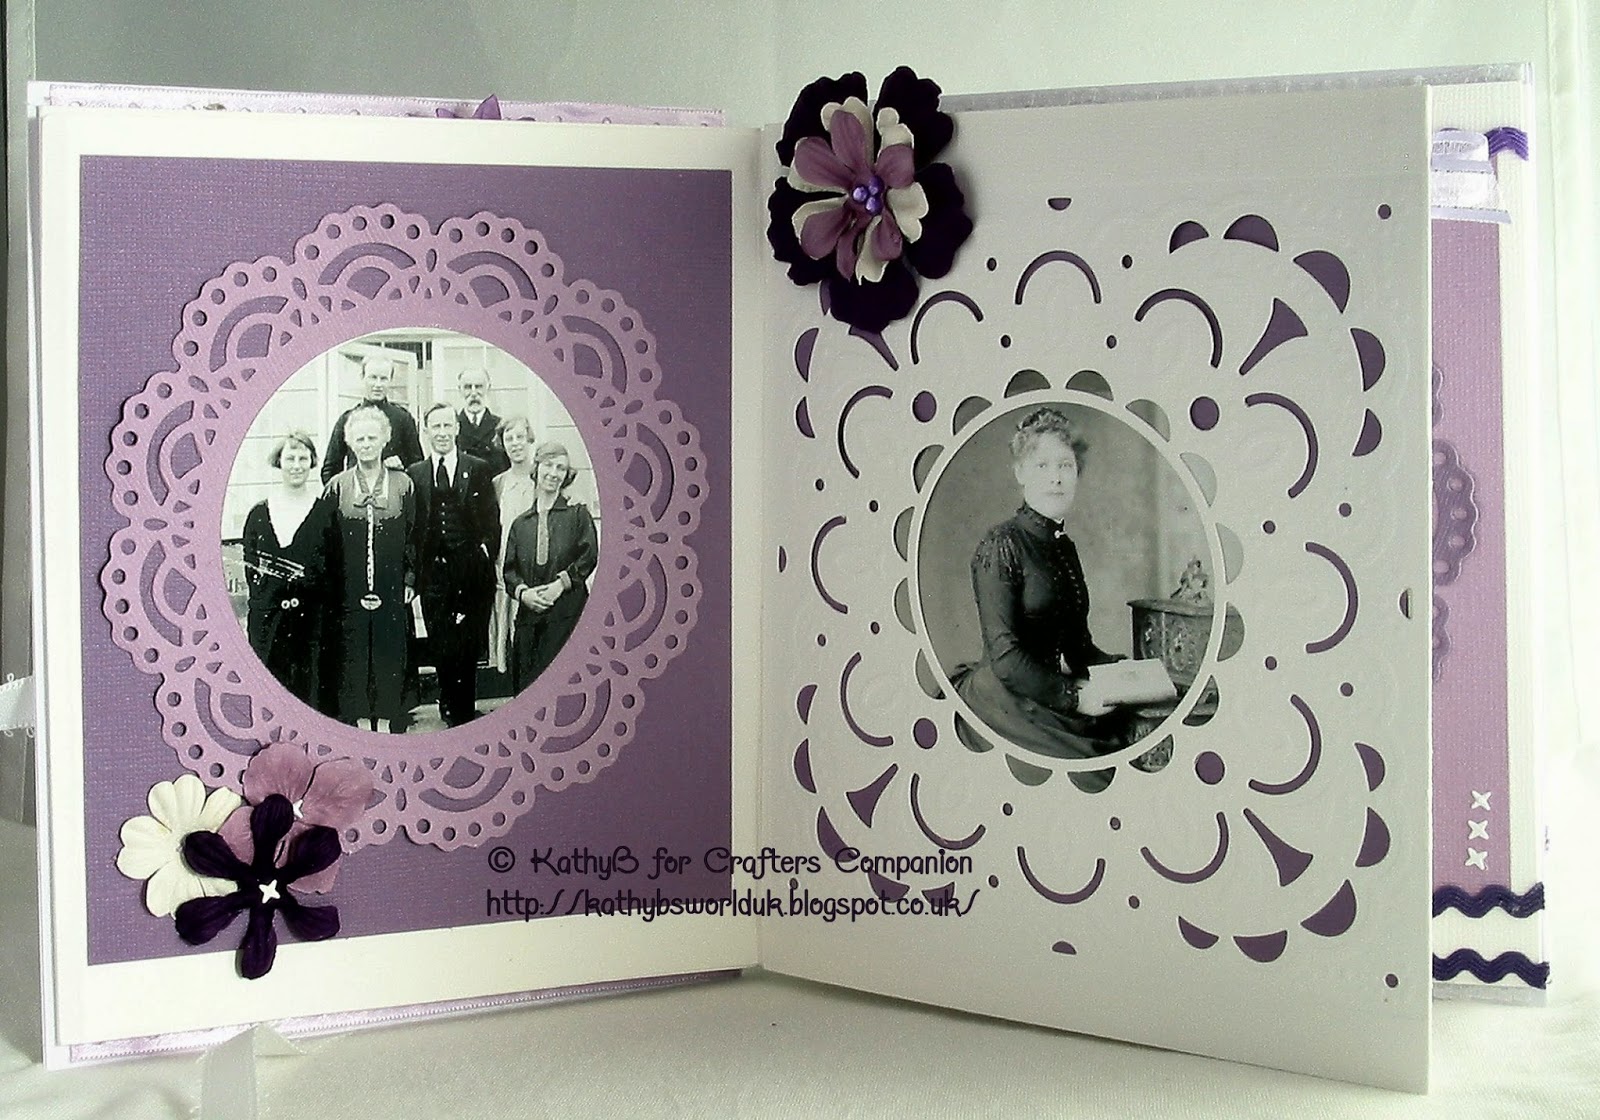
I wanted to try something a bit different with the dies, and as the centre apertures make the perfect frames I thought a zig-zag album might work.  I'm lucky enough to have quite a big collection of old family photos through some family history research I've done and I thought they would be perfect for using in this album

The book is constructed from folded and die cut pages which are overlapped and then inserts of coloured cards are slipped between the layers.  I assembled the book leaving the upper layers unglued so that I could just slip the photos in and then seal the edges. 
As the book folds out completely and there are photos on both sides, it is all kept together with a ribbon that is fixed on the back cover then tied at the front


I used Centura Pearl with a Hint of Silver card for the cover pieces and white Bazzill for the pages.  The coloured inserts behind the pages, and the extra coloured die cut "pages" are Coredinations card.
All the dies used are from Crafters Companion - I've used:
Create a Card Precious
Create a Card Extravagance
Chantilly lace Stamping Frame
Also from
Crafters Companion
Centura Snow White with a Hint of Silver
Coredinations card in two shades of purple
Collal Glues

I wish I'd checked the photos before I sent this off - I'd have taken better photos - or got OH to do them for me ;)
I should probably have set up the bigger photo cube to do them in as the one I usually use is a bit small to show off the album and all the folds.  Hey ho, maybe one day I'll remake it for myself and learn from my mistakes........yes, I can hear you saying it....."that'll be the day"!


Thanks for popping by, I hope you like my album - please leave a message, it's always lovely to hear from you!

Monday, April 07, 2014

Red Flowers

I'm not sure how I managed to forget to do my blog post for Friday's Daring Cardmakers' challenge, but I did - and then I forgot all over the w/e too. So it's a case of better-late-than-never and apologies to Lythan for being so tardy
As it was the first Friday of the month it was our usual Colour Combo Challenge week and as I mentioned, it was Lythan's turn to choose the palette for us to work with. 
I wasn't sure what to do at first, but in the end it had to be flowers.
I chose a couple of different red card shades, some plain and patterned grey paper and cards, and the best shade of green that I could find for the leaves to match up with the inspiration photo


Materials and Tools
Patterned Grey panel is from an old Hot of the Press pad
Oval doily and plain oval on top are cut in two shades of grey card
Red card, Red and Silver pearls, Red and Clear Dewdrops
2x Camellia flowers
Red petals Die'Sire Camellia (small) Quilling flower from Crafters Companion
Yellow inner petals Die'Sire "Lace" Quilling flower from Crafters Companion
2x Medium Roses
Created using own flower template cut on Silhouette Cameo
2x Rolled Roses
Hand-cut from scraps
Leaves cut with  Die'Sire "Leaf 2" Die and embossed with Tumbling Leaves A4 folder, 
Plain oval cut on Silhouette Cameo
Oval Doily die by MFT Die'Namics (Dainty Doily Duo)

Apart from just missing the grey background piece when the lid of my Tacky Glue pot fell off and the contents globbed over my desk and other stuff on it.....this went together quite well in the end.
There's a fab mix of cards on the BLOG this week, all so different in style, but sharing this lovely colour palette

Thanks for visiting, please leave a message ;)


Sunday, March 23, 2014

Create a Card - new from Crafters Companion

I've been playing with a couple of the brand new "Create a Card" dies from Crafters Companion Die'Sire range over the last few weeks.  They've just been added to the website and today at 12noon they'll be launching on Create and Craft TV    ( Sky 671 Freeview 3Virgin 748 Freesat 813 or watch on your pc http://www.createandcraft.tv/ShowGridView.aspx?showId=2433117)

Here's a quick peek and some of the things I've made with these great new dies.
They don't cut out an external line so you can use them in many different ways.


Friday, March 21, 2014

Do (craft) and Die (sets)!

Well - where did that week go then?
So much for creeping in and adding my card just a couple of days late for last week's Daring Cardmakers' Fairy Tales challenge - I finally uploaded it yesterday - I'll show that in a minute.  First though it's this week's rather exciting one.
Our lovely and incredibly talented Beckie Dreyer is also a designer for DoCrafts, and this week arranged for each of the DCM team to receive a nice package of  DoCrafts/Xcut goodies.  There were papers and die-cut sheets from the Gorjuss range, and various sets of shape and alphabet dies - so we have a wide range of DoCrafts products to show off on the Daring BLOG this week,


The challenge this week is a simple one;  
"Die-licious"
all you have to do is use die-cuts on your cards. - especially Xcut dies if you have them (but don't worry if you don't, just use your favourite dies instead)
Join in with us and you could win an Xcut alphabet die set....

I was thrilled to bits when my giant jiffy bag arrived to find a set of nesting circle dies - the biggest is a humongous 8" diameter!  I know that this die set is going to get a lot of use.  Also in the nag was a rather curvaceous alpbabet die called "Alice" and a sheet of Gorjuss girl die-cuts.
Here's my card


 I used the second largest circle folded in half to make the rocker base, then cut away the part I didn't need with another of the circle dies. 
Next I glued to pieces of card together, then taped 2 of the circles onto it (with washi tape to keep them in place) and cut to create the (red) frame section
The moon was made by cutting a circle from glitter card with a smaller of the dies then using the same die to take a "bite" from it

So I think I gave the cutting performance of these dies a good workout and I'm so pleased to say they did brilliantly well - coping with double thickness Bazzill and even a couple of different sorts of Glitter card - often the nemesis of many dies!
The "DREAM" letters were also cut  from glitter card and I was really impressed at how well the die cut all those fiddly curvy shapes - just once through the ebosser and they popped out nicely
The little girlie die-cut sheet has several pieces so you can build up your design decoupage style - the pieces I used all came out from the sheet really well, with no little teary-taggy bits to spoil the image. She's very sweet and she doesn't have a head shaped like a potato like some do.... ;)


Also used:
Chantilly Lace Doily Stamping Frame - Crafters Companion
2x flowers made using a Marianne die, plus 1 coiled rose
Leaf punch - Nellie Snellen
3x Star punches
Silver cord, Jewels, Bazzill card, Glitter card, Lokta paper for flowers


 Here is the die set you could win by joining in this week

Find out more and see all the fab cards the team have made using their DoCraft and X-cut goodies by clicking HERE

So now a revisit to last wee's challenge which was all about Fairy Tales
I based my card on the story "Ruplestiltskin"  I think I liked this story because at the end he screams "A witch must have told you" and stamps his foot so hard that it goes through the floor - at least it does in the pictures I remember from my Ladybird book!  I will admit to still stamping my size 3 every now and then.......
Papers are from Maja Designs
Die is cut down from a Spellbinders Labels
Spinning Wheel is my own template cut on the Silhouette Cameo
Aslo used: raffia (for the straw), Gold thread, Lace, Gold ribbon. Pink pearls

I'll be back over the weekend with some Crafters Companion projects - there are new dies launching on Create and Craft at the weekend........
Thanks for visiting


Thursday, January 09, 2014

CHA Sneak Peeks 2

 Two more sneak peek at the new A4 embossing folder designs from Teresa Collins which will be released at the CHA exhibition in the USA.  
It's all very exciting to be part of - even if it is only the minutest, teeniest weeniest bit imaginable!


Cabbage Rose
This Cabbage Rose folder has such a glorious, bold design that keeping it all very simple seemed the best way to go.  I used Faded Lipstick (I think) Distress Ink, applied directly to the upper side of the embossing folder.  I quite like the uneven shading you get this way because of the "watered silk fabric" look you get. Peeking in at the corner of the photo you can see a rose made with Crafter's Companion's Die'sire Quilling Rose  (Small) 


Dotted Chevrons
Another flower in the corner of the next sample, this time it's the Die'sire Quilling Lace Flower.
The embossing folder is another gorgeous chevron design (see yesterday's post for the Twill Herringbone chevrons), this one is called Dotted Chevrons and is also by Teresa Collins, and I've embossed some  lovely Centura White with a Hint of Silver card
 

Teresa Collins: Dotted Chevrons
Stamp: Die’Sire Sentimentals: Memories are Made
Dies: Die'sire Quilling Lace Flower, Cameo Stamping Frame and Circle Doilies
 All these products from Crafter's Companion 

Just a reminder that you can join Crafter's Companion's very own Leann Chivers live from CHA on Create and Craft TV at 4pm (GMT) on Saturday 11th January to see some fab new products, including the Teresa Collins Designs Collection of eBosser A4 folders I've shown a couple of here.  

Hope you like today's sneak peeks!

Wednesday, January 08, 2014

Christmas Round Up and a First CHA Sneak peek!

Happy new Year!
Okay, that's a teensy bit late, but sometimes it takes a while to get back into the blogging routine, doesn't it?
("What blogging routine?" I hear you say....)
So before I get on to the exciting Sneak Peek things for CHA here's a quick Round up of some Christmas photos as I've very much neglected my poor old blog over the last few weeks - and not in a small way due to the said CHA things!
Please click on the photos  for larger images
 
We went for a Purple red and Gold theme for our tree and parcel wrapping and I loved the way it worked:


This is the card I made for Hubby - all the while I was making other things I was wanting an excuse  to make these paper baubles!
And just one last photo of Christmas makes - because I forgot to take photos of all the other boxes and gift card wallets etc that I made. oops!
Here are some shallow gift boxes made using the WRMK Envelope Punch Board.  They were a bit of a pain until I found a tutorial even this dumb blonde could make sense of!  Definitely need more practise with this little gadget though.


Okay, so on to the exciting stuff!  Over in the USA it's the time of the year when all the crafting folks get very worked up and excited because its CHA show-time.  This is the exhibition where all the Craft companies show off all their new goodies and announce to the world what they think the trends will be for the coming year.  Eventually it all filters through and we get to buy all those new tools, paper and pretties for ourselves - usually this filtering process takes quite a while - especially for the stuff to arrive in the UK shops....but this time I've been a little bit luckier and thanks to Crafter's Companion I've already had the chance to use some of the Teresa Collins Embossing folders that will be released in the next few days.  We've just been "given the nod" that we can blog some Sneak Peeks" of the things we made with the brand new A4 folders, so here are my first two sneak peeks

First up - and my favourite of the  things I made, this one uses the About Time embossing folder.  I embossed patterned paper, then swept black ink over the embossing to highlight the clocks design. I embossed some cream card and chose one of the larger clock faces to shade with lots of Distress Inks and some Versamagic Gold ink, then again used black to highlight the embossing before cutting it out.. 
 The second sneakie for today is a wall hanging using the gorgeous Twill Herringbone embossing folder.  I created the rainbow stripes using paint Shop Pro and printed it onto Centura Pearl "Hint of Silver" - I used the same card for the embossing and I love how crisply the embossing design works on this gorgeous card.
Sentiments on both of these are from the Crafter's Companion "Memories are made" stamp set.
Now then, that's about it for this time - but you may be interested to know that you can join Crafter's Companion's very own Leann Chivers live from CHA on Create and Craft TV at 4pm (GMT) on Saturday 11th January to see some fab new products, including the Teresa Collins Designs Collection of eBosser A4 folders I've shown a couple of here.  

That's it - well done if you got right to the end ;)  
Back soon with more Sneak peeks
Thanks for looking