Showing posts with label Shares. Show all posts

Friday, December 09, 2011

Big Wooly Jumpers

You can't help thinking of them when the topic of the "Lands of Ice and Snow" comes up, can you? 

It's Fran's turn to set the challenge for the Daring Cardmakers this week and she's chosen a fabulous  
           Nordic Christmas
theme.  She's provided this fab photo just in case some extra inspiration was needed

Every time I turn the TV or radio on there seems to be someone talking about "The Killing" - or more precisely the craze for thick knitted sweaters in the Scandinavian style that the series has inspired.  I think that's why I had a pattern of rows of motifs in my head when I was thinking about what to do for my card this week
I actually made the dangly tree ornament a week or two ago when we heard what Fran's dare was to be, but it's been sitting on my desk since then waiting for an idea to present itself as to how to use it.
My Grandma used to knit "Fair Isle" pattern jumpers - those where there seemed to be hundreds of different coloured balls of wool attached to her knitting.  As I was a great disappointment to her on the knitting front I remain in awe and not a little bamboozled as to how it all works and how you can possibly know what you're doing with these patterns.
So my pattern is a simple red and white one....and it's in paper, not wool of course!  It looked a bit dull so I've added a wrap of fine gold thread to the base card, then lengths of various white, red and gold trims to brighten the basic border design
I started off by using the "shapes" options in my graphics program (Greetings Card Factory)  to make the motifs, repeating and aligning them until I had a pattern I liked.  I saved and then converted it to cut on Craft Robo (there's a surprise!) in red Bazzill then matted it on to some white card and a Kraft card blank
 Materials:
Kraft 15cm square card blank
Bazziill (red, white), Red Glitter card. Gold card
Red satin ribbon, red/white patterned braid, white plaited braid, gold lurex crochet thread, fine gold thread, red gems, KandCo glittery snowflakes, Crystal Ice Stickles
Tools:
Craft Robo (Nordic Border Design, Bauble "hanger")
Memory Box Bauble base and Bauble upper dies
If you have a Craft Robo or Silhouette and would like the GSD file for this Nordic Border design, please email me and I will send a copy to you.
I'm now thinking that I can use this border design for some fairly quick and easy Christmas cards - especially for those I don't need to put through the post so can make as "fat" as I want without worrying about the mean old Royal Mails 5cm thickness allowance for regular postal prices.
I'll let you know how I get on.
Here's another card using that fab little Santa image from Funky Hand's "Twelve Days of Christmas" CD.  He's so darned cute!
Materials:
Simple Stories Christmas 6x6 pad, 
Funky Hand (Twelve Days of Christmas) Father Christmas image converted for cutting on Craft Robo
Lettering; Craft Robo, Red twine, Crystal Ice Stickles
Bazzill card; Red, Black, White, Yellow
If you've not already visited the Daring Cardmakers BLOG, then please go and check out all the Super-Fabulous cards the team have made this week - what a treat for the eyes!
That's all for now, hope you enjoyed your visit and will come again soon

Friday, May 13, 2011

What's Bugging You?

Well I suppose poor old Blogger has been bugging a lot of people today!  A big THANK YOU to all the people who've been working hard to get our beloved blogger back up and working - I'm sure I'm not alone in saying how much it's been missed over the last couple of days.  We're really very lucky to have something like this that connects so many people, that usually works so well AND that's free to use and enjoy.

Friday is Daring Cardmakers Day and thankfully Mr B. was back in time for it not to be a Daring Saturday instead.  A bit of a special one because this is the one we're using for Stage 2 of our DT Call - though a lot of the girls who applied in Sate 1 have "been practising" by joining in with some of the recent challenges too - it's been great to visit their blogs and start to get to know them.
It's Lynda here and it's my turn to set the Dare for this week:-
The Darlin' BUGS of May
I'd like to see some BUGS eg ladybirds, bees, spiders, caterpillars, butterflies, dragonflies - it would be lovely to see them taking centre stage on your card or be used as a lovely embellishment but I won't accept them if they're just printed onto your backing papers as that wouldn't be a challenge at all!

Although I hadn't a clue what to do about it I did know I wanted to make something with a "bee happy" sentiment.For a time I wondered if I could sneak the Winnie the Pooh card that I did for another dare a few weeks ago through the net for a second airing but I didn't think Lynda would let me get away with that hehe
.  Eventually I came up with this - sorry for the fuzzy picture - the photo isn't fuzzy on my photo screen but once it got on to the blog something weird seems to have happened.
 I used:
Blue background created with Broken China and Faded Jeans Distress Inks
For the flower; Red and black card, Glossy Accents, Yellow beads
Bees; cut with Craft Robo, Yellow, White and Black card, Pale Blue ink, Black Sharpie, white gel pen
Sentiment; cut with Craft Robo, yellow and black card
Other: Lace, Ribbon, Green Leaf Braid.

I'm happy to email a copy of the templates for the bees and the bee happy sentiment I've used for this card - contact me via the email link in the sidebar if you're interested.
The Daring Design Team have come up with a whole host of buggy cards this week so please do buzz on over  to the BLOG and have a look - they are fab.  We'd love it if you'd join in with us this week 
go on, I dare you!
Thanks for visiting


Friday, January 07, 2011

The return of The Daring Cardmakers!

We're back after our Christmas Break and as we so enjoyed the monthly series of birthstone dares last year,  we've decided to do something similar this year too. 
For 2011 we'll be setting aside the first dare of each month for a Flowers series of challenges and we'll be taking inspiration from the flowers associated with each month.
The flowers associated with the month of January are the Snowdrop and the Carnation, so we have some fabulous flower inspiration to start off the year.
That said, it was only yesterday afternoon that I managed to come up with an idea for my card and even then I changed my mind halfway through making it!
The background image was printed directly onto my card and is one of the photographs we took on a visit to Benington Lordship (did you watch "Just William" on TV over Christmas?  The house at Benington Lordship was used as Violet Elizabeth Bott's home in the first episode...) at snowdrop time a couple of years back. I'd planned to find a quotation to use and add another photo of two snowdrops as the main focus.
Instead, I found this legend about the flower and thought it was perfect - at this time of year we're all filled with hope for what the new year will bring, aren't we?  I then decided to see if there was some simple clipart out there that I could make into a Robo template.

I've cut the leaves of the plant in several layers and glued them together only in the middle so that the leaves can splay out from the card.  The snowdrop flowers have four or five layers and some are raised on tiny pieces of chipboard to get the dimension.  I love snowdrops, somehow they really lift the spirit when you see them bravely peeping through the ground in the depths of winter - they really are a sign of hope that Spring is on its way.
I used:
Photographic image resized and printed directly on to a smooth white card blank, The legend was found on the net and printed onto the same type of card
Wide grosgrain ribbon (Ribbon Oasis)
Snowdrop Template made for the Craft Robo and cut from Bazzill card
Gems in corners of the card (Kaiser)
If you would like a copy of the snowdrop template, please contact me via the email link in the sidebar
Please check out the beautiful Snowdrop and Carnation cards over on the Daring Cardmakers blog and join in if you can as we love to see what everyone makes each week.
 Just before I finish, a quick note about the Funky Hand Design Team - Anice is currently looking for new members to join us working with her wonderful products.  Funky Hand has some exciting new developments in the pipeline so it's a great time to get involved.  he deadline for being considered is today, so you'll need to be quick - check out Anice's BLOG for further information - and Good Luck.

Saturday, November 20, 2010

As Mentioned Yesterday...

Yesterday I mentioned that I'd made a card that I wasn't too happy with and said I'd show the original and the  new version  to see what you thought.  So here goes
This is the original:
 I just thought it all looked a bit busy and messy, so I pulled it apart and used the same template (the other way round), the gifts, faux brads and photo corner to make this version
 

 I used: 
Square Gift (my own for Craft Robo), 2 gifts with curly bows (Crafty Templates): all are Robo cut
Paper GCD "Paris Nights", Photo Corner die (Spellbinders "Hardware Hinges") 
Faux Brads small circle form a Cuttlebug flower die, 
Oval (Spellbinders Nesties), narrow cream and gold ribbon (stash), "70" numerals (Robo cut), 
tiny flourish and sentiment are from a sheet of homemade transfer rub ons (Craft Computer Paper)


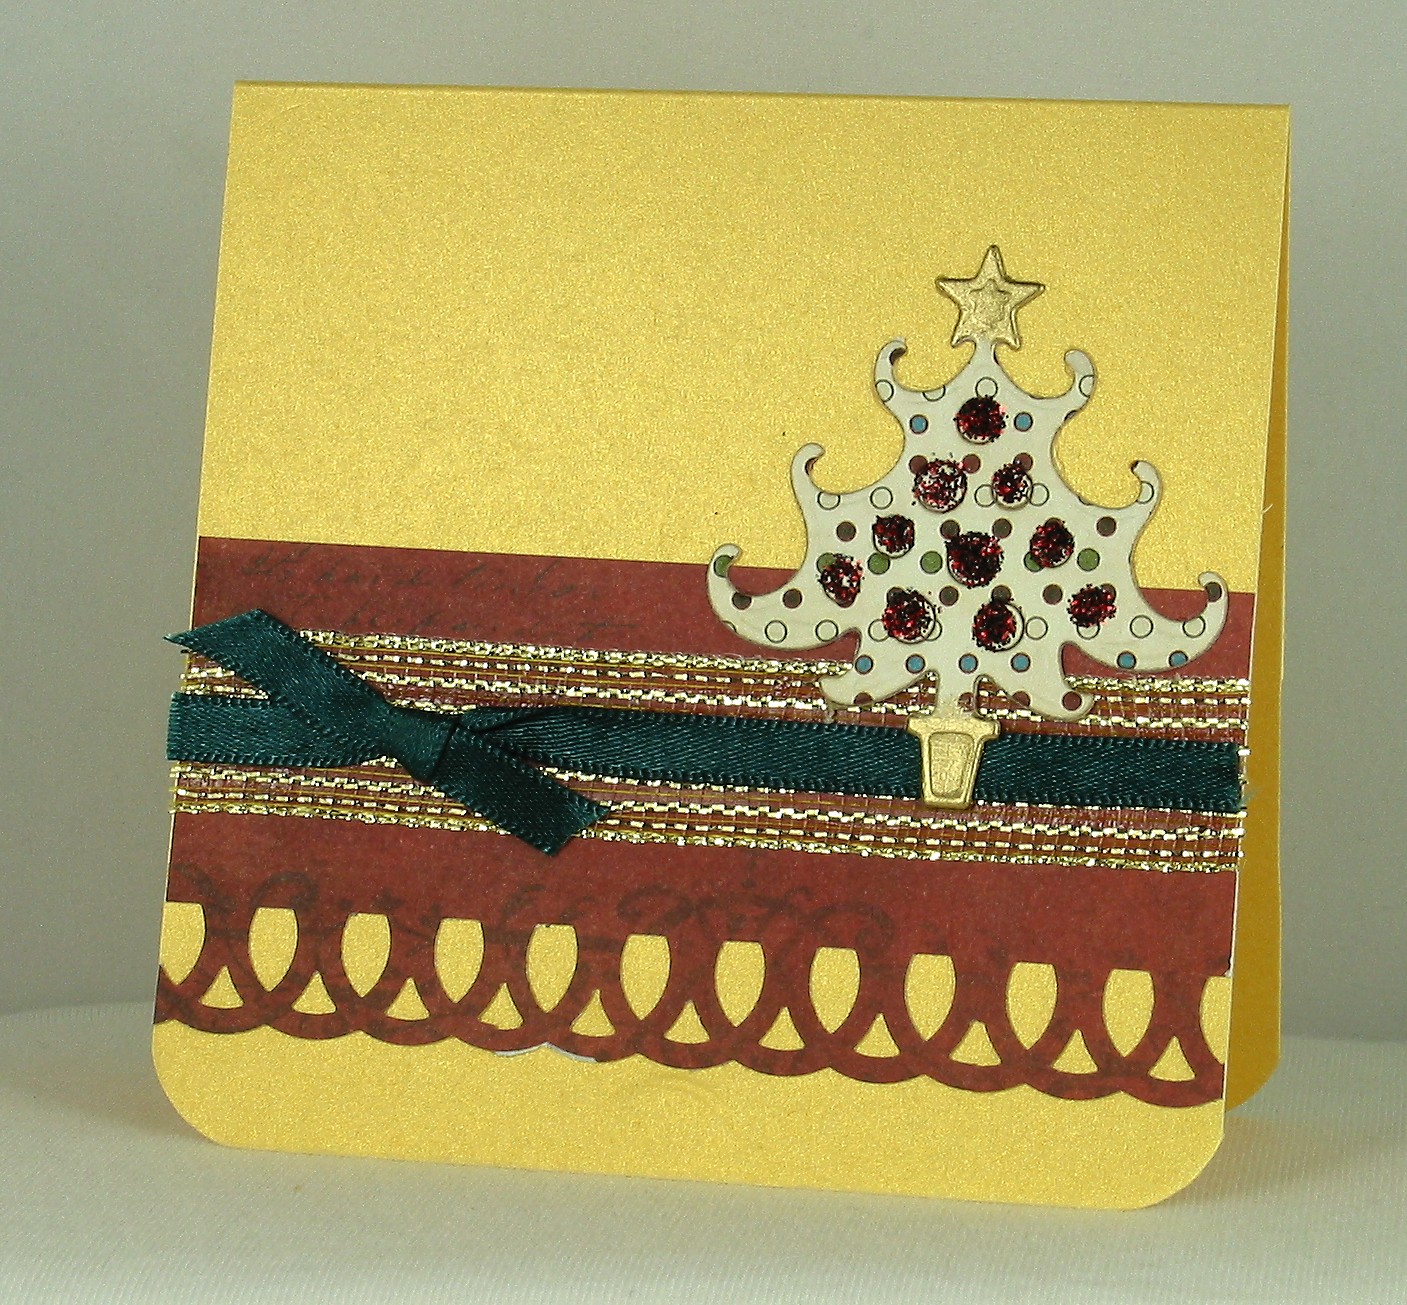
I had a pack of freebie mini cards in my last card order from PDA Woodward, so I#ve used some of them to do Christmas cards.  There are about 10x10cms and the card is "stardream" so has a lovely pearly, shimmery finish. 
ASnd yes, there are some more baubles!

 Papers on the above are GCD
The template for the three bauble shapes shown here is available, free of charge 
- email me if you would like a copy

The trees are from the Spellbinders "Fanciful Holiday" set. papers are Websters 6x6 collection pack.
 Gold mesh ribbon, green satin ribbon (stash) holly trim from The Ribbon Girl

I've got to go and make some tags now so that we can wrap the presents we've bought so far.  I don't really enjoy making tags so they'll be pretty simple I think. 
Enjoy the rest of the weekend

Friday, November 19, 2010

We 3 ..........

Its my turn to set the challenge over on the Daring Cardmakers this week.  For some reason I had the words of the "We 3 Kings" carol in my head and the idea of a We 3 "somethings" title seemed quite interesting.  It doesn't matter if it's kings, cupcakes, houses or even baubles (hehehe), as long as your cards feature a group of 3 it counts for this challenge - the theme is open so if you want to make Christmas cards that's fine, but if you don't, that's fine too.

If you're up for giving yourself an extra challenge - see how mahy groups of three you can get on there - 3 brads, buttons, papers etc for example

It seems that it's a recurring problem that those setting the dare struggles most to make their card - this one was no exception, and let's face it, it's not the trickiest subject we've ever come up with.
I did want to make a 3 Kings card - probably because I've not done anything like that yet - and I have bauble fatigue so couldn't face using those, even if it would have made it easier on myself!

Card one went in the bin.

This is card two - and I took the photo before the Stickles was dry, I should really have done another one but I didn't have time.
The crowns are all made using free colouring pages or clip-art as starting points for making the Craft Robo templates. The left and right crowns are layered so that the coloured Bazzill shows through the holes. The various "jewels" (also Robo-cut from Bazzill) were then adhered and some Stickles added for a bit of glitz
I used:
gold card, Bazzill card (purple, red), gold glitter card
swirl die cut (Spellbinders Fanciful Holidays set), oval die cut (Spellbinders Nestie)
star punch (EK Success, I think) Stickles (Christmas Red, Starry Night, Icicle), 
red flatbacked gems, pc generated verse
Crowns - Craft Robo template - email me if you would like a copy

I also made a second card, this time using the November template on the Sketch File - but I don't like it very much - so I'm going to pull it apart and redo it.  Once I've done that I'll put pics of both on here and I'd be interested to hear what you think.  If you've not come across the Sketch File before, please pop over and have a look, it would be fab to see more people using the sketches.

The DCM team have, as always come up with some fab cards for the We 3" theme and we hope you'll feel inspired to join in this week and make a card to share with us.  The challenge, the cards and the place to leave your message when you're ready to show what you've made is all on the DCM BLOG.  I'm really looking forward to seeing what everyone makes.
Right, I'm off to try and "fix" that other card now.
Happy crafting

Wednesday, November 17, 2010

WOYWW and TTSJU

Oooh it's a bit chilly today - I've got a severe case of CMH (Cold Mouse Hand) and no mistake, hang on while I go and get a coffee to warm me up....
Ok, I'm back - actually, I made a drinking chocolate instead

As it's Wednesday, its WOYWWednesday, so here's my rather surprisingly clear craft mat - ok, the periphery might not be clear, but the mat itself is looking quite spruce, don't you think?  If you're wondering what WOYWW is all about, then visit Julia's Stamping Ground and read all about this fab and fun weekly wander around web world. (ohhhh did you get all that alliteration? hehehe)
You can click on the photo for a really close inspection!

I thought  that as it made it's début here last week,  I'd add  my 'Tis The Season Journal Update today as well.  So far so good with the daily jottings, but I've jiggled the pages around a bit already, and added some extras, so a good job I didn't do the binding properly straight away. 

I've added a recipe and photos for the chocolate brownies I made during the week too.  It was impossible to write what happened in such a small square, but it should serve to remind me!  I took them out after the specified time at the fan oven temp, left them to cool for a bit and turned out onto the wire rack as instructed - only to discover that the thing to collapse as it was still far from cooked. aggghhh.  I didn't really want to waste it so I switched the oven back on, re-lined the tin, scooped all the mixture back into it and spread it out again then cooked it for a bit longer!  Well, surprisingly it turned out fine - probably not in the traditional Brownie style, but it tasted pretty good - I'd have felt really peeved if I'd used all that dark chocolate for no reward!
I've got my journalling pages ready for this week, though I've not written in them yet.  The Websters
6x6 pages work really well - I trim around the picture bits first, then cut the remainder of the page down to fit the journal page and glue into the book, then I ink around the image sections and glue them into place.  I'm mainly using the cut off scraps to make the journalling spots, and adding some Stickles for a bit of glitz.

And finally.....a couple of Christmas cards - yep, they've got baubles on - there's a surprise, eh?
I made the template for the garland from a free colouring page I found somewhere on the net - I can't find it now, which is a shame because I think there were some other nice ones I could have used too
First card uses: 2 shades green Bazzill, Spellbinders Nesties Baubles, Kaiser Dear Santa papers, Stickles (red, gold), gold crochet thread
First card uses: 2 shades green Bazzill, My own Craft Robo Baubles templates, Kaiser Dear Santa papers, Stickles (red, gold), gold crochet thread
I've added a "Shares" list in my sidebar of images and CR templates I can share with my Blogmates - click the links to see them, and in the case of Craft Robo templates, email me if you'd like a copy as I haven't a clue how to add them for instant download!  Obviously the CR templates are for personal use only and not for passing on to any third party.
Thanks for visiting, hope you'll have time to leave a message and to come back soon :-)

Friday, October 29, 2010

The Witching Hour

This week it's Nat's turn to set the challenge for the Daring Cardmakers and she asked us to use Hallowe'en themes - not necessarily using spooky images though, we could also choose to make cards simply using the colours associated with the occasion. What a good chance to use that in-you-face orange and purple combo!
It's been a struggle even to sit at my craft desk this week so it was just as well this one went together pretty easily. 
 For the pumpkins I used a kid's free colouring page to make a Craft Robo template, there are several layers to this one and some of the layers are raised on bits of chipboard to get more definition. I still had a few leaves lying on my desk from making last week's card so I've added them too.  The spiders web corners are also Robo cut.  If you would like the templates email me and I'll send them to you - but please be patient as it takes a while to make the instruction sheet!  If you just want the web template that's no problem though.
Craft Robo Template: Pumpkins and Spider Web

I've used the fab, and beautifully bright papers from the Funky Hand  Spooky Dookie download (just checked the link and I see that there's a big SALE on ;-))
I cut about 6cms off the front of my 14cm square black card blank.  Adhered a stripy panel of paper to the inside edge and the spotty piece to the front before sticking the pumpkin in place. The broomstick is just a few strands of raffia tide and trimmed, then glued to narrow strip of card.  There's a hand-cut witch's hat trimmed with purple ribbon in there too
Thought I'd add a photo of the card on a white background too as I can't decide which it shows up best on!
I've already mentioned there's a  Downloads sale on over at Funky Hand this weekend and on Create and Craft TV tomorrow (11am, repeated at 10pm) you can see Anice strutting her stuff and offering a very special TV exclusive price when you buy both the Papercraft Factory CDs together.  If you are in any doubt as to the quality of the sort of thing you can achieve printing your own papers with downloads and CDs just click on the images above - believe me, I was the same before I started using Funky Hand stuff.
Here's another of the Christmas cards I made for tomorrow's show:
The papers are from the Merry Berry set on the Colour Me Happy CD - none of the paper collections on the CD are aimed at Christmas but you'll definitely find lots you can use for festive projects (that's what the show tomorrow will be highlighting).  I think these colours work beautifully, greens, golds and gorgeous berry red.  I resized a couple of the designs to print 4 on a sheet of A4 - that's how I could get the tiny dots and the narrower stripes for the baubles.  
 Also used:
Spellbinders Nestabilities die, Gold card scraps, gold crochet thread, Home-made decal "rub-on", Krylon gold pen for a bit of a distressed edging on the red panel
That's me for now.  I have a new baby card to make, I'm feeling a bit better today and I've been putting it off till I felt I might be able to do it without making a hash of the job. I'm still not up to H.wk (obviously!)  but I'm getting a bit worried about the Everest proportions of the ironing pile.  I must be getting better just to actually be concious of its growing dimensions.
Don't forget to visit the DCM blog where I'm sure you'll be inspired by the spooky stuff and the wonderful vibrant Hallowe'en colours you'll find there - isn't it lovely to have a good excuse to use really bright, vibrant colours all on one card!
Thanks for looking, I hope you'll leave a message before you leave

Friday, October 08, 2010

Office Skills

Just when I thought I was getting a grip on everything it's all gone manic again.  Ah well better busy than bored.....haha
Friday lurches around again and that means a new challenge on the Daring Cardmakers' blog.  It's our lovely Rein's turn to set the dare and she's come up with the theme of "Office".  A great chance to raid the desk drawers and stationery cabinets for staples, paperclips, and all manner of office supplies.

I went to my drawer of "stuff that might be useful one day" - in there are pages from old books, playing cards, stamps and all sorts of other "stuff" that I can't bear to throw away just in case.....  I bet you've all got one!  A few years ago a forum friend had a clear out and sent bags of vintage bits and pieces out to all who wanted some - what a treat to find old book pages, buttons, lace, fabric and all sorts of other things - obviously all little treasures and far too nice to actually use on cards and projects - so into the drawer they went.!  Hunting through said drawer I found this page from an old typing manual which I thought could help with this card, I'm adding the page here too as a blog share for anyone who might want to copy it for their own projects - click on the image for the larger version.
The page gave me the idea of  trying for something evoking the old-fashioned secretarial image - the sort of office girls you see in those old 50's movies. Somehow those girls always looked so businesslike - but always feminine too - so I reckoned I could add a bit of lace into the mix (well, you have to take every opportunity, don't you?)
It looked better in my mind's eye than it turned out - but by then I didn't have time to pull it apart and re-do it - but you can't win 'em all.
I cropped and resized the lower section of the scanned page and printed it directly onto my card base, then cropped, resized and printed the photos at the top to use as embellishments. 
I used an image from google to make a Robo template for the old fashioned telephone (if you would like the template, email me at the address in the sidebar)
The vintage photo is from a sheet that came in an old Bubbly Funk kit.  The brackets on the definition are chipboard covered with black Enamel Accents (Charmed Cards and Crafts)
From the desk drawer I added staples, ring-reinforcements, parcel twine 
and one of those paper clip thing that probably have a proper name but I can't recall what it is!
I think what I don't like is the colour of the typing photos - so I might be able to get away with just tweaking the colour and printing them again - or printing them onto a creamier coloured card.
As usual the girls on the design team have made some wonderful cards using the Office as their theme, so please visit the DCM BLOG to see what they've been doing. We'd love you to join in and we always enjoy wandering around all the blog links that are left each week.
I'm off now to prepare the cards blanks and inserts,  and cut the other bits and pieces I need to make a set of invitation cards I've said I'll do.  Now, I've always shied away from such things as I'm so useless at doing two cards exactly the same - let alone a whole set!  So this should be interesting - I only need to make 15-20, so we'll see if I can cope, eh?  I'll let you know how I get on!
Thanks for popping by, I hope you'll visit again soon

Thursday, July 23, 2009

Round the Block

For the Bubbly Funk Shop BLOG this week I've been using the July Verbena kit again, and this time I've made a little memo block dodah. A few weeks ago I bought a really boring plain white mini memo block thinking that I might be able to make something with in. In the event, I divided it into three sections and I've used one section to make this: I couldn't decide whether to add a word or a name/monogram on it so in the end I opted to leave it blank - I can always add something later if I change my mind. This was so quick and easy that I'll be making more to stash away for little gifts. I might even make one to sit on my own desk - but maybe that would be just a bit too organised for me..... You can find out how I made this by visiting Bubbly Scrumptious, and see what the various components of the Verbena kit are by clicking HERE
Can I ask a favour? If you head over to see the full project - it makes such a difference to all the designers and contributors when messages are left for us, so please take a minute and please leave a comment on there - thank you.

Here's another shared image that I'm hoping someone will find useful. Click on the little pic to bring up the larger version which you can copy and save to your computer. If you use it, I'd love to see what you make so please come back and let me know.


Tuesday, July 21, 2009

Postcard, Twinchies, and a Vintage Share

I'm not sure what's happened to the hot sunshine we were enjoying a few weeks ago - now we're back to sunshine and showers - with more of the showers than I'd like to see. The good thing is that there's less need to water the veggies out in the garden - the bad thing is that it means getting soaked when I go out to cut the latest batch of courgettes - which are growing so quickly and abundantly that we could probably supply Tescos just now.

Rummaging through the "ephemera" drawer to make my Vintage themed postcard for SCD at the weekend I found all manner of old stuff. A few years ago a friend who loves accumulating old stuff had a clear out and sent bags full of vintage stuff out to those who wanted some. In my bag there was paper, tickets, pictures, stamps, lace, buttons, beads and all sorts of stuff dating back through the decades. Most of it I can't bear to use, but I did use some scraps of manuscript and book pages on the postcard - it reminded me of a card I made a couple of years back, also using some of Puss's goodie bag.

To make the flower I glued some of the old book pages on thin card and added some distress inks. After cutting the petal shapes I added more inking. The background is made from more inked paper, plus some ribbon and lace.

Among the treasures Puss sent were some old playing cards. I used one to make this postcard for this week's SCD Turquoise and Chocolate challenge.

There was no way I was going to use the actual playing card though, so I scanned it, then printed it out three times to use to make the background for this card. The swirl is a piece of a larger one that had broken, I used acrylics and inks to get the right colour, then added a tiny bit of turquoise Stickles before giving it a layer of GA. The flowers are Primas. the flower centre is made using turquoise beads dropped into Glossy Accents. The brad looked a bit boring so more Stickles and GA made it look more "at home"

I've been inspired by all the generous people out there who share their images for other crafters to use, so I thought I'd try to join in and share some of the things I have that might be useful to others. My first "share" is the playing card that you can download - I think this one is from the 1920/30s, but don't quote me!

If you click on the small image it should open a larger copy which you can download to your computer. If you do use it, please let me know, I'd love to hear how you made use of it.

I'll add some more Shares soon.

The Rosie-Dee challenge blog has "Babies" as the subject for this month's "Occasions" theme.
I've been looking at all the lovely "Twinchies" that are appearing on some of my fave blogs and itching to have a go. My DT spot gave me a great excuse to play with the 2 x 2" squares - especially as I knew I'd be needing a baby card and could use my twinchies to make it.
These are the twinchies I made, I'll put the finished card on here tomorrow.

Imaginisce papers, QK pram die, Robo-cut letters and tiles. various ribbons and brads from stash.

Gosh, this turned into a bit of an epic - hope you made it through to the end!

Thanks for looking :)