Friday, July 26, 2024

Christmas in July


Hello! 
Welcome to my little crafting place! Here's where I share the things I've been making, and sometimes other bits of waffle!

Friday is Daring Cardmakers Day and this week it's my super-talented crafty friend Nat setting the challenge!
 
Nat's challenge is...
 
 Christmas in July

If you want to get ahead with your Christmas cards and be done in good time before December, this challenge could be the perfect opportunity.

I know Christmas won't be on everyone's agenda, but you can still play along by featuring a festive colour palette on a card celebrating another occasion, or by giving your Christmas supplies a new lease of life on something non-festive.

***

As I said last time if you know me making Christmas cards before my birthday (September) and even then it's usually with reluctance!

However, I was nudged into thoughts of Christmas when I recieved my Affiliate package for the July club kits from Spellbinders which have a Christmas vibe! There was holly, poinsettias and lovely foliage and I just love using that sort of stuff on my cards!

So Nat's challenge had a flying start really!

There was a piece of corrugated card sticking out of the pile of cereal packet and other recycled bits of card I keep for adding dimension etc. 
 I love this stuff as the ripples are really small and its very easy ti removethe paper layer with a quick squirt of water and a pointy tool to lift it off!
It comes from Tesco Finest croissants if you're interested🤣😆

So I used the pael of card matted onto a piece of gold paper (gold envelopes that were useless for writing on!)

I used the lovely July Glimmer of the Month plate  foiled onto inked card for the large holly sprig, and also made the JOY sentiment from the same set. Next I added the poinsettia and foliage cut using dies from July's Small Die of the Month  
Rge wax seal was a bit of an experiment.  I used an old die set with small hollu leaves to die vut the holly from some thinky spread wax then made the seal in the usual way gluing the leaves in place  trying to add a tiny amount of red wax for the berries - that bit was a step too far for my abilities so I popped so,e red gems on instead!  

 
Anyway, I hope you like it and if you have any tips for easy ways to add 'extras' to wax seals then please help me out!

*****
Just a Note

If you buy from Spellbinders and you're happy to help out a crafty
 friend with a stash addiction...
  HERE is my Affiliate Link to the Spellbinders store - you can use it to access the store any time, and I'd really appreciate it if you did, don't worry, it doesn't cost you anything!
There's a UK based shop now, so you can use the 'Visit Our UK Store' button at the top right of any page on the Spellbinders site  

******

Thank you so much for coming by.
 
 Happy Crafting, Take care of yourself,
Kathy xx


Friday, July 19, 2024

The Sky’s The Limit


Hello! 
Welcome to my little crafting place! Here's where I share the things I've been making, and sometimes other bits of waffle!

Friday is Daring Cardmakers Day and this week it's my lovely friend Shabneez setting the challenge!
 
Shabneez says: 

The Sky’s The Limit
This time I'd love to see your creations featuring the sky, whether day, night, sunrise or sunset.
Maybe a scene with flying 'things' eg. balloons, birds, planes, or insects...
Or perhaps you'll make a deep space themed card.

Or with 'Christmas in July' in mind how about a snowy sky?

***

Those who know me will probably raise their eyebrows at me voluntarilly making a Christmas card for this challenge!  I mean, I could have made a sunset or a blue sky with kites and balloons or butterfliexs - all favourites of mine, but I CHOSE to go Christmassy!

Normally I'd be running kicking and screaming away from the very phrase "Christmas in July", but the first couple of weeks of July were sio miserable that thinking about Christmas didn't feel so weird!  Added to that, this month's club kits from Spellbinders have a Christmas vibe and when I opened them I went "Oooh!" rather than "Nooo, not yet!", because there's flowers and foliage and love using that sort of stuff on my cards,  So, I was kind of in the mood


I started by inking the front of my card - there must be at least 10 shades of ink on this, building up from light blues and sea shades to the deeper royal blues and night sky shades, which is why it's not just a flat colour.

Next I dug out an ancient die plate with smaller sizes of snowflake designs on it and cut two lots in white Bazzill (Avalanche, I think). I glued them on to the background, hand cut a curvy piece of the same card to go across then added some twinkly silver gems and a few tiny circles of white card to finish the background

I made a few snowflake wax seals using the seal from Spellbinders July  Wax Seal of the Month club, I wanted a dark sky colour so tried a few mixes of blues/black/purple then added white gloss pen to highlight the designs.  I chose my favourite to use on this card

 To finish I added a little sentiment, printed a few out in the navy on white, and changed the settings to do white on navy.  So I can make more like this, or variations on the theme as it turned out reasonably simple and quite striking - just how I like my Christmas cards to be!

*****
Just a Note

If you buy from Spellbinders and you're happy to help out a crafty
 friend with a stash addiction...
  HERE is my Affiliate Link to the Spellbinders store - you can use it to access the store any time, and I'd really appreciate it if you did, don't worry, it doesn't cost you anything!
There's a UK based shop now, so you can use the 'Visit Our UK Store' button at the top right of any page on the Spellbinders site  

******

Thank you so much for coming by.
 
 Happy Crafting, Take care of yourself,
Kathy xx


Monday, July 15, 2024

July Spellbinders Clubs: Wax Seal

   Hello!

Welcome to my little crafting place!
It's Christmas in July with this month's Spellbinders club kits and this time I've the first of my Wax Seal projects to share
 
As usual I started by making a batch of seals in different styles and colours, I fond its a good way to focus the mind on what sort of card or other item I could make.
Here's a few of those I made. Mostly I used the white wax that comes in the set this month then cut out the circle while it was still in the stamper just by running a knife around the metal stamp part.  Then I melted other colours of wax and presses the stamper (with the snowflake still in place) into the poured wax.
I also played with adding foil flakes to my wax before stamping, or glitter or minute pieves of pastel shades of wax.  You can really go made with experimenting becuase it its n unholy medd you just reheat and do somehting else!

This pretty snowflake seal from the
Wax Seal of the Month club comes with white wax beads    
  I made this seal by cutting out the snowflake from the white imprint - it was fiddly, took absolutely ages and its definitely not perfect, but I still like it!
While melting some mixed blue and silver wax, I heated the empty seal stamper a little then pressed the spindly snowflake back into it (it just falls out if you don't warm the metal a bit) then stamped the seal into the wax.
 
For the card I found some matching card, then added silver foliage using the 
   
and a sentiment from  the 
Glimmer of the Month set foiled in blue 


Note
~~~~~~~~~~~~~~~~~~~~~~~~~~~~~~~

  THIS is my Affiliate Link to the Spellbinders store 
-  you can use it to access the store whenever you buy from Spellbinders
It doesn't cost you anything, but I may get a little reward for pointing you there.
There's a UK based shop now, so you c use the 'Visit Our UK Store' button at the top right of any page on the Spellbinders site 

~~~~~~~~~~~~~~~~~~~~~~~~~~~~~~~

Thank you so much for coming by

 Happy Crafting, Take care of yourself,
 
 Kathy xx

Spellbinders' July Glimmer of the Month Club


  Hello!

Welcome to my little crafting place!
 There's a Christmas in July vibe throughout this is month Spellbincers club kits and as usual I've got the Glimmer, Small Die and Wax seal sets to play with.
 
If you have a hot foiling gadget, I think you'll love this month's set -it's perfect for making simple and stylish Christmas cards as well as being fun to 'fancy up' with die cuts, ribbon and layering

card 1

I've used the Glimmer plate, gold foil and stencil from the July Glimmer of the Month Club to make this one, but this fabulous set also has the outline cutting die and a super-useful two part sentiment and matching cutting dies.

I decided on a lovely deep green base card, then backed the hot-foiled and stencilled focus piece with white and gold card.  I could have added a sentiment and left it at that, but instead I can a gold and green die cutting session with the poinsettia and foliage dies from the Small Die of the Month set   

 
Below is the Hot Foiled image filled in using the stencil and a few shades of green and red inks
 
card 2
 

This time I used the Glimmer plate, gold foil and the matching cutting die from the Glimmer of the Month Club,  and added it to a white base card with a curvy red lower panelI've used just the JOY Glimmer sentiment from the set, but you also get 'wishing you' in a lovely script font

The card didn't really need much more, but I couldn't resist anadding a red and white gingham bow


Note
~~~~~~~~~~~~~~~~~~~~~~~~~~~~~~~

  THIS is my Affiliate Link to the Spellbinders store 
-  you can use it to access the store whenever you buy from Spellbinders
It doesn't cost you anything, but I may get a little reward for pointing you there.
There's a UK based shop now, so you c use the 'Visit Our UK Store' button at the top right of any page on the Spellbinders site 

~~~~~~~~~~~~~~~~~~~~~~~~~~~~~~~

Thank you so much for coming by

 Happy Crafting, Take care of yourself,
 
 Kathy xx

July Spellbinders DOM club


Hello!

Welcome to my little crafting place!

This month the Spellbincers club kits celebrate a little bit of Christmas in July and will help you  plan your Christmas crafting, or get a head start on those Christmas cards!

The Small Die of the Month club is right up my street with lots of foliage and another poinsettia die for my collection (you can't have too many), but also, just to give a hint of Winter Sports there are dies that make up a fabulous ice skate too.

I've used a soft sliver-white glitter card for the boots and matte silever card for the blades, then cut a load of the various foliage shapes in grees and silvers and the layers for the poinsettia in bright red.

I decided on a curved deep bloue background to sho off the silver and red, and added a red satin bow and some silver thread strands for even more texture

I love the versatility of the two part sentiment from 
.  I hot-foiled both parts  in shiny red and used the matching dies to cut them out
 
 
Note
~~~~~~~~~~~~~~~~~~~~~~~~~~~~~~~

  THIS is my Affiliate Link to the Spellbinders store 
-  you can use it to access the store whenever you buy from Spellbinders
It doesn't cost you anything, but I may get a little reward for pointing you there.
There's a UK based shop now, so you c use the 'Visit Our UK Store' button at the top right of any page on the Spellbinders site 

~~~~~~~~~~~~~~~~~~~~~~~~~~~~~~~

Thank you so much for coming by

 Happy Crafting, Take care of yourself,
 
 Kathy xx

Friday, July 12, 2024

Cheers!


Hello! 
Welcome to my little crafting place! 

It's Daring Cardmakers Day again and this week it's Joanne in the hot seat setting the challenge!
 
Joanne says: 

Cheers!

Let’s raise a glass to our shared hobby this week — whether your favoured tipple is beer, wine, champagne, orange juice, lemonade, cocktail or mocktail, show us what you’re drinking. 

Salut! Sante! Sláinte mhath!


This isn;t the card I was planning to make!
At the weekend I'd treated myself to an hour or so playing with my wax seal making stash.  Among the seal stampers I bought a few weeks back (and haven't had the chance to try out yet) was a cute little drinking glass which would be great to use for this challenge.  I made a few seals I was fairly happy with, but then looking around for what else to use on my card I got diverted by the different glss shapes I found in my die collection!
I couldn't think how to work my wax seal into a card with the 'cocktails' I made, so made this instead
All the dies are by Spellbinders, though from different sets, some old some new

I thought it was a bit of a shame that I'd not managed to use a wax seal after all, so I thought I'd see if I had any paper pads that would work with one of them, and was lucky that I found an old Carta Bella 6x6 pad within just a few minutes - lucky because I would probably have lost the inclination if I'd had to go through too many boxes of paper pads!

So I made this one just using paper from the pad  for the background and the sentiment, and just needed to add a little loop for extra interest

 
*****
Just a Note

If you buy from Spellbinders and you're happy to help out a crafty
 friend with a stash addiction...
  HERE is my Affiliate Link to the Spellbinders store - you can use it to access the store any time, and I'd really appreciate it if you did, don't worry, it doesn't cost you anything!
There's a UK based shop now, so you can use the 'Visit Our UK Store' button at the top right of any page on the Spellbinders site  

******

Thank you so much for coming by.
 
 Happy Crafting, Take care of yourself,
Kathy xx

Friday, July 05, 2024

July Pastels


Hello! 

Welcome to my little crafting place! 

It's Daring Cardmakers Day again and as its the first Friday of the month its time for thekind where we challenge you to use whatever elemsnts you like from the photo.  This time it was my turn to come up with a moodboard and I thought that after Rizwana's 'brights' of last week I would go 'pastel' with my colour theme

 July Elemental Inspiration
 My moodboard is all about Summery, Pretty Pastels and I hope you'll find plenty to inspire your creative juices within the frame!
Of course you don't even need to use pastel colours - you can choose any 3 (or more) 'element's from the mood board to use when you get creating!
Ideas: rectangles, wheels, vehicles, cake, drinks, 
flowers, colours, fruit, scripty fonts, layout...
 
My card is based around the tall rectangle with the flowers in it. 
So I used colours from the moodboard, the flowers, a rectangle, the scripty capital letters and a few shiny silver gems inspired by the headlamp on the scooter!

Are you bored seeing this flower stem yet - I hope not because it's still my favourite and I'll be using it for a while yet!
 
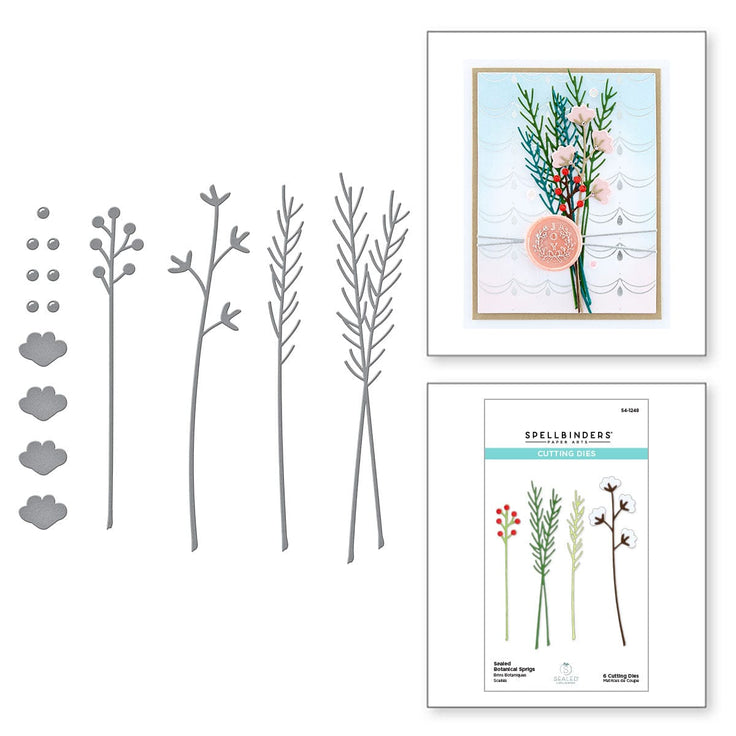
: Sealed Botanical Sprigs  by Spellbinders

The background rectangle is inked with a few shades, then sprayed with water.  The petals were cut using suitable shades from my scraps as were the stems. I addedsome tiny silver gems into the flower panel then 3 larger ones to the side
The letters were die cut using a couple of different alpha sets - I'm not convinced they work on this card so I may end up doing a 'refurb' 😀
 
*****
Just a Note

If you buy from Spellbinders and you're happy to help out a crafty
 friend with a stash addiction...
  HERE is my Affiliate Link to the Spellbinders store - you can use it to access the store any time, and I'd really appreciate it if you did, don't worry, it doesn't cost you anything!
There's a UK based shop now, so you can use the 'Visit Our UK Store' button at the top right of any page on the Spellbinders site  

******

Thank you so much for coming by.

 Happy Crafting, Take care of yourself,
Kathy xx