Wednesday, December 26, 2018

Let's Decorate

Hello
Happy Boxing Day!
I hope you're having as lovely Christmas time, and enjoying it however you are spending the holiday period.  
Like many households I expect, OH is spending the day trying to set up various new itoys and update other techie stuff.  Which gives me a few minutes to do some updating of my own - namely my much-neglected blog.  It was manic here over the last days of last week and over the weekend and I just didn't get around to blogging my project for the Daring Cardmakers on Friday:

 This week, it's the last challenge for 2018 and time to take a final "Step Away from the Cards", we've called it
  Let's Decorate!
and really it's a chance for you to share whatever else you make, or arrange for Christmas.  We would love to see your sewing projects, Handmade Decorations, Table centres, Crackers, Other home décor - absolutely anything really!


I'd actually made something for this challenge a few weeks ago, but took it to the Southwold holiday flat for the tree there - meaning to photograph it in situ. Thankfully I'd made a paper version as a practice piece as I totally forgot those photos!
So, please imagine this star in pretty card, gold on one side and silver on the other, much smaller and with thinner card strips, sitting atop a Christmas Tree and that's what you should have seen here!
Instead there's my practice one, just made in simple copier paper.  The strips are each about 1x21cms.  The gold version is about half this size and more delicate.

That's all really!
Thank you for popping by.  
Next I'm hoping to catch up with sharing some of this Christmas's card designs.  As usual it was only in the last minute rush that I came up with some card designs that I liked enough to make a few of! Is it only me this happens to?
Happy Crafting

Friday, December 14, 2018

Snowflakes Falling: Hot Foiling Adventures no 3

Hello!
How's it all going with you?  Everything ready for Christmas now? We'll not mention just how far behind I am.....
Straight down to the business of The Daring Cardmakers today:
This week our theme is
Snowflakes Falling
One snowflake or a whole blizzard, perhaps a snowman, or a whole snowscape if you like - just keep it snow-themed for your card this week, and remember, it doesn't have to be a Christmas card.

As far as I'm concerned the snow can just stay away all Winter.   I probably say this every year but I wouldn't mind the white stuff if it only settled on the gardens etc and never made the roads and paths so treacherous.  Being a born worrier I can never rest until I know that those I love are safe and sound and not travelling.
However, I love snowflake shapes especially when it comes to extending my die collection and I'm pretty sure it's impossible to have enough of them!
So I used quite a few to make  couple of similar cards this time, and experimented with  some hot-foil layering too.  I won't be sharing the version where my spatial awareness capabilities went to pot though!

 Info
For the  hot foil layer 1 a few of my smaller regular dies were laid onto the heating platform, then the foil (pretty side down), then the pale aqua pearl cardstock and finally a shim. It doesn't matter if some of the dies extend past the card, just be sure the shim (or you could add a piece of paper below the shim) is big enough to catch any stray foiling.
Because regular dies foil only where the cutting edges are, you get a lovely delicate background pattern
For layer 2 I used a hot-foil stamp plate ( I think this one is by CraftstashUK). You need to keep the stamp in position on the card, I use washi tape to do this and prepare the stack on my craft mat so I can get it all lined up.
  
At this point I have a tip for you:  I find it a bit fiddly cutting the slippery foil to shape, so I male a template using a scrap of card to roughly draw around the stamp on, cut the shape out leaving a small margin, write on it to label it then store stamp and template together.  It's much easier to cut the foil using the template than the actual stamp 

The foil needs to be between the card and the stamp so once I've decided where the stamp needs to be and use a small piece of tape to fix it and act as a hinge when I tuck the foil in place.
The stack (on the craft mat) will be:
Card
Foil (pretty side up),
Hot foil stamp, face down (add more washi tape to hold everything place)

Now turn the whole lot upside down and place on the heating platform
Add the shim and allow to heat through before rolling slowly through your die cutter a couple of times.
Layer 3 is the same as layer 2, but I used red shiny foil and a Spellbinders Hot Foil plate
The second card was made in pretty much the same way, just  finished off differently.  The NOEL hot foil plate is also by Spellbinders 

Info
Hot foiling as above
Gold paper added to card base
Die cut snowflakes added to the large hot foiled snowflake

Extra small die cuts and gems added to both cards

Hope you like them, and the instructions make sense, though I suspect they make more sense if you've actually got a hot foil gadget!
Have a great weekend
Happy Crafting

Tuesday, December 11, 2018

SnipArt Tree: Hot Foiling Adventures no 2

Hello
Over the last few weeks I've been continuing to experiment with my hot-foil machine and I thought it was about time I blogged another project.

I've been having a go at making my own hot foil 'plates', and will share how I got on another time - I've had to put that project aside while I concentrate on trying to get my Christmas cards done.  But having learned that it was possible to so it, I realised that you could probably also use those lovely laser-cut designs too.  I have a few pieces of SnipArt that have come in kits and I thought it was worth trying the idea out with this swirly tree.
To use the SnipArt shape as a hot foil plate, heat your machine and cut foil to size cutting off any corners as usual,to leave a 'softer' outline.
Now build your stack on the hot plate; 
*your cardstock
*the foil (sticky side onto the card)
*the SnipArt piece
*a shim 
Close the lid.  Leave to heat for a minute or so then run back and forward SLOWLY through your die-cutting machine a couple of times 
(I use my ancient Cuttlebug)
Allow to cool slightly before peeling the foil from the card.

This shape worked really well and I love the foiled tree. I used green foil on the top card and gold on the lower one - but they both look similar in the photo! If you are careful you can get several uses out of the SnipArt shape before it begins to get a bit too tatty.  It might be worth buying two of the ones you like best!

I was going to show you an example of foiling using a SnipArt piece that didn't work so well but I can't find it atm.  It was a lovely laser cut, but probably a bit too intricate to work as well as I'd hoped.  When I unearth it from the junk heap I fondly call 'my craft desk' I will show you thouhg.

All for this time, thank you for visiting

Saturday, December 08, 2018

December's Elemental Inspiration

Hello

Well,. my rubbish blogging has gone to new lengths this week!  Usually even if I blog nothing else all week, I at least manage to post my project for The Daring Cardmakers on the right day.  But not this week, here we are at mid-day on Saturday typing furiously in an attempt to get in done before I have some lunch.  Which is likely to take some going as I fear any minute now the cry "What's for lunch" will be heard from OH.

So without any more waffle, here's my card for this week

    As usual our first challenge of the month is an
     Elemental Inspiration Challenge
     For December we have a beautiful Christmas decor picture which we hope will inspire you.
     There are lots of elements to choose from and you just need to pick a minimum 3  to use when making your card.  If you choose to use the colour palette, then that would count as one of your elements

    Visit the blog HERE to see what the team have made
    
    Suggested elements include; Tree, Brickwork, Ship, Snowflakes, Baubles, Stockings, Gifts, Books, Mirror, Greenery, Succulent Plants, Tray of Nibbles

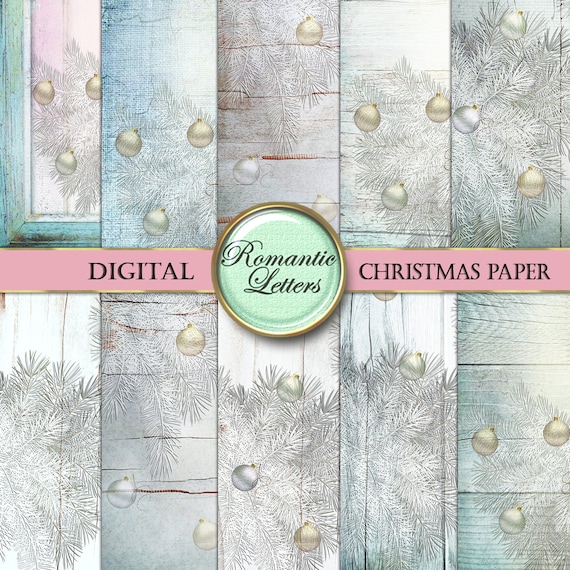
 I chose the snowflakes, the frame on the wall and the greenery - but of course I couldn't resist the lovely [ale turquoise shades, could I?  Especially when I was browsing some digi papers I downloaded a couple of weeks back and noticed that one of them actually features the perfect frame as part of the paper design! 


Info
 I resized my chosen paper design so that I could pring it directly onto the front of my 14cm sq card.  Sometimes I need to trim a tiny piece off each edge of the card to get this right but I was lucky this time and it was perfect.

This beautiful paper download is from RomanticLetters via etsy
The baubles were made using a couple of dies for the bases, then a whole variety of snowflake dies cut in various kinds of gold, white and turquoise card.
I added some tiny die-cut holly from a holly sprig die, and berries from whichever tiny circle dies I could find. 
A length of gold twine was glued behind each bauble shape and more twine used to create tiny bows.
To finish a little gem was added to the centres of the baubles and NOEL was cut from red glitter card using one of my favourite Spellbinders sentiment die-sets from last year.


That's it for this time, one day I'll get caught up on here and share some more of my Christmas cards.  It's been a bit like trying to drag a boulder out of the ground getting them done this year.  That naughty BFoP (Bad Fairy of Procrastination) has taken up residence and just won't flippin' leave!

Ah well.....


Have a great weekend