Monday, February 28, 2011

Work Begins

We spent the weekend moving the computers and desks into our temporary study and today the builders have arrived to start the renovation work.  Hopefully the internal insulation will make a big difference to the room even though it means losing a few cms of floor space. They also decided that the wall (where my craft stuff used to be) is in too much of a mess just to re-plaster so it's got to be boarded too - another couple of cms lost there then - good job it's quite a big room, eh?  That leaves just one wall good enough to be skimmed - all the walls and ceiling will be done and there'll have to be new windowsills, a new radiator and lots of new power sockets added.  Once all that's done the painters come in to do their stuff - and then the exciting bit - we're raiding IKEA for new desks, shelving and various drawer/basket/box inserts to put in them.  We've been daubing the walls trying to decide on a new colour - and even sticking sheets of Bazzill and scrapbook paper up for more ideas!
We think the "coral" one might be the one we go with.  The shelves/desk will be "birch" coloured and most of the inserts white. 
Anyway, till the new room is sorted we're in the spare room - three desks, some of my craft junk plus all the stuff that lives in here the rest of the time - a great big sofa bed, a folding bed, my sewing cabinet and even a big vanity unit that was here when we arrived!  At least there's not much floor to manoeuvre the vacuum around!


It'll be cosy, at least!  Not sure how we'll manage on hubby's work-at-home days.
Today I'm struggling to get started with any crafting - I've got a dreaded man-card to get in the post in the next couple of days and haven't a clue what to put on it yet.  So here I am, blogging by way of procrastination and blaming the building noise for lack of motivation.
This is the finished version of the robot card that was on my desk last WOYWW, plus yet another cake themed card.
I used:
 Papers, Wobble card template and Robot all from Craft the Year Away (Funky Hand)
I used the workspace feature to import the spotty design onto the wobble card template.
Robot  image converted for Craft Robo cutting,
Letters, number and spiky speech bubble created on Craft Robo
Scraps of Bazzill, Wire, Tiny buttons, Large lime green jewel bards, Glossy Accents
I used:
Ready coloured version of the tiered cake digi-image and all papers from Craft the Year Away (Funky Hand)
Scalloped edgings cut on Craft Robo, Spellbinders scalloped circles, Yellow ribbon, tiny gems from stash
Well, I can't really put it off any longer, I've got to make that card.
Thanks for visiting

Friday, February 25, 2011

Bargain Hunting

The Daring Cardmakers DT have all been hunting for treasure on the shelves of our local "pound" shops they'd be dollar stores if you're in the US etc or presumably there's a Euro  equivalent! 
 It was all in aid of today's dare from Samm dare - it's her first time in the dare-setter's chair so she's had time to come up with something devious like this! 
Anyway, once home with our new bargains we had to use them to make our cards.
Now some people always seem to find fab stuff in their local cheapo shops, but I never seem to do that.  I scan and scour the shelves to no avail - and these days it seems nearly every shop that opens is one of these stores so there are a few to choose from.
I spotted some tiny sprinkles shape thingies in the "nail art" section and immediately thought they might work for a cupcake card - plus it would give me the chance to use some gorgeous new papers that I bought recently and hadn't dipped into yet.  I don't think this one could actually be any more different from last week's Steampunk one!

It's a DL card and the cupcakes are a good size to work with  ie. not too fiddly!  I've cut the  cupcakes on the Craft Robo, there are three basic layers, the lowest is the the patterned paper, then the Bazzill "cake" colour and then the paper "icing" - I love working in layers like this as you get a great dimensional effect.  I cut enough cherry shapes in red Bazzill to make each cherry three layers - topped with some Glossy Accents and you get lots of lovely dimension and glossiness!
I used:
White DL card blank,
All papers, both plain and patterned from the "Springtime" collection by Echo Park (Craftz Boutique)
Cupcake template made using digi image from Craft the Year Away (Funky Hand)
Ruffled and twisted Seam Binding (Creative Treasures), 
teeny-tiny "sprinkles" from Nail Art section of Poundland
Bazzill card (lemon, chocolate, coffee), MS border punch, 
White pen for highlights, Glossy Accents

Click HERE to visit the Daring Blog and see more Poundshop treasures, and please have a go yourself, we'd love to see what bargains you find in your local cheapie shops!

Here's another card I made using two sizes of the same Funky Hand digi-image
 I used:
Lilac gingham and watercolour stripy papers from Funky Hand's "Craft the Year Away". 
Ready-coloured versions of the cupcake image also from Funky Hand's "Craft the Year Away".
Lilac Stickles layer for icing on large version
Nesties Large Scalloped Circles die, MS border punch, pink ribbon, red button, silver thread from stash
Instructions on how I make the "danglies" are on the Get Funky! challenge blog
Thanks for visiting today, please leave a comment, it's always a joy to know you've been!

Wednesday, February 23, 2011

Temping

WOYWW today so thought I'd share a couple of photos of my temporary crafting corner and what's on my desk waiting to be finished.  My stash is all over the place as the bookcase I have for storage while the study is being renovated is the wrong size for just about everything.  My big paper boxes are in the cupboard next door and the drawers with other stuff in are in the guestroom. Still, I'm lucky that we do still have a spare room that the crafting, and other office paraphernalia into while the builders are here - the work is due to start next Monday so we'll be spending the coming w/e moving the pc stuff - that will be fun!
Oh no, I got that wrong....That Won't be fun! haha
We're hoping that everything will be ready for moving back in about a month.
Here's a closer look at what I'm busy with atm:
A card for my cousin's little boy - it's been in that state for the last 3 weeks but now I really do need to finish it.  Also in this photo you cans ee a couple of cards I've been making for the next Funky Hand show on Create and Craft.  It's all about the new "real" stamps that were released recently and you know by now how much I love stamping......aaaggghh!  Actually, it's not the stamping so much as the colouring I can't cope with.
Next, something I finished by the skin of my teeth, Hubby's birthday card!
I was a bit stuck for what to do this year, but then remembered the "Builder" I made for Crafty Templates a couple of years back and thought that I might be able to tweak it to make a Veg Plot card He's been buy sowing seeds in the indoor propagator lately so I thought this might amuse.
I was pretty pleased with how it turned out, though I think I oversized the beans a bit!  I just didn't have time to cut them again.
I used:
Figure from Crafty Templates set (March 2009).
All other items are cut on the Craft Robo
I made the following cutting templates: seed tray/pots/ seedlings (all on one template), plants, carrots, beans, courgettes, seed packet are all separate templates - email if you would like a copy of these.
Lots of Bazzill card and lots of inking!

He loved it - then said "but, I don't wear those boots for gardening!"
What can you do? hehehe

A few reminders
Find out all about WOYWW on Julia's BLOG
Current Daring Cardmakers challenge is STEAMPUNK
Current Funky Fifteenth challenge is "Show us Your Heart"
It would be great to have you joining in!

Thanks for visiting

Monday, February 21, 2011

I've Moved!

Well, it's been quite a weekend.  Not only was it hubby's birthday yesterday, but we spent most of Saturday clearing yet more stuff out of the study ready for when the builders "move in" next week.  Consequently, my craft area of our study now looks like this:
Warts and all!  Manky flaking plaster, badly filled in old fireplace, loads of big screw-holes all over the walls (only a few of them mine!).  There's even an echo in here and our computer desks and the carpet are still in here. Next weekend we move those into the spare room too - now doesn't that sound fun......not!
I have set up my desk in the spare room and have one of the old bookshelves behind me to store some of my stuff on.  When I look at the photos it looks like the same room because of the wall colours but honestly, it's not!
When I was trying to put stuff away in this corner yesterday afternoon I got in a bit of a state trying to work out where it should go and what a mess the whole upstairs of the house was because of having to move everything out of the study.  I know it will be worth it, but right at that moment all I could see was chaos and the end of the journey seemed so far away. Stupid eh?
I've been sorting and clearing some of the stuff out as I go, but I know that most of that job will happen when we move back in - I won't wont my lovely new shelves all stuffed up with loads of tat, will I?  I need to look around for good ways to store all my "little things" so that they are accessible and easy to get at even in the "big" 12x12(ish) spaces the wall (where the Dyson etc are on the first phot) will be covered with.  We think  I will ahve about 50 of them to fill.  OHHHHHH YEAH!!!!!

Anyway, enough of that, I'll add more photos as the job progresses, and you must feel free to help with the planning and with any storage ideas! We're now trying to decide on paint colours....

Over on Get Funky! - which is the challenge blog for Funky Hand we're well into the second month of our new-look blog.  Instead of showing all our projects once a month, every couple of days one of the team loads their project and a little bit of info about how they made it and what they used.  This month's hostess is Jules who can't make anything, not a tiny thing without adding a heart on it somewhere!  So not surprising that she's chosen "Show us your Heart" as the theme for this month's Funky Fifteenth.  On the Get Funky! blog you can already see projects from Jules, Lou and Anice and today it's my turn to add something - this is the card I've made
Anyone can join in and make a "hearty" project of any kind  - and be in with a chance of winning a free download from Funky Hand!  It doesn't matter what you make as long as it features at least one heart - and of course you must use at least one Funky Hand product - to make it really easy each month there's a new Funky Freebie available - it'll be related to, and only available to download for the duration of the challenge.  Click HERE to visit the blog where you'll find out all about my card, see the other projects, find the links to the shop and the freebie and  how you can join in and maybe be a Funky Winner!
That's all for now, I'm off across the landing to my temporary craftspace now!
Have a great day, thanks for visiting

Friday, February 18, 2011

Steampunk!

Daring Day today and a brand new, and very "different" challenge has been set by our lovely, and very talented Rein - before that though, a quick reminder that if you joined in last week's dare, the winner of our prize draw has been announced on our blog today - you really do need to see if it's you who'll be receiving that wonderful prize from The Ribbon Reel.  If no one claims it I'm putting "first dibs" on it hehehe
Most of us had a little panic  (to say the least) when we saw Rein's dare on our calendar and went scuttling off to do some research hehe. 
You know all those wonderful altered art pieces you see with crazy "machines" being built from bodies, hot air balloons, clocks, flying machines and cogs, often with some butterfly wings thrown in for good measure - well it turns out that's a lot to do with what steampunk art is about.  There's loads of info on wikipedia's steampunk page, and some pictures too.  Over on the Daring Cardmakers blog we've added a couple of links to free downloads that might help too. 
So that's our challenge for this week, have a go at making something inspired by the Steampunk Movement, then let us know where we can see what you've made - go on, we dare you!
This is my card
I even bought a stamp set to use on this - and you know how I feel about stamping, hehe!  Mind you at least with these "arty" stamps you don't need to do any of the dreaded colouring in so I might have a fighting chance!  This set is by 7 Gypsies - some of them are ok, but I must say that I'm not paarticularly impressed at the lack of clarity I got when I was practising, but maybe that's just because I'm rubbish at stamping.  A shame as it's got all the cogs, clocks, pointing fingers etc you might want for first forays into steampunk.  I'd decided I wanted a hot-air balloon on my card, so I was disappointed to find made a particularly messy and blobby image - so I decided to go with my trusty Craft Robo instead. 
This challenge had me searching through my "might come in useful one day" drawer - and I was panicked again by not finding what I thought was in there oh oh!  I finally found the stuff I'd ordered yonks ago from The Fruit Pixie in a box on top of the tall bookshelf!  I'd not got that far in my clearing the shelves quest last weekend!   Anyway, in that particular box of quirky, off the wall stuff I found some miniature postcards and cut the little man out - with his hand held out that way (he was holding a cane originally) I thought I could "sit" my hot air balloon on it.  I used a brass sundial (I think that's what it is) for the balloon and the tiny compass (it really works!) in the middle.
The butterfly wings behind the balloon are by K&Co and from an old Bubbly Funk kit.
All the cogs came from my lovely (and generous) DCM Teamie Lynda (thank you darlin'!) - by chance the brown ones matched my colours perfectly and I only needed to paint a few for some extra contrast in gold and black - the one on the right is painted with Black Enamel Accents so has a lovely shiny, raised finish.
I needed to add some sort of sentiment and was a bit stuck for what to do until I thought about using words from the DCM blog banner - after all, that's what we hoped to do when we set up the blog all those years ago and with a dare like this one it's even more appropriate!
Here's a list of the things I've used on the card - it's quite a long one!
Background panel: 
paper by Delish Designs from the Bistro collection, : Stamped images from the Steampunk clear stamps set (7 Gypsies)
Balloon section:
Gent cut from a mini postcard, Balloon and Basket cut by Craft Robo, Butterfly by K&Co, tiny compass and sundial fave from The Fruit Pixie, strings are drawn in, flames are made with red and yellow Stickles
Cogs:
I think they are cut with Tim Holtz die set. Krylon Gold pen, black ink, 
Black Enamel Accents
Globe:
Cuttlebug die, cut in black card, edged with Krylon gold, then inked with black ink to distress down the gold a bit.
Rosette:
hand folded using paper from Steampunk Debutante collection (Graphic 45)m gold Krylon and ink as before, Clock in the centre is another of the stamps from the 7 Gypsies set.
Other:
Dusty pink ribbon (you've just got to have ribbon, eh?), 
two screw-head brads from stash, words pc generated.
Lots of chipboard scraps for dimension, lots of inking, lots of glue, lots of fun!
Please have a go at this challenge - I think you will enjoy it, adnd as there's no rights or wrongs you can really just make it up as you go along and have some fun.  I think this one will be another thing for the wall when our study is all done and looking posh!
Check what my fab and Daring Teamies have done this week HERE.

Thursday, February 17, 2011

The Cow, the Horse and the Little Mouse

The new set of Crafty Templates are out now and this month the templates have a lovely Nursery Rhyme theme.  There's also a fab, optional Crafty Goodies Kit that Leo has put together - these goodie kits are always full of interesting and often quirky bits and pieces to inspire your crafting.
Here are the cards I've made with this month's templates
1. this is my favourite - it's for the "Horsey Horsey don't you stop" rhyme and I couldn't resist making the Rocking Horse a Rocking card!
 I used my Craft Robo to cut the oval shape which, folded in half makes the rocking card blank.  The spotty card is from the Goodie Kit.
Also used:
Rocking Horse template (February Crafty Templates)

Spotty card, brown textured card, paper for tail and mane, all from the current Crafty Goodies kit
Yellow and blue card, tiny blue gem all from stash
2. I thought the pop-up box style card would be perfect to use with the "Hickory Dickory Dock" template
The folding box base is made with one of the card blanks in the CGK.
Also used:
Hickory Dickory template (February Crafty Templates)
Green textured card, patterned papers, tiny letter stickers, backing card for clock pop-up all from February's CGK
Turquoise, gold and cream card from stash, Cuttlebug fancy corner die
3. Lastly, is the "Cow Jumped over the Moon" bit from Hey Diddle Diddle, the Cat and the Fiddle!
I used a black card blank, lined up the straight section of the cow's back on the crease of the card and drew around the shape.  I cut through both card layers and leaving enough room for the moon and stars trimmed off the excess at the base to make the shaped card.
I used:
Jumping Cow, Moon and Stars template (February Crafty Templates)
Black card blank, white card, scraps of black card, silver card for moon and stars, all from my stash
These templates are all so cute and would make fab new baby cards as well as birthday cards for the Little 'Un's.  Sadly, all but one of our Little 'Un's is past the nursery rhyme stage so I'll have to remember these when baby Amelia is coming up to her first birthday - what's the chance of my remembering all the way to October? haha
The Bad Fairy of Procrastination is visiting today.  I have hubby's birthday card to make and today is my last chance to get it done while he's not in the house, let alone the study!  I might be able to giver her the boot if I had the merest glimmer of an idea for his card.  I wonder if a cup of coffee would help my mojo....well, it's got to be worth a try....
Thanks for looking in today, wish me luck for the Hubby Card.....

Tuesday, February 15, 2011

Roses, Roses

Just a quick call in from me today as I wanted to share something I made yesterday.  I should have been making something else, but I suddenly took it into my head to do this instead!
Everything about this is dead easy and took about an hour to make - except the twirly bits I made at the end which nearly sent me demented!
I used:
21cm square of black card to make the rose "bowl", and a little card tube to fit in the centre to keep the stems together
I decorated the four faces of the bowl with cream Lokta paper and a hand cut heart cut from burgundy Lokta paper 
The coiled roses are made with the same papers and attached to wire for the stems
Long strips of the scrap Lokta were used for the twirly bits, they are also attached to wire.

Once I'd found the surface of my desk I enjoyed making this.  I hope you like it.
Thanks for visiting


Monday, February 14, 2011

Another Sorry!

We moved more stuff out of the study yesterday.  My arms ache from lifting stuff up to hubby to stash away in boxes in the loft.  We've cleared three of the bookcases now and I've almost emptied the tall bookcase which holds/held lots of my craft stuff.  My desk looks like a dump and isn't helping my mojo one bit.  Nor is thinking about what to do about all those teeny weeny crafting bits on and above my desk - these are the things I use every day, I think we need to work out where the desks will go in the temporary study before I can figure out where to put my stuff in there
  It'll be worth it when it's done, It'll be worth it when it's done, It'll be worth it when it's done.....

Oh well, hopefully it won't be for too long - though it won't be as quick as I'd like hehehe.  On to a little bit of crafting.
I've used the same little sentiment on this card as I used on Net's card in the post below.  Yes, I do seem to be making a habit of needing belated birthday cards and yes, I must try harder to get them done and in the post on time!
I wanted to make a non-romantic card using the Love Love Love papers - just because I could, really!  I do love the black, grey, red and white combo of this set and they are going to be useful often, I particularly like the one that forms the background for this card, and the lovely "weave" patterned ones.
I used:
All papers from the Love Love Love paper download by Funky Hand
"Sorry" word and mat cut with Craft Robo, "Belated" sentiment pc generated,
brads from stash
If you need a Valentines card in a hurry because you've forgotten and it's today - check out the Love Love Love papers HERE.
These are the other things I've made so far using these papers:

Thanks for visiting, hope you're having a sunny Valentines day!

Saturday, February 12, 2011

The Moving Begins!

Oh My!  The big clear out has begun.  We have started clearing out the study ahead of the work I mentioned on here a week or so back.  Our builder is due to begin on 30th Feb so we thought we'd better begin moving our stuff. So I've been clearing some of the books and albums off the shelves and passing them to hubby up in the loft to be boxed for the duration.  I'm now shattered and we've done just a tiny amount of what needs doing.  The plan is to put the things we definitely wont' need up there first then we can move on to finding temporary homes for the stuff we're going to want closer to hand.  I reckon this is the easy bit - wait till it comes to shifting and finding space for our desks and computer gear in the spare room.... I'm not looking forward to being in there - I'm used to spending time in here, where we have two decent sized windows and lots of daylight (well, when there is daylight to be had!), whereas the spare room is on the other side of the house and doesn't get nearly so much light. 
It will be worth it when its all done, It will be worth it when its all done, It will be worth it when its all done.... 
I think there will be an overspill into the guest room - something I'd like to avoid, just in case we get visitors before we're all sorted out again.
I'm looking at my craft stuff on the tall bookcase deciding which things I can put away - it's a long time since I played with my beads so I think I can box those up for the loft for a start.
Anyway, enough of crafty clearance for now. 
Here's the belated birthday card I made for Net:
Materials:
paper: Basic Grey, Sentiment is pc generated
Ribbons, flowers, lace, card candy etc mainly Creative Treasures, other bits from stash
I made the organza ribbon thing using my new mini bowdabra

One more card for today, another made for the recent Funky Hand C&C TV programmes:
Papers from Funky Hand's "Craft the Year Away" CD, I cut the flowers from one of the paper designs and added Glamour Dust to the centres.
Buttons are also from Funky Hand - there are lovely colour matched ribbons and buttons for each of the colour themes on the CTA collection.  There are new things being added to the Funky Stash section on the website all the time.
Twine is from my stash

Thanks for visiting, please come by again soon

Friday, February 11, 2011

A Ribbon Recipe

It's another Daring Friday today and a very special one too, as the Team were all sent fabulous goodies to play with for this one - and we have the most fabulous prize to give away too.
We are being sponsored by The Ribbon Reel, who offer a fantastic array of ribbons, trims, twine and other gorgeous goodies.  Just looking at this picture of the prize one lucky person will win will show you exactly what I mean!

In our little goodie bags the DT received ribbons, some lace, baker's twine, buttons and heart shaped pins - it was Nat's turn to come up with the challenge and she came up with a great recipe - any sort of cards, but they must include all of these ingredients:
Two items of ribbon/trim/twine
One or more buttons
At least one heart element
The rules for entry to the prize draw are simple:
1. Make your card using the recipe above and add it to your blog
2. Add links to both The Ribbon Reel and The Daring Cardmakers
3. Enter your card for no more than FIVE challenges -ncluding this DCM one
Visit the Daring Cardmakers this week and you'll see some fabulous cards - all very opulent with lots of ribbon and other beautiful trimmings!.
I've decided not to go down the valentines route, instead I made a birthday card - this is the first card I made, but it's not the version you'll see on the DCM blog, because as soon as I'd finished this one I decided I didn't like it - don't you hate it when that happens?
I thought I'd still share the first version so that you can decide which one you like best, and whether I was right to pull it apart!
 I was trying to use the current Sketch File LO again, and I wanted to do the bunting in a different way - actually, I quite like that bit, but I'm not keen on all the little bows- too fussy, I think.  Most of all though I hated the big layered flower - it just looks a mess.  So I ripped that off, cut down the  lace/buttons/Kraft section and re-mounted it on fresh black card and a new card blank, made the rosette, added one of the bows from the original with a pretty brad and added some more buttons.  I used the heart pin to balance things out on the left side and ended up with this:

Red is my aunt's favourite colour and I think I'll put this away until her birthday comes round.
I made the rosette with wide twill ribbon, the bow in the centre, and the trim on the heart pin are gorgeous, soft silk ribbon.  I gathered the lace slightly for the ruffled effect.
Materials:
Heart pin, silk ribbon, red twill, red/white striped button all from The Ribbon Reel
Smooth White card blank, Black Bazzill, Ribbed Kraft card
Metallic red thread, extra buttons, decorative brad all from my stash
Sentiment is one of the "home made" rub-ons I made ages ago

So, what do you think? which version do you prefer?  I'd be really interested in knowing which you like best and also why - it's always interesting to get an insight into which components and styles other crafters like, isn't it?
That's all for now, but please do join in this week - it's got to be worth having a go at getting your sticky mitts on that prize - I'd certainly be having a go if I was allowed!
Thanks for visiting

Wednesday, February 09, 2011

A Little Loving!

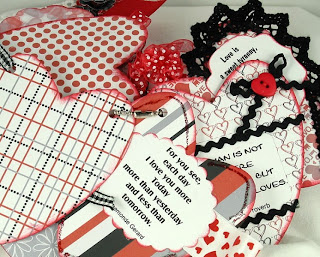
I've made this heart shaped mini book using papers from Funky Hand's "Love Love Love" download collection.
To make the pages I resized the designs to print either 2 or 4 different designs on both sides of some thin (about 160gsm) card.  For the covers I did the same but on thicker card, I cut 3 pieces for the covers so that I could sandwich the white lace on the front between two pieces and hide the messy bits!
 I cut all of the heart shapes using one of the templates that come with the Craft Robo.
For the title I did a lot of "cut and pasting" from the letters sheet which is part of the download, then resized the whole thing to fit my cover.

The book is held together with a ball and chain type thingie (tech term hehe), decorated with a ruffled dotty ribbon and a big dotty button.


Here are the pages, you can click for a closer look


This was fun and easy to put together.  I hope you like it.

I used:
All papers inc. lettering "Love Love Love from Funky Hand
Dotty Ribbon + some others,  Lace (black, white) from Creative Treasures
Other buttons, gems, ribbons, brads and lace from my stash
Roses are made using a Marianne's die set
Various Nesties dies
MS Doily punch

Here's my desk shot for today's WOYWW.  

As my desk is in need to a serious tidy up I thought I'd share a little close-up of some gorgeous ribbony goodies from Creative Treasures  that arrived yesterday - such a lot of loveliness in such a little box!
Click HERE to visit Julia's blog and find out all about WOYWW.
Thanks for visiting