Friday, October 23, 2020

Ghoullies and Ghosties

   Hello....

Just a quick post for this week's Daring Cardmakers project.  Better than my usual moaning, I hear you say....

Rizwana is this week's challenge setter and has a topical challenge for everyone this week:

  'Spooktacular Makes'

Show us your spooky cards or other spooky makes for Halloween. 
You can have scary pumpkins, ghosts, witches, bats,
spiders, skeletons...
 the spookier the better.


 When it comes to Halloween I'm the miserable old bag who locks up early, closes the blinds, draws the curtains and doesn't open the door to anyone. It's not so much having fun at Halloween parties (when such things were possible!), with all the traditional 'bobbing for apples type games etc, its the way the "Trick or Treat" thing has obliterated all the local traditions of different countries. 
I think its a real shame when that happens - I'm sorry, but there it is!
Anyway, a challenge is a challenge so I made a little ghostie


Info
I'm useless at drawing, but managed to come up with this simple ghost shape.  I copied it onto the it on the reverse of a piece of white card before cutting out as Purple card blank with piece of black card the same width, but shorter, to leave upper and lower border.  Before adhering it to the card, some silver thread was  wound randomly around it for a spider's web kind of effect. 
I die cut circles i the ghost large enough for these bigger than usual googly eyes to pop through.  The ghost was adhered to the card using foam pads and the eyes slid under and into place.  
The mouth is a hand cut shape added on top
The die cut letters are cut using a Lawn Fawn alpha set.
 
Do pop over and see what the team have been making this week - and we would love to see your spooky creations!
Thank you so much for visiting today, I hope you'll leave a comment, I really appreciate it when people take the time to leave a message!

Happy Crafting, and please Stay Safe


Sunday, October 18, 2020

What is a Snowflake?


 Hello....

 I'm late with my  Daring Cardmakers post this week.  Still struggling with with my Autumn Blues, feeling 'bleurgh' and everything being so much harder to do.  The heating is still not fixed, but at least we can turn it on manually now - even if it does mean OH climbing up into the loft to switch it on and off. It seems that its not only the boiler, but all the various electrical 'bits' too.  The electrician is due early next week so fingers are crossed for that.

  Anyway, Joanne is this week's challenge setter for the Daring Cardmakers

Did you know it's 

World Dictionary Day? 

I need very little persuasion to celebrate words - celebrate with us by using a dictionary definition, dictionary or book page or make words the focal point of your creation this week.


 Info
I started by stencilling a silver snowflake in the top left and lower right corners of the card blank
2 x Tonic Studios Scribbled Circle die cuts were glued onto the card (one glitter card, 1 pearl card) using foam tape.
A selection of medium and small snowflake dies were cut in a
variety of silver, white and turquoise card types and layered around the circles.
The Snowflake definition piece was created on the pc, resized and printed onto card. This was then matted onto turquoise mirror card before adhering in place.
To finish I added a few turquoise and silver gems and pearls
 
 
Anyway, do pop over and see what the team have been making this week - and we would love to see your mail-themed creations!
Thank you so much for visiting today, I hope you'll leave a comment, I really appreciate it when people take the time to leave a message!

Happy Crafting, and please Stay Safe

Tuesday, October 13, 2020

Glittery Stencilled Christmas


 hi there

I hope your week is going well so far - I had a really grotty day yesterday - the sort where only the duvet will do! Feeling better today though, so hopefully a duvet day did the trick!

We had another quiet weekend - to be fair, all the weekends are 'quiet' these days!OH was in the garage. tarting up the old cupboards he's bought for his new storage, and I sat at my craft desk and got glittery!

 I had a lot of fun experimenting with glitter paste and stencils and thought I'd share what happened with you today


Always on the look out for a short-cut when making Christmas cards I decided to take a risk and try stencilling directly on to some card blanks - these are some I've already run through the printer to add our Christmas message to the insides - again, a short cut!

Having done a few images just using a single colour of glitter paste, I got a bit adventurous and decided to add some more colours to the same images

Info
These are 12x12cm card blanks
Nuvo Glitter Paste by  Tonic Studios
Both stencils by Funky Fossil
I've added guidelines with a Sharpie pen to frame the snowflake design and 
help line it up with the edges of the card/
A strip of washi tape holds the stencil in place, but allows me to lift it up to check the design has stencilled properly
To begin with I used a pink glitter paste
I wiped my spatula and w
ithout moving the stencil spread some
 gold glitter gel over some areas. 
Then I removed the stencil to leave this pattern
Once dry I added a gem to the centre and a black and white printed sentiment
 
Here's thee rest of the cards made using a couple of stencils, different colours of glitter paste and some gems, printed sentiments, the odd die cut and some gold thread
 
Rather than clean the stencils between uses, I taped another card in place and spread the remaining glitter paste through to the new card - you can just lift the stencil while its still attached at the top to check how the pattern looks and add more paste if required.
 
That's all for today, thank you so much for visiting, I hope you'll leave a comment, ots always lovely to know you're not talking to yourself

Happy Crafting, and please Stay Safe

Friday, October 09, 2020

Vintage Decoupage Postcard

 Hello....

 It's a bright, blue sky kind of day here, but I'm Mrs Grumpy again!  I have good reason to be - we thought the issue with the boiler of a few weeks back had gone, but no its got worse and we've had no heating for the last few days and any hot water that was left in the system is on the cool side of tepid now.  
Have you tried getting a plumber lately 🙍

So we're going to hang on and keep our fingers well and truly crossed that our regular builder - plumber, who has plenty of experience with the house's weird plumbing  will find a few spare minutes to pop round and try to fix it because I get super-grumpy when I'm cold! Oh, and I have a headache too....

  Anyway, its Daring Cardmakers day Svenja has come up with something a bit different for us this week:

It's just the right time of the year for making cards and writing 
letters. Aaaand October 9th is world post day - so let's see some
Mail Art this week! You could feature letters and envelopes
on your card, decorate a beautiful envelope, make a postcard
 or even create some faux postage.


I decided to make a postcard....but then was stuck for what to put on it (so often the case when I sit down with half an idea in my head!)

I've a 12x12 paper pad by DCWV which has a Paris theme - the papers are fabulous, but a bit too big to be really useful for cards and mini album, but that said they are rarely put away on the shelf because I've used them for so many things- its one of those sets you keep digging into but the stack never seems to get smaller! Anyway, one of the papers has a few vintage postcard type images on it, so I thought one of those would be a good starting point

 Info

I cut the basic postcard shape from one of the DCWV 12x12 papers, then adhered it to some card to make it more mail-able.

Next I tore small pieces from other papers in the set, and a few bits from another Paris set of 8x8 papers, which may also be DCWV but must be at least 8 years old by now! I pasted down the scraps of printed papers, plus a few bits of gold foil biscuit wrapper (just happened to be on my desk...) and used thin coatings of PVA glue in between the paper layers to seal them.  I sprinkled Glimmer Dust over the glue while it was still wet, then when dry carried on adding more scraps of torn paper. more glue etc.  For the upper layers I used pieces cut rather than torn from the paper - the Gold Eiffel Tower, the words, the striped paper, flowers, and arranged them on the card before gluing down.  

The pink poodle is a die cut added for a bit of fun. 

Anyway, do pop over and see what the team have been making this week - and we would love to see your mail-themed creations!
Thank you so much for visiting today, I hope you'll leave a comment, I really appreciate it when people take the time to leave a message!

Happy Crafting, and please Stay Safe, its getting a bit Covid-scary out there


Tuesday, October 06, 2020

Framed Flower, and a Good Service 'Shout Out'


 hi there

I hope your week is going well so far - at least its finally stopped raining here/  My word, did we have some rain over the last few days!

As usual, I've got behind with blogging the things I've been making, so today I've a birthday card from August to share with you. this one was for the birthday of one of our nieces. 

Great Service Shout Out - Tonic Studios!

I had this LO in mind and really wanted to use the Scribbled Square frame set from Tonic Studios - I have the circles, hearts and squares sets and love them!  Ever since they arrived I've had bother cutting the largest of the squares, I tried again for this card - tried everything I knew that might get the die to cut but had no luck.  So I got in touch with Tonic Studios, explained my issue and told them all the different things I'd tried - and within a few days a brand new set of Scribbled Squares that cut properly popped through my letterbox.

Isn't it refreshing when you get service as good as Tonic's?  Thank you especially to Sarah on the Customer Support Desk

However, it was too late to use for this card, so I had to improvise!


Info
Square white card with a black and white striped and notched piece adhered across it
I stencilled a pale aqua square shaped onto a separate piece of card then framed it with very narrow strips of black card.
This panel was cut out and adhered over the patterned strip
For the flower and swirly 'stem' I inked white thin card in yellow and green, then used a couple of die sets from Tonic Studios. For the flower centre I used Black Stickles. 
To finish I added the sentiment and a few tiny clear gems
 The Black and White elements were pc generated.


 That's all for today, thank you so much for visiting, I hope you'll leave a comment, You've no idea how happy it makes me when someone leaves a message!

Happy Crafting, and please Stay Safe
    

Friday, October 02, 2020

Just Stay in with a Good Book and a Drink of your Choice!


Hello....
I'm blogging from a very wet Hertfordshire today, and the weather suits my mood! It's getting harder for me to avoid my hibernation tendencies!
I hope you are feeling less grumpy than I am!

It's felt very Autumnal the last couple of days, the leaves are definitely on the turn now, but as yet they are not falling too much - hang on in there, I say!  Those dreary months of bare brown branches and dead looking earth are so long and so depressing.

Did I mention I was feeling grumpy?

  Anyway, its Daring Cardmakers day and reflecting the nicer, cosier side of the impending dark days Dawn's chosen a lovely photo for the October Elemental Challenge

October Elemental Inspiration Challenge
As its the first Friday of the month, its time for an elemental inspiration challenge. I have found an image which I think is perfect for October.  

Lovely warm autumnal colours and lots of textures.  
Please remember to use at least 3 elements from the image below on your creations and have fun.

Using the Colour palette counts as 1 element..
We're looking forward to seeing what you make
 
Click here to see this week's design team inspiration
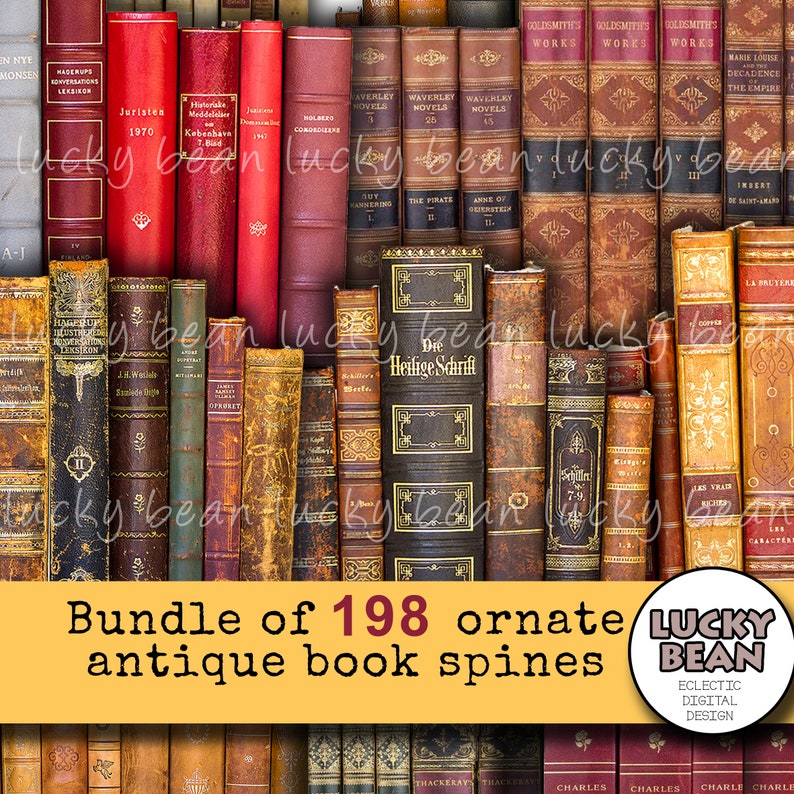
I managed to squeeze a few of the elements from the picture into this one.  My original idea was to use a page from a book, but then, browsing around the digital downloads on Etsy for something to use I came across a fab collection of book spine digis which I couldn't resist!  I love digital images for the scope they bring to the crafting table - easy to crop, to cut bits from and of course to resize to fit your project

 
The elements from the image that I've used this time are: Book, Drink, Black and White (from blanket), Texture, Wool strands (Twine),  
 
Info
Fat rectangle white card blank, with a side fold
I stsarted by adding some Autumnal shades of ink to the card, then angled a stencil with a 'weave' pattern over the top and rubbed a Nuvo Bronze embossing paste (Tonic Studios) through part of it to add some of the texture from the picture.
The Book Spine download is from LuckyBeanStore via Etsy 
 
I resized and printed my chosen book spine image onto white card and printed it out.  After cutting the image out I spent some time folding along the lines between the books, then running a largish ball tool down the back of each 'spine' 
Next, to echo the gold lines on the book spines I added a margin-line of gilding flakes, plus a bit more on the lower left edge for an old book distressed kind of feel
The Black and White chevron paper was adhered to the top section, and some twine strands glued in place before the book image was glued in place - I used a piece of corrugated cardboard between the layers to give more dimension to the books
Next I hunted out a good quotation a
 
nd found the perfect one for Dawn's image from C,S. Lewis
For the cup and saucer I used dies from Spellbinders, but as they were a bit too big, I drew inside the cut line until I got the size I wanted. For the handle I used a swirl punch shape, which was more interesting than the basic circle shapes in the die set.
All the Black and White elements were created on the pc


I'm not sure I entirely agree with C.S. Lewis though, as I don't really like tea, and reading the trilogy of "A Suitable Boy" AND carrying it around for months while doing so, I'm not sure the long book bit either 😄 At least these days a Kindle means you don't go everywhere carrying you own personal doorstop!

Anyway, do pop over and see what the team have been busy with this week - and we would love to see your creations using elements from the picture too!
Thank you so much for visiting today, I hope you'll leave a comment, I really appreciate it when people take the time to leave a message!

Happy Crafting, and please Stay Safe, its getting a bit Covid-scary out there


Monday, September 28, 2020

Cake Box


 hello there
Hope your week has got off to a good start.  I've just knocked one of my photography lamps over and broken the bulb - thankfully the whole front of the lamp was covered by one of those elasticated diffuser covers, so all the broken bits landed in that rather than on the floor, but still could have done without that happening, to be honest!
 
It was our anniversary back at the end of July, and a week or so back I shared card I made for hubby. As our lovely neighbours have been such a supportive bunch over the last few months we decided to make some cakes to share with them when we went out into the street for the usual Sunday drinks and chat.  Sadly, its going to be a bit more difficult to do that with the 'Rule of Six' now in force, but I'm sure there's a way we can still meet up, albeit in smaller groups.  Anyway, some of the 'regular' 'Sunday Drinkers' were away that day so we saved some cakes to take over when they got back.
 

Being me, I couldn't just put them in a bag, could I? 
 Plus its ages since I made anything other than a card so making a box was too much of a temptation to resist!

Info
I used 2 sheets of 12x12 scrapbook paper from the same pack to make the lid and base of the box.  I would tell you where they are from because they are rather gorgeous, but I can't remember! It was pretty enough on its own, but I wanted to add a label to say what was inside, so I had to add some flowers too.  They are just simple 'rolled roses', three larger ones with some leaves in the corner of the box, and a teeny one to decorate the tag.I finished up by tying up the box with some black and white Bakers Twine

 It fits 2 large Rhubarb and Custard Cupcakes and a couple of stacks of Rocky Road slices


That's all for today, thank you so much for visiting, I hope you'll leave a comment, You've no idea how happy it makes me when someone leaves a message!

Happy Crafting, and please Stay Safe

Friday, September 25, 2020

'S' for September


Hello

I do hope you've had a good week.  i did, because we finally managed to get up to Northumberland to spend some time with my aunt and uncle, we were able to take my cousin (their son) with us as we are in a 'support bubble' with him.  It was just lovely to see them, and to spend time visiting some of my favourite places, though it would take a lot longer to visit them all!  

We were lucky enough to have some really warm sunny days and even managed a day sitting on the beach.  Being the stressy, anxious person I am, we kept away from other people when we were out and about, took picnic lunches out with us and stayed in for evening meals. 

So it was a different kind of trip, but soooo good!

Shockingly, I was organised enough to get most of my card for this week's Daring Cardmakers challenge made ahead of our trip, so only had the sentiment to add yesterday - its my own challenge this week, so quite important to be as ready as I could be! 

This week its Kathy here with a letter challenge for you
 'S' for September
Please use at least three things beginning with the letter 'S' on your card this week - extra Kudos to you if you can manage
"Six (or even 7) S's for September"
ideas: stencil, sequins, song, spots, stripes, shells, scraps, silver, monogram 'S', stepper card, sea, sunshine, sandals, superhero, sunflower, stamps, shark,
Have fun, and remember to share your creations with us

Click here to see this week's design team inspiration

 Its a bit of a 'thing' on our team that whenever you set a challenge, you will struggle with your own card! This seemed such a good idea when I wrote the challenge into our calendar, but when I sat down to make something it didn't look right.  I started with the stencilling for the top panel and it was supposed to be just on a white card. The yellow shades were just lost on the white so I had to change to a deeper background to make them show up.
My 'S' elements are Stencils, Spots, Stripes, Sunflower, Splatters and Sentiment - so I managed 6 (7 if you count the word 'Sunshine)!

White card blank, cut to a fat rectangle shape, then inked with a burnt orange-red shade. 

Another piece of card was masked into a small rectangle and stencilled first with stripes in yellow, then with a spotty design stencil and a mix of yellow and orange inks over the top.  This panel was cut out and adhered to the base card.

For the sunflower I inked some 80gsm paper with a few shades of yellow and used a Tonic Studios die set to cut the petals.  I coloured some large white flower stamens with brown ink and attached through the centre of the flower

Next I used a brush and spattered some gold paint over the card before gluing the flower in place.More gold paint was added toi the centre of the flower.

The black and white striped piece and the sentiment were created on the pc and adhered in place with some thick scrap card between the layers to add more dimension

This time last week I was sitting on this beach at Druridge Bay having a picnic in the warm sunshine.  Today, we're back home, the wind is howling and the house is cold because the boiler sprung a leak last night and water started dripping through the ceiling!  Hubby switched it off and we rung the plumber who's just been round to fix it!  Typical that it was a cold morning today, eh? 

Never mind, we caught it quickly before any real damage was done, and the house will soon warm up again

Anyway, Thank you so much for visiting today, I hope you'll leave a comment, I really appreciate it when people take the time to leave a message!

Happy Crafting, and please Stay Safe


Friday, September 18, 2020

Shaun of the North


Hello

I do hope you've had a good week.  We've had some really warm sunny days lately which have been a real September treat;

 WI think its probably fair to say that making cards for men and boys can sometimes be a bit tricky! So Dawn is giving us the opportunity to get ahead of the game and concentrate on the males in our lives this week on the Daring Cardmakers!

 Its Dawn here with this weeks challenge and its one that I often struggle with or I just don't make that many.
So this week I would like to see your
Masculine Makes.
Its always a good idea to have a stash of masculine themed cards ready for the men/boys in our lives.

Click here to see this week's design team inspiration

 This challenge was a good chance to get my nephew's card done and dusted - and to make use of another of the dies from the Wallace and Gromit collection.  

I thought Shaun the Sheep would look cute in a Newcastle United FC jumper

Info

White card blank, with Black and White striped backing piece which was pc generated

For Shaun (die sets from CraftStashUK), I used scraps of white, black, red, yellow and blue card plus more of the striped card for his jumper.  I added some White Stickles to his 'hair'

He was matted onto white and blue circles (Tonic Studios die set)

The sentiment is a Spellbinders die

Thank you so much for visiting today, I hope you'll leave a comment, I really appreciate it when people take the time to leave a message!

Happy Crafting, and please Stay Safe


Wednesday, September 16, 2020

Storage Idea

 hello there
I hope you are having a good wee and enjoying this lovely late summer warm sunshine  
 
I've a very quick 'project' to share today and its got an element of upcycling too!
  Do you ever buy Innocent Smoothies? Well, a couple of weeks back I was about to throw an empty bottle into the recycling when I thought; this bottle looks about the right size to hold some of the Nuvo unembellished mousse pots. At that time I was keeping them in stacks in a drawer, but finding the one I wanted was a pain, and as they were piled on top of each other.  It turned out those bottles are exactly the right size to fit the pots, once you cut them down to the straight part just below 'shoulder'
 

Info
Just remover the label - it peels off fairly easily.  I then cleaned the sticky residue away with "Sticky Stuff Remover" (It does what it says on the bottle, don't you know).  Now cut around the bottle just below the curve of the shoulder.  I used a Sharpie to give me a guideline and cut with my Tonic Studios scissors.  Each bottle will hold four Nuvo Mousse pots and as you can see, its simple to see the one you need.  I've a few more pots flailing around in the drawer, but I also have two empty and washed bottles ready to convert into holders.Anyway, hope this is a helpful idea that you can use. 
Do Let me know how you get on
 
That's all for today, thank you so much for visiting, I hope you'll leave a comment, You've no idea how happy it makes me when someone leaves a message!

Happy Crafting, and please Stay Safe