Friday, April 26, 2019

Balloons

Hello!
I hope you've had a good week.  Just a quick blog post today - time is running away with me just now!
Another Friday and another challenge from the Daring Cardmakers and this time it's our lovely Miri in the hot seat:
This week we want to see balloons on your cards.

I think they are perfect for any birthday card and easy to adapt to the recipient’s taste in colours, patterns etc.
There are lots of ideas from the design team to help inspire you, click HERE to see them!

Well, I set out to make a hot air balloon card - the dies I was going to use are still out on my desk. But while trying to work out how to use them I changed my mind completely and made this instead!

Info
The base card is made from Hunkydory's Adorable Scorable cotton white card with a silk finish on both sides. This lovely card has a slight gloss to it which makes the ink slide nicely and gives a lovely depth to the colours' 
I used a few shades of Distress Inks and Distress Oxides to make the background, then when I was happy with the colour I spritzed it with water to get the mottled effect. Once dried I cut off 3cms from the edge of the front of the card.
For the balloons I inked small pieces of the same card with bright inks shades.  The finish of this card means the inks take quite a while to dry.  I could have dug out my heat gun to speed up the process, but I went and had some lunch instead 
Once dry, I cut a bunch of balloons using a Spellbinders die set and arranged them to go over the edge of the card front before gluing down and adding some Bakers Twine strings and a double bow


From the bits of leftover inked card I punched out some small stars and die cut some squiggles.  I don't (apparently) have any 'streamer' type dies so I improvised with the loopy bits from a couple of sentiment die sets, also from Spellbinders
I also cut a few of these in glitter card to add some sparkle.  
On the inside back edge I adhered a strip of matt black card as I thought it looked better than leaving it white.  I cut the top layer of the 'celebrate' sentiment (also Spellbinders) in the same black card, and added a few black stars to tie the colours together. The other two layers of the sentiment are cut from white card.
The black card was some I scavenged from the little folder of 'coming soon' flyers we brought home from the Royal Shakespeare Company's Live-Stream showing of 'As You Like It' at our local cinema last week! 

So that's it for this time, I hope you like it!
Thank you for coming by (and leaving a message, I hope....)
Have a great weekend, see you soon

Wednesday, April 24, 2019

Hunkydory Crafts Review pt 1

Hello!

I hope you had a lovely Easter.  We were so lucky with the weather this year, weren't we?
 I mentioned a week or so ago that I'd been asked if I'd like to have a play with some goodies from Hunkdory Crafts and review them here on my blog. I I wanted to choose a selection of things to try, and eventually settled on a die set, a paper set and some of the Adorable Scorable card I've been meaning to try for ages!  So I've been using them on various projects and over the next few weeks I'll share more of the things I've made.

This time I'm concentrating on the a fabulous set of butterfly dies:
Beautiful Butterflies, Moonstone dies by Hunkydory crafts

 Having made a few cards which I'll show next time, I thought it would be fun to try to make those butterflies fly, so I used my set of mini milk bottles to create this Butterfly Garden

I have to say that I really, really love this set of butterflies - you just can't have too many butterfly dies in your collection and this set is already a favourite.
 
Moonstone Dies by Hunkydory - Beautiful Butterflies

 Why am I so happy to have this set?

* I love that you get the plain wing shapes and a fancy set of wings for each butterfly 

* There are 4 different designs in the pack. 2 small and 2 larger butterflies - *  

* They are all perfectly sized for using on cards, scrapbook pages, journal pages....all sorts of projects.
Measurements (approx)
 5.5 x 5cms, 6 x 4cms, 4.3 x 3cms, 4 x 2.5cms
 
* They cut beautifully - even the tiny little detail pieces come out without much effort (this is a big bugbear of mine, dies that cut poorly are a pain in the proverbial!)

* They are thin metal dies so you can use them with most die cutting machines.  I used an eBosser, but also tried them with my ancient Cuttlebug and they worked great.

* The price for the set is a very reasonable £14.99, which I think is really good value!

Toi make the butterflies for this project I used paper from the
Spring Days & Country Life Inserts & Paper Pack £4.99 

I should have checked the size details more carefully, as the sheets are actually A4, which means the pictures on them are a bit too large for most of the cards I make.
Spring Days & Country Life Inserts & Paper Pack


In this pack you get papers intended for inserts which are single sided and a matt finish and also a set of double sided papers which have a slight gloss finish.  If I'm being completely honest (and there's no point in doing a review if you're not) I'm not keen on glossy paper, though lots of people love it, of course!
The designs are a delight and the colours are lovely.  I only wish they were smaller - those lambs, Easter Eggs and ducklings would have been perfect on my Easter cards, but the designs were just too big for my taste.  I will have to think of some other way to use them!
As well as the pictures though, there are lots of pretty, patterned designs which I really like - several have soft blue sky designs which will be very useful!
 
I really wanted to try and use the glossy papers, and they were just perfect for my wired butterflies, as the glossy finish catches the light as they move on the thin wires
 
So that's all for this time, I hope you've enjoyed seeing my Butterfly Garden.  There was a gorgeous flower set right next to the butterfly one on the Hunkdory Crafts website, and it took me ages to decide which to go for. Now I really want that one too - wouldn't it work brilliantly in the mini bottles in a similar way?
Moonstone Dies by Hunkydory - Fabulous Flowers

Anyway, that's it for today, thank you for coming by - please leave a message 
before you go - I would LOVE to hear what you think about this project

Happy Crafting

Friday, April 19, 2019

Blooming Wonderful

Hello

It's a beautiful day; warm and sunny, and a Bank Holiday weekend too!
Today I'm sharing the card I made for Ruth's Daring Cardmakers challenge this week
Blooming Wonderful
It's Spring here in the Northern Hemisphere and the parks and 
gardens are beginning to bloom.
I LOVE flowers so lets see lots and lots of them in 
your creations this week!
I love flowers too and they are probably my most used focus item when I make cards.  So why I struggled quite so much too make a card this week I really don't know!
So I started again, and came up with this
 Info
The pale peach card for the card base, and the light cream used over it are both from the Pearl Bouquet pack of Adorable Scorable card by Hunkydory
I used some paper from the Spring Days & Country Life Inserts & Paper Pack (also  Hunkydory) to make the flower.
The dies used to make the curved border and detail, the flower and the leafy There's a length of narrow satin ribbon in the gap between the two pieces of cream card, and some loops of the same ribbon behind the flower. 
 The leafy die cuts and the edges of the flower petals were inked to a darker shade of peach with a Versamagic ink pad and some pearls were added to complete the card.
In the end I quite liked the layout of the card.  I really love this set of edging dies and must look out for another set along the same lines so I have even more options!
You know how you hear good things about something and mean to get your hands on some to try - it was like that for me with the Adorable Scorable card, so when I was contacted by the lovely people at Hunkydory Crafts about reviewing some of their goodies, this stuff was definitely on "Please can I have....." list.  The soft, pretty colours in this particular pack are just stunning.  I'll have more Adorable Scorable stuff to share soon.
Anyway, the DCM blog is a veritable bouquet of beautiful flowers this week, so please do go and have a look - and of course we'd love you to join in and share your own floral creations with us!
Thanks for looking
Hope you get some Bank Holiday crafting in


Happy Easter

Friday, April 12, 2019

Bingo and Butterflies!


Hello!

You know those days when it's 'all happening'?  Well I'm having one of those today and it's not even mid-day!  And there was me hoping that just for once I'd get my Daring Cardmakers' Friday post done nice and early. Hah!
Dawn's mum loves playing BINGO - and is celebrating a big birthday!  So this week come and play the game along with us"

Just pick a line; horizontal, vertical or diagonal from our Bingo card and use those three things when you make your card.

  Or try for a 'Full House' by using them all!
I decided on the centre, vertical line: Ribbon, Paper and Twine. 
I've already done my stamping for this year so any line with that in was out of the question haha! 🤣
I have a beautiful new set of Butterfly dies!
I was asked recently if I'd like to have a play with some of their products by the lovely people at Hunkdory crafts and review them here on my blog.  Obviously I jumped at the chance and among the goodies I chose was a fabulous Butterfly die set.  A full review will be here soon, but it's been almost impossible to make anything without using these dies!
Butterfly die set, Hunkydory crafts

Info

Digital papers from DigitalMagpie on Etsy
Bazzill white card for printing on
Brown card for base set of wings
Black twine to make the butterfly's body
Brown organza and satin ribbon
A few pearls

I started by adding my text to one of the journal pages in the digital download, then resizing  and printing.  I tore around the 'page' and inked up the edges
Next I chose an area of another of the pages with mainly peachy-pink shades on and cropped and so that I could print only that area - I resized this piece so that I'd have enough to make the background panel and to cut butterfly wings using one of the larger, fancy layer dies,
I cut one plain butterfly in brown to use as a base, then added a couple of the fancy wings on top, only adhering together in the centre area. Because I was going to mke the body from twine I cut off the tail and antennae from all layers.
I glued the panel in place, then added the length of ribbon before adhering the sentiment piece on top.
For the body I used lengths of black twine. one glued down the centre makes the tail and part of the body. 2 shorter pieces either side for the body and antennae, then finally another piece glued down the middle and wrapped around for the head - this piece is then tucked to the back and glued there.  It was a bit fiddly!
To finish the card I added a few matching pearls.

I really love this die set - and that there are four different designs of fancy wings, and each has a plain wing set too, so you get 8 shapes in all. I'm always disappointed when a butterfly set doesn't have the plain wings too - or when you have to buy them separately!
Rather like snowflake dies, you can never have too many butterfly dies - these ones cut beautifully - and I even found most of those tiny 'bits' popped out when I gave the die a quick tap on my desk!
 
Anyway, that's all for this time, I hope you'll come and play a game of Bingo with us this week - we'd love to see what you make.
Thanks for looking 
Happy Crafting

Monday, April 08, 2019

Jackie's card

Hi there

Something I really missed when Craft Forums became less popular were the Birthday Card clubs that often housed them so after my own birthday last year I asked around on FB to see if anyone was interested in starting one up. 
It's just so special to send and receive some lovely handmade cards on your special day!
So today I'm sharing a card made for one of my lovely crafting friends in our group. I've 'known' Jackie for, gosh, it must be over 10 years, and we've worked together on a couple of design teams, but have never actually met in person!  Got to love the interweb, eh?
For this card I broke into a brand new My Mind's Eye paper pad called Gingham Farm - its actually the first paper set I've bought in ages, I've just not been inspired by what I've seen from the big manufacturers recently. But there are lovely and I bought quite a few 12x12 sheets as well as the 6x6 paper pad
The colour palette is mainly Black and White, but with some sage green and naturals in the mix.

I used a few strips of the papers to make the background, adding in some gorgeous white lace.
Then I made some flowers using more of the paper and a Spellbinders Cinch and Go Flowers die set
I added stamens in black and white to the flower centres.
Having arranged the flowers on the card, I cut a few leafy swirls from one of the green-themed papers (also from Spellbinders sets) to tuck behind the flowers.
To finish I added a few pearls and gems, and a die cut sentiment (I think it's a Creative Expressions one)

That's it for today, thank you for coming by - please leave a message 
before you go!

Happy Crafting!

Friday, April 05, 2019

Elemental Inspiration for April

Morning All!

Hope you're feeling 'full of the joys of Spring' this sunny Friday morning!

Every day this week I've sat at my computer all geared up to updating my blog, and every day something has diverted my attention.  I'd just made a coffee and sat down today to make a start when I glanced out of the window to see the Grocery delivery van already outside - 30 minutes early - you see, it's really not my fault!
Anyway, with the groceries put away I'm back here (with my coffee now just lukewarm), but hopefully there'll be no more interruptions until I've hit the publish button!
  
It is of course, Daring Cardmakers day and as it's the first Friday of the month
Nat's here with April's Elemental Inspiration dare.
As always, you need to interpret three elements from the image on your card, should you choose to use the colours, the colour scheme counts as one element .


There are lots of lovely details to choose from, so the only problem will be deciding which to go for! ;)

To get you started, check out f the gorgeous projects the design team have created!

From Nat's beautiful moodboard, I chose to use the colour palette, the distressed wood effect on the frame (centre, lower line) and the vase of flowers to make my card.
In my ever-growing collection of digital paper download sets
designs I have this fabulous set from RomanticLetters, perfect to use to make the background for my card.  I LOVE this Etsy shop - there are masses of gorgeous paper sets etc to download and at the moment they have a sale on.  Beware!
WhiteWoodTextures by RomanticLetters
Info
I resized my chosen design so it would print at 14.5cms sq, then rotated by 180 (so it would be the right way up when I folded my card) and printed it onto a sheet of my usual white 350gsm A4 card.  
I folded and creased along the top edge of the design and trimmed down to create my card base.  
Next I resized the same paper to 8xms sq and printed it out on a textured White Bazzill card for the top layer.
I then chose another paper design with mostly cream shades and cropped it down to just the cream coloured area.  I resized to about 11cms sq  and printed as before
Once I'd got the central panel to the size I wanted I cut the cream one to just a small amount bigger, inked the edges of both quite heavily, glued them onto the base card.
For the flowers I inked up scraps of the same Bazzill card in the colours of the flowers, and a couple more pieces in green shades for the leaves.  I like using inked-up card for die-cutting as you get a bit of variation, texture and a lot more say over the end colour result.
I used various die sets for the leaves as I needed quite small ones and wanted a variety of shapes.  The flowers are cut with an ancient "Cherry Blossom" set from Spellbinders which I think is discontinued - a shame as its a fab and really useful set with loads of different sized petals plus some branch shapes.
For the vase there was more inking of card, this time building up the colour with olive green, silver and a not-quite-black over the top. I added a piece of chipboard behind the vase before gluing into place.
Then it was just about sticking a few leaves in place, shaping the flowers a little with a ball tool then adding them to the picture. More leaves were added afterwards to fluff out the bouquet. 
The sentiment is a rub-on - I cannot remember the last time I used a commercially made rub-on, I went off them because they so often disappointed in the way they came off everywhere except where I wanted them.  Thankfully this one worked perfectly!
The dots on the flowers are just added with a fine pen

That's it for this time.  I know I've gone on a bit about the digital stuff, I think I'm on a bit of a mission to extol how wonderful and versatile they are!
If you've not tried them out, you really should, you know 😊

Thanks for looking in today

Happy Crafting!


Friday, March 29, 2019

Woman

Hello

A quick post again today because its been the kind of morning when my eyes rebel against the idea of having my contact lenses in.  I can't see much without them so it's a little inconvenient!  Hopefully they'll settle down soon.
As ever, Friday is Daring Cardmakers Day:
It's Nat here and this week I'm challenging you to
 make a card for a special lady in your life.
With Mother's Day just around the corner here in the UK, this might give you the nudge to get your card made if that's still on your to-do list.
But this is by no means just a Mother's Day challenge!
We want you to celebrate all women, whether family, friends or paying homage to a female figure you admire.
You can even quote your favourite fictional characters.

The design team has been hard at work creating some lovely projects to jump start your creativity, see their cards HERE
 

I used this week's challenge to get a Mothers Day card for MiL, but I also gave a nod to Svenja's recycling challenge from last week!
As I mentioned then, I have a bunch of cards I've made but felt were not quite 'right'.  I kept this one because although I really liked the papers, colours and especially the flowers, I felt the balance was a bit 'off' on this 10x10 card and the focus piece would work better on a larger card.

Original Version

I knew the papers were digi ones from an old Funky Hand CD so I'd be able to print more from the same collection.  I saved the flowery rectangular section and the handmade flowers, then printed another couple of designs to make a new background.
This time I used a border punch on one strip of paper, added a knotted organza ribbon, printed a new sentiment tag and added a few pearls and gems
Digi papers 'Lollipop' from the Now That's Funky CD, printed onto White Bazzill Bling card
EK Success border punch
I can't remember which dies I used to cut the flower petals, sorry!!

I think it's better now,  I love the soft sheen you get by printing onto the Bling cardstock, and it would have been a shame to waste those roses!

Anyway, that's all from me today, I hope you have a great weekend.
Thanks for visiting

Happy Crafting!

Thursday, March 28, 2019

Big Hearted

Hello
A big welcome to my blog!
Today I've a quick crafty post, with no waffle 😀
Its an anniversary card made a couple of weeks ago using a big heart shaped die and some lovely marbled papers.
Info
I started by resizing my chosen design and printing it onto white Bazzill card.
The upper layer of the heart and the background paper are cut from this paper design.
I also cut the heart in a matching pale pink plain cardstock three more times and glued them on top of each other, finishing with the patterned paper heart.
The corners of the backing square were rounded off
The sentiment was computer generated and printed onto white Bazzill, then cut into a banner and matted onto a deeper pink card with a pearlised finish.
The small hearts were punched from the same pearl card.
To finish I added a few tiny silvery gems

The big heart die is by Spellbinders
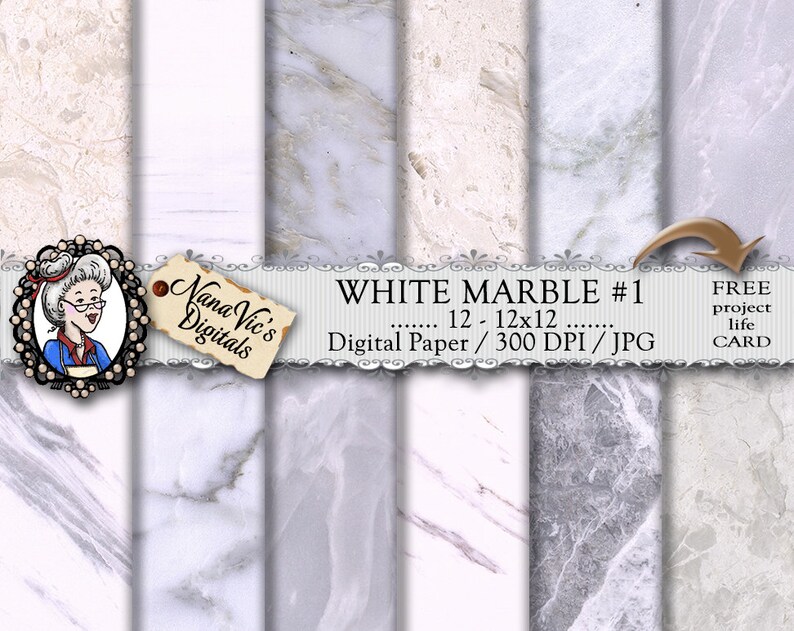
Digital papers from NanaVicsDigitals
This set is White Marble #1


Thank you for looking, I hope you'll leave a comment before you go, and if you'd 'Follow' my blog too, that would be fab!
Back tomorrow with something new for The Daring Cardmakers.

Happy Crafting 

Friday, March 22, 2019

Recycle, Re-use!

Hello!

I hope you're well and have had a good week. 
At last the wind and all those storms we seemed to be having one after the other have gone and everything has calmed down.  It's now light enough in the early evening for OH to commute to work on his bike via the countryside tracks and bridleways a couple of times a week rather than sit in traffic jams in the car.  Our little magnolia tree is flowering and looking lovely right now.  I love it when those 'feature' plants come into their own - even if they don't flower for long they are worth having just to look amazing for a week or two!
That's enough of the waffle, time to get down to the craft!

This week on The Daring Cardmakers blog.....

 R-E-C-Y-C-L-E

It's Svenja here and I'm trying to keep you busy - and in a sustainable way. My challenge for you this week is to recycle something that was likely to go in the bin. 
What did you make from it instead?
It doesn't have to be a card but could also be a book or box or anything else that came to your mind.

Let us see what a difference your work makes - and we'd also like to hear the story of your object so please do tell us what you've used and did to it to make things as good as new.

 I confess to being a hoarder.
Just for starters I hate to throw a box away, you never know when you might need a box in just that size, right
Then there's the little trimmings on gift boxes, cards, Christmas Crackers, tags from new clothing - even the little bits of ribbon and twine that attach them to the garment - I can't help it, it all finds its way into my "might come in useful" box.  And occasionally something actually does get used!  
And then there's 
the extra inked backgrounds I make when I'm on a roll
the extra flowers and other embellishments made but not used
and the cards and other projects I make but decide don't quite look 'right'  

So Svenja's challenge made me get them out and see whether I could actually use some of this hoarded 'stuff'

I started by ripping the top layer of paper from a small 'letterbox' type of cardboard box.  These are especially fab because between the smooth cardboard layers there is a corrugated layer, which has much smaller ripples in it that those of big cardboard boxes - therefore much better for using on cards and suchlike!
I find that damping the upper layer of brown paper with water is the key to removing it, I use my piercing tool or a bamboo skewer between the ripples to help lift it then its just a case of tearing it off - some might say its tedious, some may find it therapeutic 
Now it can be torn to a pleasing wobbly shape that fits across a card.

I added a few strands of hairy twine, tucking the ends under the corrugated card and gluing them there
The flowers are some that I didn't need for a card I made a few weeks back and they've been sitting in a pot on my desk since then.
By chance, in my 'Not sure about this card' pile was this scrapling, with a little hard that matched the flowers perfectly, so I pulled it off (along with the Baker's Twine, which went back in the Bakers Twine box!)
I duie cut some new leafy sprigs and popped them under the flowers and used some more hairy twine to make a bow for the heart.
The sentiment is one of my home-made decal stickers and I added 3 tiny gems for a little bit of bling.
I like this card so much better than the original scrapling one, and its good to have found a use for those two paper roses. 
 I must admit that this LO with a piece of corrugated card is one of my favourites - I wonder, does that count as recycling too?


So that's it.
Now if only I could get round to using some of the other stuff I've hoarded....
I would love it if you'd join in this week, it would be so good to see your recycling and re-using ideas.

That's all for this time, have a great weekend

Happy Crafting!

Friday, March 15, 2019

Sew Much Fun!

Hello

Another windy day and I'm bored with Gareth, Hannah and all their stormy cohorts now!
Also bored with having no fridge but fingers crossed the new one will be here tomorrow.  Although I'm hoping it won't be the first delivery of the day
as I don't fancy being woken at 7am.  Not on a Saturday!

We have my lovely friend Shabneex to thank for this week's challenge over at  the Daring Cardmakers 

 In Stitches
This week I'd like to see stitching of any sort on your cards - dust the cobwebs off those sewing machines, use a needle and thread, faux stitching is fine or how about adding some thread on your cards?  We can't wait to see your creations. You'll find some wonderful inspiration from the Design Team over on the blog

A few weeks back I made a mountain bike cutting template to use on OH's birthday card, my cousin is also a keen cyclist so I thought I'd use it again, but in a different way.
This time I scaled down the template to cut it in a much smaller size, and instead of using wire for the spokes. I used silver thread.
I needed to cut the bike out first using my Silhouette Cameo.
Next I inked the front of a piece of white Bazzill card, then turned it over to trace around the wheels of the bike.  I used the black base shape for this, flipping it round so that it would face the way I wanted it to on the front.
I made needle holes which would be hidden by the 'tyres', then strands of silver thread to sew in the spokes.  My thread is very fine and tangles easily, so I went over each spoke a few times and kept the thread 'tail' fairly short - which is why it looks such a horrible mess on the reverse.
My old 'A' level needlework teacher would be so shocked at how bad it looks (sorry Miss Clowes)
Once all the stitching was done I flipped the card over and hey presto! the spokes are revealed.
Once the rest of the bike was assembled it was glued in place over the spokes.
I computer generated the sentiment and printed it directly on to the card, then using a rectangular die cut an aperture and adhered the panel inside.
 I hand-cut some triangles for the banner and added some black and white Balers Twine, then added some tiny jewels to finish the card off


As ever there is a fab selection of ideas for this challenge over on the Daring Cardmakers blog this week, so I hope you'll head over to see them - and of course we'd really love you to join in!

That's all for now, thanks for visiting

Happy Crafting