Friday, March 29, 2019

Woman

Hello

A quick post again today because its been the kind of morning when my eyes rebel against the idea of having my contact lenses in.  I can't see much without them so it's a little inconvenient!  Hopefully they'll settle down soon.
As ever, Friday is Daring Cardmakers Day:
It's Nat here and this week I'm challenging you to
 make a card for a special lady in your life.
With Mother's Day just around the corner here in the UK, this might give you the nudge to get your card made if that's still on your to-do list.
But this is by no means just a Mother's Day challenge!
We want you to celebrate all women, whether family, friends or paying homage to a female figure you admire.
You can even quote your favourite fictional characters.

The design team has been hard at work creating some lovely projects to jump start your creativity, see their cards HERE
 

I used this week's challenge to get a Mothers Day card for MiL, but I also gave a nod to Svenja's recycling challenge from last week!
As I mentioned then, I have a bunch of cards I've made but felt were not quite 'right'.  I kept this one because although I really liked the papers, colours and especially the flowers, I felt the balance was a bit 'off' on this 10x10 card and the focus piece would work better on a larger card.

Original Version

I knew the papers were digi ones from an old Funky Hand CD so I'd be able to print more from the same collection.  I saved the flowery rectangular section and the handmade flowers, then printed another couple of designs to make a new background.
This time I used a border punch on one strip of paper, added a knotted organza ribbon, printed a new sentiment tag and added a few pearls and gems
Digi papers 'Lollipop' from the Now That's Funky CD, printed onto White Bazzill Bling card
EK Success border punch
I can't remember which dies I used to cut the flower petals, sorry!!

I think it's better now,  I love the soft sheen you get by printing onto the Bling cardstock, and it would have been a shame to waste those roses!

Anyway, that's all from me today, I hope you have a great weekend.
Thanks for visiting

Happy Crafting!

Thursday, March 28, 2019

Big Hearted

Hello
A big welcome to my blog!
Today I've a quick crafty post, with no waffle 😀
Its an anniversary card made a couple of weeks ago using a big heart shaped die and some lovely marbled papers.
Info
I started by resizing my chosen design and printing it onto white Bazzill card.
The upper layer of the heart and the background paper are cut from this paper design.
I also cut the heart in a matching pale pink plain cardstock three more times and glued them on top of each other, finishing with the patterned paper heart.
The corners of the backing square were rounded off
The sentiment was computer generated and printed onto white Bazzill, then cut into a banner and matted onto a deeper pink card with a pearlised finish.
The small hearts were punched from the same pearl card.
To finish I added a few tiny silvery gems

The big heart die is by Spellbinders
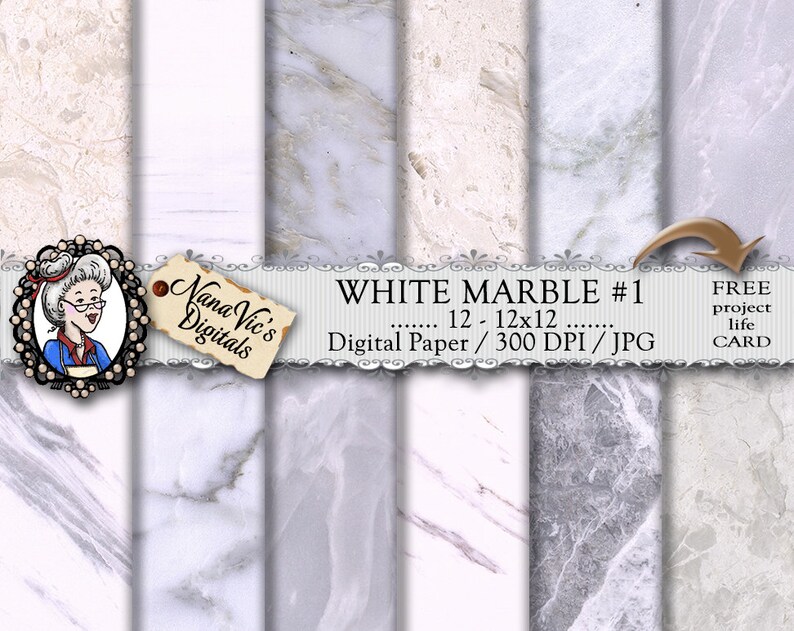
Digital papers from NanaVicsDigitals
This set is White Marble #1


Thank you for looking, I hope you'll leave a comment before you go, and if you'd 'Follow' my blog too, that would be fab!
Back tomorrow with something new for The Daring Cardmakers.

Happy Crafting 

Friday, March 22, 2019

Recycle, Re-use!

Hello!

I hope you're well and have had a good week. 
At last the wind and all those storms we seemed to be having one after the other have gone and everything has calmed down.  It's now light enough in the early evening for OH to commute to work on his bike via the countryside tracks and bridleways a couple of times a week rather than sit in traffic jams in the car.  Our little magnolia tree is flowering and looking lovely right now.  I love it when those 'feature' plants come into their own - even if they don't flower for long they are worth having just to look amazing for a week or two!
That's enough of the waffle, time to get down to the craft!

This week on The Daring Cardmakers blog.....

 R-E-C-Y-C-L-E

It's Svenja here and I'm trying to keep you busy - and in a sustainable way. My challenge for you this week is to recycle something that was likely to go in the bin. 
What did you make from it instead?
It doesn't have to be a card but could also be a book or box or anything else that came to your mind.

Let us see what a difference your work makes - and we'd also like to hear the story of your object so please do tell us what you've used and did to it to make things as good as new.

 I confess to being a hoarder.
Just for starters I hate to throw a box away, you never know when you might need a box in just that size, right
Then there's the little trimmings on gift boxes, cards, Christmas Crackers, tags from new clothing - even the little bits of ribbon and twine that attach them to the garment - I can't help it, it all finds its way into my "might come in useful" box.  And occasionally something actually does get used!  
And then there's 
the extra inked backgrounds I make when I'm on a roll
the extra flowers and other embellishments made but not used
and the cards and other projects I make but decide don't quite look 'right'  

So Svenja's challenge made me get them out and see whether I could actually use some of this hoarded 'stuff'

I started by ripping the top layer of paper from a small 'letterbox' type of cardboard box.  These are especially fab because between the smooth cardboard layers there is a corrugated layer, which has much smaller ripples in it that those of big cardboard boxes - therefore much better for using on cards and suchlike!
I find that damping the upper layer of brown paper with water is the key to removing it, I use my piercing tool or a bamboo skewer between the ripples to help lift it then its just a case of tearing it off - some might say its tedious, some may find it therapeutic 
Now it can be torn to a pleasing wobbly shape that fits across a card.

I added a few strands of hairy twine, tucking the ends under the corrugated card and gluing them there
The flowers are some that I didn't need for a card I made a few weeks back and they've been sitting in a pot on my desk since then.
By chance, in my 'Not sure about this card' pile was this scrapling, with a little hard that matched the flowers perfectly, so I pulled it off (along with the Baker's Twine, which went back in the Bakers Twine box!)
I duie cut some new leafy sprigs and popped them under the flowers and used some more hairy twine to make a bow for the heart.
The sentiment is one of my home-made decal stickers and I added 3 tiny gems for a little bit of bling.
I like this card so much better than the original scrapling one, and its good to have found a use for those two paper roses. 
 I must admit that this LO with a piece of corrugated card is one of my favourites - I wonder, does that count as recycling too?


So that's it.
Now if only I could get round to using some of the other stuff I've hoarded....
I would love it if you'd join in this week, it would be so good to see your recycling and re-using ideas.

That's all for this time, have a great weekend

Happy Crafting!

Friday, March 15, 2019

Sew Much Fun!

Hello

Another windy day and I'm bored with Gareth, Hannah and all their stormy cohorts now!
Also bored with having no fridge but fingers crossed the new one will be here tomorrow.  Although I'm hoping it won't be the first delivery of the day
as I don't fancy being woken at 7am.  Not on a Saturday!

We have my lovely friend Shabneex to thank for this week's challenge over at  the Daring Cardmakers 

 In Stitches
This week I'd like to see stitching of any sort on your cards - dust the cobwebs off those sewing machines, use a needle and thread, faux stitching is fine or how about adding some thread on your cards?  We can't wait to see your creations. You'll find some wonderful inspiration from the Design Team over on the blog

A few weeks back I made a mountain bike cutting template to use on OH's birthday card, my cousin is also a keen cyclist so I thought I'd use it again, but in a different way.
This time I scaled down the template to cut it in a much smaller size, and instead of using wire for the spokes. I used silver thread.
I needed to cut the bike out first using my Silhouette Cameo.
Next I inked the front of a piece of white Bazzill card, then turned it over to trace around the wheels of the bike.  I used the black base shape for this, flipping it round so that it would face the way I wanted it to on the front.
I made needle holes which would be hidden by the 'tyres', then strands of silver thread to sew in the spokes.  My thread is very fine and tangles easily, so I went over each spoke a few times and kept the thread 'tail' fairly short - which is why it looks such a horrible mess on the reverse.
My old 'A' level needlework teacher would be so shocked at how bad it looks (sorry Miss Clowes)
Once all the stitching was done I flipped the card over and hey presto! the spokes are revealed.
Once the rest of the bike was assembled it was glued in place over the spokes.
I computer generated the sentiment and printed it directly on to the card, then using a rectangular die cut an aperture and adhered the panel inside.
 I hand-cut some triangles for the banner and added some black and white Balers Twine, then added some tiny jewels to finish the card off


As ever there is a fab selection of ideas for this challenge over on the Daring Cardmakers blog this week, so I hope you'll head over to see them - and of course we'd really love you to join in!

That's all for now, thanks for visiting

Happy Crafting


Wednesday, March 13, 2019

Simple Sympathy

Hello
Gosh, it's windy today.  Actually it seems to have been blustery for the last few weeks.  I'm sick of chasing bins and plant pots around the garden and having to brave the weather to re-tie the strings on the patio set cover before it takes flight!
We are still struggling to get by without a proper fridge, the little table-top one OH bought to tide us over has room for milk, butter and cheese and not much else.  It brings it home how 'in the moment' catering for their families must have been for our Grannies and Great-Grannies without fridges and freezers to keep things in.  Mind you they didn't have central heating either.  New fridge-freezer is due soon, thank goodness!
I'm going to try harder with my blogging - I've been very slack lately and I have things to catch up and share.
A few weeks ago we were sad to hear that the mum of one of OH's oldest friends had died.  We were both fond of her and will miss seeing her when we visit the IOM, because she was one of those full-of-fun people who always made you feel relaxed and welcome, and always made you laugh.
Making Sympathy cards is never easy, is it?  I wanted to make something with a modern feel, so I decided on a simple and subtle silver and white theme
 I created the sentiment on the pc using Paint Shop Pro, then worked out the placement of the writing so that when it was printed it would give the space I needed to add thedie cuts I wanted to use.
Once printed, I cut down to size and matted onto silver paper, then onto my card base.
The die cuts are a mixture of Spellbinders dies (the leafy sprigs) and Ultimate Crafts (Butterfly layers), cut in matte silver and a shiny silver card .
with a slight holographic finish.
To complete the card I added a piece of knotted white satin ribbon and three tiny silver gems.

 I was really pleased at how this turned out, I think I managed to get exactly the look I was after - and that doesn't always happen!

That's it for now, thank you so much for visiting, please leave a message, I'd love to hear what you think of this one.
Happy Crafting


Friday, March 08, 2019

Mad March Hare

Hello

Yet again I've failed to blog since this time last week. I know a lot of people get ahead with their blogging then schedule their posts, maybe I need to get into that kind of routine too.  It's never going to happen, of course.  I do know myself.........
It's been a heck of a week, I won't go into details, but I'm hoping the 'bad things always come in threes' saying holds up, because I've had enough now.

At least Joanne's lovely challenge to the Daring Cardmakers didn't cause too much of a headache as straight away I knew it was a jolly find excuse to use Nana Vic's Alice in Wonderland digital paper designs again.

"Hello, Joanne here with this week's challenge. As we move in to spring in the northern hemisphere, I'd like you to be inspired by the phrase

 Mad March Hare

You might feature a hare or a rabbit, maybe even Lewis Carrol’s perpetually late character? Perhaps the mental image of boxing hares will take you down that route - the gloves are off! If you’re the punning type, you might focus on HAIR - crazy coloured hair, long flowing locks..."

There are 3 sets of Nana Vic's Alice in Wonderland papers; I found them when we had an "Alice" challenge a couple of years ago.  Obviously I couldn't decide which set to buy so I bought them all....
Once I'd decided which papers to use, I cropped and resized to work on my card. I printed it twice once for the background, with the second for hand-cutting the details which were adhered over the first layer with scrap pieces of chipboard between them.
I used another of the papers for the sentiment background and for the tea party element.
For the sentiment, I cropped down then added the wording using the text function on my graphics program (Paint Shop Pro).  I worked out how big it needed to be then resized accordingly. After printing it was matted onto black card.
For the tea party element, I cropped and resized to make it exactly the right size.  Again printed it twice, cut out by hand and added chipboard between the layers.  This time I also added another piece of chipboard just on the lower edge so that I could layer it over the sentiment
To finish I added some Glossy Accents to some of the clock faces, a small watch charm and some "Alice-blue" ribbon.
There is a fab selection of ideas for this challenge over on the Daring Cardmakers blog this week, so I hope you'll head over to see them - and of course we'd really love you to join in!
That's all for now, thanks for visiting

Happy Crafting


Friday, March 01, 2019

Elemental Inspiration Picture for March

Hello!
Thank you for visiting my blog, please let me know you've been by leaving a comment before you leave. That way there'll be a link and I can use it to visit your blog too.

How has your week been?  There are a few of my friends and family with birthdays within the next few weeks so I've been trying to get ahead with cards, and gift buying. That's a sort of excuse for my poor blogging, well it will have to do!  I'll try harder next week, otherwise I'll have a pile of unblogged projects and that would never do! 

Over at the Daring Cardmakers Svenja has been looking back on her holiday photos from last summer and used some of them to make our Elemental Inspiration Picture board for March
Can you believe it's March already? On the other hand: we've had some definitely springy days in February, so why-ever not...
It's Svenja here and I've packed some sunshine into this month's elemental inspiration picture for you. Please choose at least three elements from the pic and use them on your card (colours count as one element). 
In the end, I made two very different cards, but each has the required three elements from the picture board


This is Svenja's picture.

For the first card I took as my inspiration the layout, the coloured floats on the nets, the fishing boats and I also used the colour palette
Info:
I started by adding lots of blue inks to a piece of card, then cut this down to a 9x9cm square.  This square was then cut into the various sections of the LO and all but the square that would have the beads on were glued in place.  The last one was glued down after the beaded string had been wrapped around it.
Using an image I found on the internet I hand cut the pieces for the fishing boats from red, black and white card.  The portholes are just tiny circles die cut from spare blue-inked card
I threaded some beads onto natural coloured twine for the 'floats' element and added an anchor charm.
To finish, I drew some wavy lines on the rectangular pieces with Ice Stickles

I wanted to go a bit "off piste" and see if I could make something completely unrelated to the picture board but still
using 3 elements from it.  
This time I chose the nets, the ropes (twine) and again the floats.
 Info
The background was stencilled using a Prima stencil and a pretty set of 4 Versamagic ink pads
I strung a variety of beads in matching colours onto gold thread and added them to the card by way of needle holes.  The string is tied and glued on the inside of the card.
I inked thin card in the same colours and used this to make three different flowers, adding bought flower stamens to the centres
I used Bakers' Twine to echo the ropes in the picture and tied a double bow to add to the tag.  The sentiment is a home-made decal sticker
The dies for the flowers. leaves and tag are all Spellbinders


That's all for this time.  I hope you like these cards and feel inspired to join in with the Daring Cardmakers this week, we'd love to see what you can make.
There are some lovely ideas from the design team over on the blog. so please hop over there for a look.
Have a great weekend
Happy Crafting